

If you’re looking for a cute, fun, and absolutely delicious treat to wow your Valentine this year, I’ve got you covered. This Valentine Lollipop Treats With Melted Chocolate Recipe is one of my favorite go-to desserts—it’s playful, charming, and surprisingly easy to make! Whether you’re crafting a batch for your kids’ classroom party or surprising your significant other, these lollipops turn out glossy, colorful, and totally irresistible. Get ready because once you try this, you’ll be hooked just like I am!
Why You’ll Love This Recipe
- Simple Ingredients: You only need a few pantry staples like melting chocolate and sprinkles to create something magical.
- Kid-Friendly Fun: My kids love helping me fill the molds and decorate—it’s perfect for family bonding time.
- Customizable Designs: Change colors, shapes, or add sprinkles to match any celebration, not just Valentine’s Day!

Ingredients You’ll Need
This Valentine Lollipop Treats With Melted Chocolate Recipe relies on simple, high-quality ingredients that work beautifully together to deliver rich flavor and fun colors—perfect for Valentine’s Day or anytime you want a sweet little surprise.
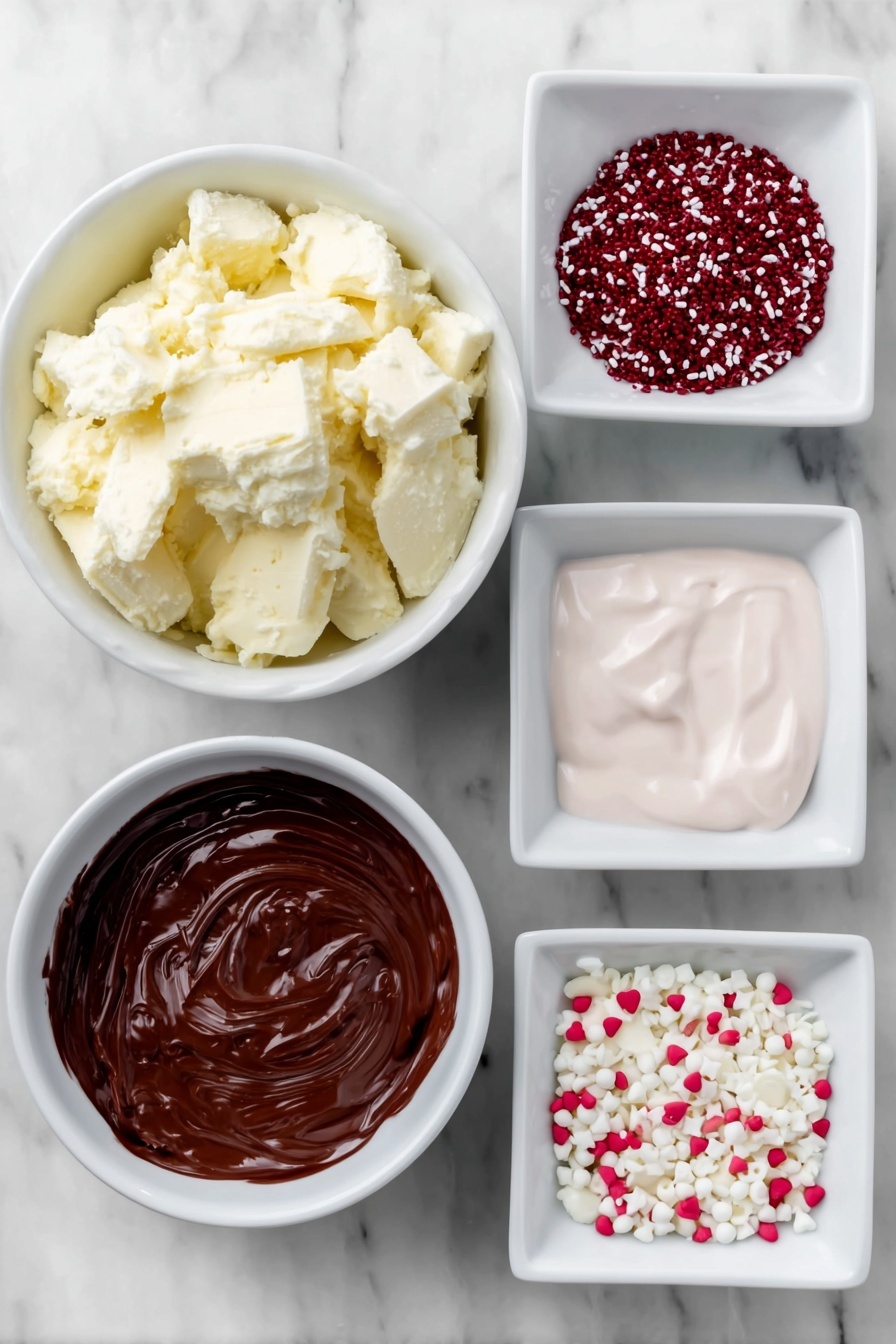
- White almond bark or white chocolate chips: For a smooth, creamy base that melts easily and solidifies with a glossy finish.
- Pink melting chocolate: This adds that lovely soft romantic hue to your lollipops—perfect for details.
- Red melting chocolate: Bold and vibrant for messages or accents, a must for that Valentine pop.
- Sprinkles: I love colorful or themed Valentine sprinkles to add some whimsy and texture as a finishing touch.
Variations
One of my favorite things about this Valentine Lollipop Treats With Melted Chocolate Recipe is how flexible it is—you can totally put your own twist on it and make it uniquely yours. I often swap out colors and toppings depending on the occasion or who I’m making them for.
- Using Dark or Milk Chocolate: I’ve switched to milk chocolate for a richer, less sweet treat, which my family adores. Just melt and use exactly the same way.
- Vegan Variation: Try dairy-free white and colored candy melts if you need a plant-based version—I’ve had great results with those too.
- Seasonal Colors: For spring, pastel melting chocolates work beautifully, while orange and black are perfect for Halloween-themed lollipops.
- Add Nuts or Crushed Candy: Want extra crunch? Sprinkle chopped nuts or crushed peppermint on top before chilling—the texture is such a crowd-pleaser.
How to Make Valentine Lollipop Treats With Melted Chocolate Recipe
Step 1: Prep Your Mold and Choose Your Colors
First, make sure your mold is clean and completely dry—this is essential to avoid any chocolate seizing or imperfections in your lollipops. I like to use silicone heart-shaped molds, but any lollipop mold will work. Then pick which color you want for the intricate details—the words or little decorations—and melt a small amount of that color in the microwave, heating in 15-second bursts until silky smooth. Use a toothpick or small piping bag for the finer work.
Step 2: Fill in the Details Carefully
This part takes a little patience, but trust me, it’s worth it! Using your toothpick or piping tool, carefully fill in the mold areas for your details or lettering. When I first tried this, I realized working in small batches really helped keep my details neat and prevented the melted chocolate from drying out. Once you’ve finished, let that set for a few minutes while preparing the rest.
Step 3: Pour the Base Layer and Add Sticks
Pick the main color for the lollipop base—white almond bark or your chosen melted chocolate—and heat it gently until melted. Spoon it carefully over your details to fill about halfway. Then, lift the mold slightly and drop it gently onto your counter several times to pop any air bubbles out; this trick is something I discovered after a few attempts and it really makes a difference in the final shine. Immediately place your lollipop sticks on top, pressing so they stay securely in place but don’t push all the way through.
Step 4: Finish Filling and Add Sprinkles
With the remaining melted chocolate, fill the rest of the mold cavity so the sticks are fully covered but don’t overfill. Tap the mold again to even out the chocolate and release any last bubbles. Quickly sprinkle your festive Valentine sprinkles on top for that perfect finishing touch—I love using heart-shaped and red-pink confetti to really bring out the Valentine vibe.
Step 5: Chill and Pop Out
Place the mold in the fridge for 10 minutes or longer until the chocolate is fully hardened. When you’re ready, gently pop the lollipops out and inspect their edges. I like to keep a small paring knife handy to tidy up any rough bits for that professional look. These treats always come out so glossy and fun—I can’t resist grabbing one (or two) while I clean up!
Pro Tips for Making Valentine Lollipop Treats With Melted Chocolate Recipe
- Keep Tools Dry: Even a tiny bit of water can cause melted chocolate to seize, so always dry your bowls, spoons, and molds thoroughly.
- Thin if Needed: If your melted chocolate starts to thicken, add a drop of coconut oil to smooth it out without altering flavor.
- Work in Batches: I fill a few mold cavities at a time for detailed work, so the chocolate won’t set before I’m done.
- Tap Twice: Tapping your mold once to release bubbles is good, but I do it twice just to ensure that flawless glassy finish.
How to Serve Valentine Lollipop Treats With Melted Chocolate Recipe

Garnishes
I usually stick with holiday-themed sprinkles—tiny hearts, edible glitter, or even a light dusting of colored sugar. It adds just the right festive sparkle. Sometimes, I drizzle a bit of contrasting melted chocolate on top for extra pizazz. You’ll enjoy making each lollipop your own little piece of art!
Side Dishes
These lollipops pair wonderfully with sweetheart cupcakes or a simple fruit platter to balance the richness. When serving at a party, I like to place them alongside a hot chocolate bar—it’s a total hit with both kids and adults.
Creative Ways to Present
I’ve wrapped mine individually in cellophane tied with ribbon for gift-giving, or stood them in floral foam covered with Valentine-themed tissue paper for a charming centerpiece. For parties, arranging them in a decorated vase makes them easy to grab and super pretty on the table.
Make Ahead and Storage
Storing Leftovers
Store any leftover lollipops in an airtight container at room temperature or in the fridge if your home is warm. I’ve found that keeping them cool but dry protects their shine and crunch for up to a week—perfect for nibbling over several days.
Freezing
Freezing works surprisingly well! I wrap each lollipop in plastic wrap, then place them together in a freezer-safe bag. When I thaw them, I let them come to room temp slowly to avoid condensation, and they taste just as fresh as the day I made them.
Reheating
Since these are solid chocolate treats, there’s really no reheating needed. If the chocolate gets a little dull, just let it warm up slightly at room temperature before serving for the best texture and flavor.
FAQs
-
Can I use regular chocolate instead of melting chocolate for this recipe?
Regular chocolate can be tricky because it often contains cocoa butter and sugar that don’t melt as smoothly as melting chocolate. While you can try, the texture may be less glossy and harder to set, and you risk seizing. I recommend sticking with almond bark or melting chocolate for the best, easiest results.
-
How do I avoid air bubbles in my lollipops?
Dropping the mold gently onto your counter multiple times after pouring the chocolate helps release trapped air. Also, tapping the mold before the chocolate begins to harden ensures a smooth, bubble-free finish. I always do this step twice—it really improves the look of the lollipops.
-
Can these lollipops be made without a mold?
While molds make shaping easier and neater, you can improvise by pouring melted chocolate onto parchment paper and inserting sticks before the chocolate sets. You won’t get as precise shapes or details, but it’s a fun, casual alternative!
-
What’s the best way to clean the molds after use?
Wait until the chocolate has fully hardened, then gently peel your lollipops out. Wash the silicone molds in warm soapy water and dry them thoroughly—never use abrasive scrubbers to prevent damage.
Final Thoughts
I absolutely love how this Valentine Lollipop Treats With Melted Chocolate Recipe turns out every time—it’s one of those simple pleasures that’s as fun to make as it is to eat. The best part? Anyone can whip these up, and they always impress! Next time you want a sweet project to share in the kitchen or a heartfelt gift that looks store-bought but feels homemade, give this a try. I promise you’ll enjoy every moment and every bite.
Print
Valentine Lollipop Treats With Melted Chocolate Recipe
- Prep Time: 20 minutes
- Cook Time: 0 minutes
- Total Time: 20 minutes
- Yield: 12 lollipops 1x
- Category: Dessert
- Method: No-Cook
- Cuisine: American
- Diet: Vegetarian
Description
Create charming Valentine Lollipop Treats using white almond bark or white chocolate chips combined with vibrant pink and red melting chocolates. These delightful treats are perfect for gifting or celebrating Valentine’s Day, featuring customizable colors and fun sprinkles for a festive touch.
Ingredients
Chocolate Coating
- 1 package white almond bark or white chocolate chips
- 1 package melting chocolate, pink
- 1 package melting chocolate, red
Decorations
- Sprinkles, as desired
Instructions
- Prepare the mold: Wash and dry your mold thoroughly to ensure no moisture disturbs the chocolate consistency.
- Melt detail color chocolate: Choose the color for the words or detail, pour a small amount into a microwave-safe container, and microwave in 15-second intervals until fully melted, stirring between intervals.
- Fill mold details: Using a toothpick or squeeze bottle/piping bag, carefully fill the mold cavities with your chosen detail color, outlining words or designs precisely.
- Melt main color chocolate: Select the main color for the lollipops, melt the chocolate or almond bark similarly in the microwave until smooth.
- Fill mold halfway: Spoon the melted main chocolate into the mold on top of the detailed work, filling about halfway up the cavity.
- Remove air bubbles: Gently lift the mold about an inch off the counter and drop it back down a few times to release trapped air bubbles and even out the chocolate.
- Place lollipop sticks: Carefully lay one lollipop stick onto each partially filled mold cavity, positioning it suitably.
- Fill mold completely: Using the same or a different color melted chocolate, fill the mold cavities fully, covering the lollipop sticks but avoiding overfilling.
- Tap mold for smoothness: Tap the mold again gently to release any remaining air bubbles and ensure an even chocolate surface.
- Add sprinkles: Sprinkle decorative sprinkles on top, if desired, before the chocolate sets.
- Chill to set: Place the mold in the refrigerator for about 10 minutes or longer until the chocolate hardens completely.
Notes
- Keep tools dry: Even small amounts of water can seize melted chocolate.
- Thin if needed: Add a tiny bit of coconut oil to smooth out thick melted chocolate.
- Work in batches: Fill a few cavities at a time to maintain neat, detailed results.
- Delicate work: Use a toothpick for filling small details and letters to achieve precision.
- Tap then tap again: Removing air bubbles helps achieve a glossy, glassy finish.
- Neat presentation: Use a paring knife to clean edges after unmolding for professional results.
Nutrition
- Serving Size: 1 lollipop
- Calories: 120
- Sugar: 18g
- Sodium: 15mg
- Fat: 6g
- Saturated Fat: 4g
- Unsaturated Fat: 2g
- Trans Fat: 0g
- Carbohydrates: 18g
- Fiber: 0g
- Protein: 1g
- Cholesterol: 5mg


