

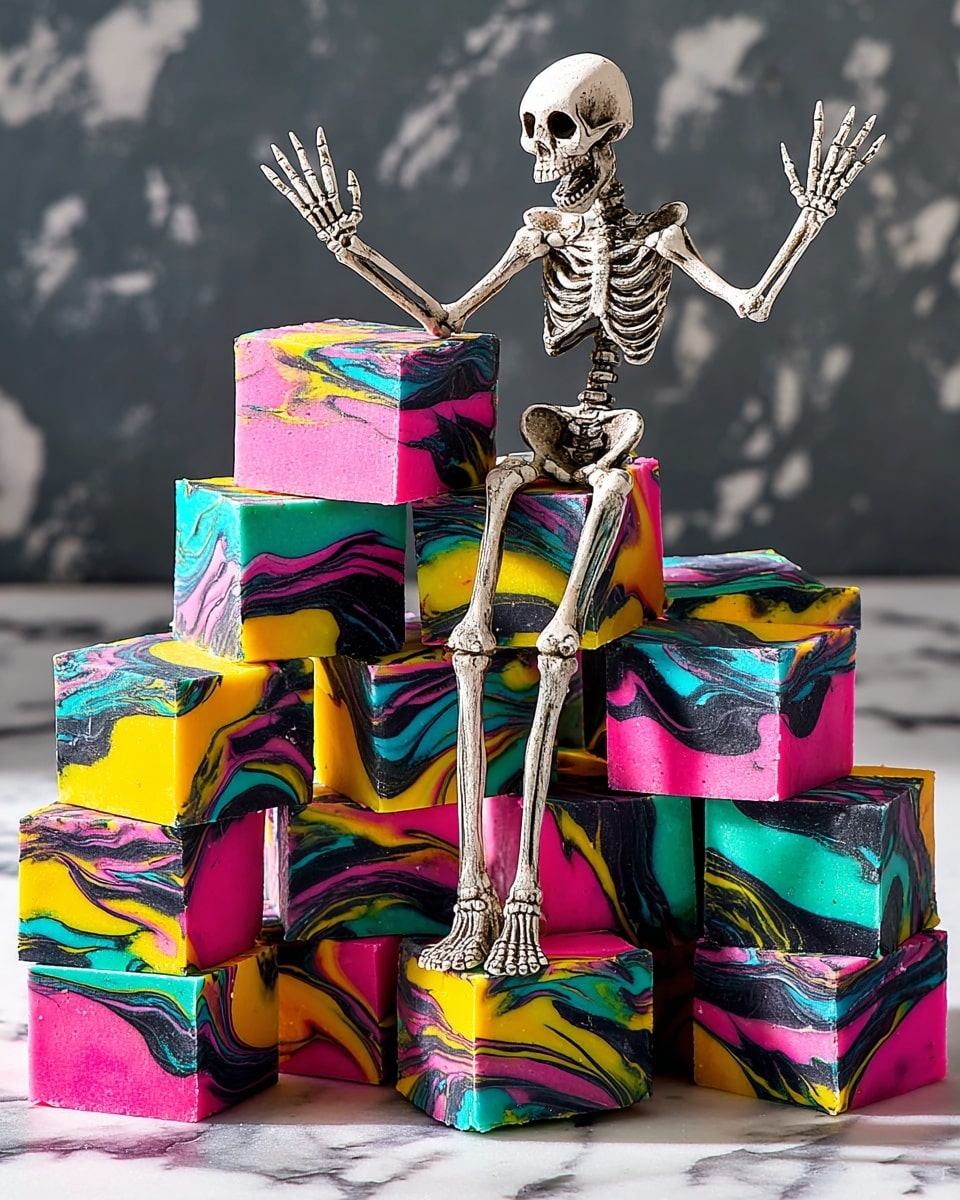
If you’re a fan of both heavenly sweets and the whimsical charm of Tim Burton’s classic, then this Nightmare Before Christmas Fudge Recipe is going to blow your mind. I remember the first time I made this—mixing those vibrant colors, the rich peppermint-flavored white chocolate melting on my tongue—it’s fan-freaking-tastic. So stick around, because I’m about to share everything you need to create this fun, festive fudge right in your own kitchen!
Why You’ll Love This Recipe
- Vibrant, Fun Design: The swirled colors bring this fudge to life, perfect for Nightmare Before Christmas fans and festive occasions.
- Simple Yet Decadent: You don’t need fancy equipment, just a few ingredients and a little patience for a dreamy result.
- Perfect Peppermint Kick: The peppermint extract adds a bright note that balances sweetness beautifully.
- Make-Ahead Friendly: This fudge stores well, making it a go-to for holiday gifting or party snacks.

Ingredients You’ll Need
This recipe keeps things straightforward but special—you’ll get that creamy white chocolate base enriched with marshmallow fluff for an ultra-smooth texture, while the peppermint gives it that seasonal zing. Plus, the gel food colors are key to creating those iconic Nightmare Before Christmas hues!
- White chocolate chips: Choose good-quality chips or chopped bars for the creamiest melt.
- Sweetened condensed milk: This adds sweetness and the fudgy, dense texture you love.
- Marshmallow Fluff: This is a secret ingredient I discovered that keeps the fudge soft and luscious.
- Unsalted butter: Adds richness; make sure it’s unsalted so you control the sweetness.
- Vanilla bean paste or extract: Vanilla deepens the flavor and makes everything taste homemade.
- Peppermint extract: Adds that refreshing, wintry flavor that pairs amazingly with white chocolate.
- Gel food coloring: You’ll want black, pink, yellow, and teal to capture those spooky, magical swirls.
Variations
I love having fun with this fudge by switching up the colors or fudging with flavors. Feel free to make this your own! After all, the best recipes are ones you love making again and again, with little tweaks here and there.
- Chocolate Mint Variation: Add a bit of cocoa powder in one bowl instead of white chocolate for a chocolate-mint twist—the family went crazy over this combo last Christmas!
- Dairy-Free Version: Swap the butter with coconut oil and use dairy-free white chocolate chips. I tried this for a friend and was surprised how close it came to the original.
- Spicy Peppermint: A tiny pinch of cayenne or ginger in one of the colors adds a subtle warming kick—great for those who like a little spice!
- Festive Themes: Change up the colors to match other holidays—orange and black for Halloween, red and green for Christmas—to impress guests and add variety.
How to Make Nightmare Before Christmas Fudge Recipe
Step 1: Prep Your Pan Like a Pro
Start by lining your 8″ x 8″ pan with parchment paper in a cross shape so you have overhang on all sides—this makes lifting the fudge out a breeze later. I always use binder clips on the edges to keep the paper in place, which saves me a lot of wrestling with the paper as the fudge sets.
Step 2: Melt White Chocolate and Sweetened Condensed Milk
Place your white chocolate chips and sweetened condensed milk in a medium pot over low heat. Stir gently but consistently so nothing burns—the magic happens as the chocolates melt into a silky smooth mixture, about 5 minutes. If you rush the heat, you risk seizing the chocolate, so patience pays off here.
Step 3: Stir in Marshmallow Fluff, Butter, and Extracts
Add the marshmallow fluff, unsalted butter, vanilla bean paste, and peppermint extract to the pot. Keep stirring gently until everything is melted together, warm and creamy—this only takes about a minute. I learned early on that the marshmallow fluff really makes the texture just right, almost melt-in-your-mouth soft.
Step 4: Divide and Color Your Fudge
Quickly divide the fudge evenly into four medium bowls—about a cup in each. Here’s where the fun begins! Add black gel food coloring to one bowl and pink, yellow, and teal to the others—one color per bowl. I’d start with just a few drops and add more if needed because gel foods color so intensely. Work fast so the fudge stays pliable and doesn’t set before you plunge into swirling.
Step 5: Swirl and Set
Drop spoonfuls of the different colored fudge randomly into your prepared pan. Then, take a toothpick or paring knife and swirl the colors to create that mesmerizing marbled effect. Don’t over-mix—you want those pretty distinct swirls to stay vibrant. Pop the pan in the fridge and chill for at least two hours, or overnight if you can wait (I know it’s tough!).
Step 6: Lift and Cut
Using the parchment paper overhang, gently lift the fudge out of the pan and set it on a cutting board. Cut into bite-sized squares—this recipe makes about 36 pieces, perfect for sharing or gift bags. I always find it easiest to use a sharp knife and clean it between cuts for those nice-looking squares.
Pro Tips for Making Nightmare Before Christmas Fudge Recipe
- Slow and Low Melting: Always melt the chocolate mixture over low heat to prevent scalding or gritty fudge—trust me, it makes all the difference.
- Work Fast When Coloring: The fudge starts setting quickly, so prepare your bowls and coloring beforehand to move smoothly through this step.
- Use Binder Clips: Clipping your parchment in place keeps it from slipping while you pour your fudge—no paper wrestling needed!
- Sharp Knife for Cutting: Wiping your knife clean between cuts avoids smudging the colors and gives you those beautiful fudge squares.
How to Serve Nightmare Before Christmas Fudge Recipe
Garnishes
I like to sprinkle crushed candy canes or edible glitter on top when serving, adding a hint of crunch and sparkle that makes each piece feel like a little holiday gift. Sometimes, a few leftover Halloween sprinkles in black or purple colors add a fun twist too!
Side Dishes
This fudge pairs wonderfully with a hot cup of peppermint tea or rich hot chocolate—perfect for cozy winter nights. If you’re serving at a party, sliced fruit like oranges or cranberries cut through the richness and keep things fresh.
Creative Ways to Present
I’ve wrapped individual fudge squares in wax paper tied with colorful ribbons for gift bags—always a hit at holiday swaps. For parties, I like arranging the fudge on spooky platters with themed decorations like mini pumpkins or skull candy toppers to amp up the Nightmare Before Christmas vibe.
Make Ahead and Storage
Storing Leftovers
I store leftover fudge in an airtight container layered with parchment paper between layers to keep the pieces from sticking together. It stays fresh in the fridge for up to two weeks, so you can enjoy it slowly or bring it back out for impromptu gatherings.
Freezing
Freezing fudge can be tricky, but I wrap pieces individually in plastic wrap and then place them in a freezer-safe bag. When thawed in the fridge overnight, they maintain their texture and flavor well—handy for making batches ahead during the holidays.
Reheating
If your fudge hardens too much after refrigeration, I let it sit at room temperature for 10-15 minutes before serving to soften up. Avoid microwaving as it can cause texture changes; patient thawing is your fudge’s best friend.
FAQs
-
Can I use regular food coloring instead of gel for this Nightmare Before Christmas Fudge Recipe?
While you can, gel food coloring is highly recommended because it produces more vibrant colors without altering the fudge’s consistency. Regular liquid food coloring adds extra moisture, which might make the fudge too soft or grainy.
-
What’s the best way to store this fudge to keep it fresh?
Keep your fudge in an airtight container in the fridge, preferably layered with parchment between the pieces to prevent sticking. This method preserves the texture and flavor for up to two weeks.
-
Can I substitute the peppermint extract with another flavor?
Absolutely! Vanilla extract makes a lovely alternative for a milder flavor, or try orange extract for a bright citrus twist. Just remember that changing the flavor slightly alters the classic vibe of the fudge.
-
How do I prevent the fudge from hardening too much?
Using marshmallow fluff and butter in the recipe helps keep the fudge soft. Also, avoid overcooking during melting, and store the fudge properly in an airtight container to maintain that perfect texture.
-
Is the marshmallow fluff essential for this fudge recipe?
Yes, I found that marshmallow fluff is what makes this fudge stand apart—giving it a creamy, soft, and slightly chewy texture. Skipping it might result in a denser, less smooth fudge.
Final Thoughts
I absolutely love how this Nightmare Before Christmas Fudge Recipe brings together fun, flavor, and festive nostalgia all in one bite. Whether you’re making it for a holiday party or just to treat yourself, I promise it’s worth every minute of prep. It’s one of those rare recipes that’s visually stunning and genuinely delicious—I’m excited for you to try it and enjoy that magical peppermint goodness with a fun twist. Go ahead, whisk up this colorful batch, share with friends, and watch everyone light up with each sweet, swirled square!
Print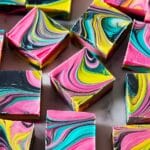
Nightmare Before Christmas Fudge Recipe
- Prep Time: 15 mins
- Cook Time: 10 mins
- Total Time: 2 hrs 25 mins
- Yield: 36 squares 1x
- Category: Dessert
- Method: Stovetop
- Cuisine: American
Description
This Nightmare Before Christmas Fudge is a colorful and festive treat perfect for holiday celebrations or any time you want a fun, swirled chocolate confection. The fudge combines smooth white chocolate with sweetened condensed milk and Marshmallow Fluff, flavored with peppermint and vanilla, then divided into vibrant portions and swirled together for a spooky, whimsical look inspired by the iconic movie.
Ingredients
Fudge Base
- 3 1/2 cups white chocolate chips
- 1 (14-oz.) can sweetened condensed milk
- 3 Tbsp. Marshmallow Fluff
- 2 Tbsp. unsalted butter
- 1/4 tsp. vanilla bean paste or extract
- 1/2 tsp. peppermint extract
Coloring
- Black gel food coloring
- Pink gel food coloring
- Yellow gel food coloring
- Teal gel food coloring
Instructions
- Prepare the Pan: Line an 8″ x 8″ pan with two pieces of parchment paper arranged in a plus sign shape, allowing a 2″ overhang on all sides. Secure with binder clips if desired to keep the parchment in place.
- Melt White Chocolate and Condensed Milk: In a medium pot over low heat, combine the white chocolate chips and sweetened condensed milk. Stir occasionally until the mixture is fully melted and smooth, about 5 minutes.
- Add Fluff and Flavorings: Stir in the Marshmallow Fluff, unsalted butter, vanilla bean paste or extract, and peppermint extract. Continue cooking and stirring for about 1 minute until everything is heated through and well combined.
- Divide and Color the Fudge: Pour the fudge evenly into four medium bowls, about 1 cup per bowl. Add approximately 4 drops of black gel food coloring to one bowl, and about 2 drops of pink, yellow, and teal gel food coloring to the remaining three bowls respectively. Mix each bowl until the colors are vibrant, adding more drops as needed while working quickly so the fudge doesn’t start to set.
- Create the Swirl Pattern: Drop spoonfuls of each colored fudge randomly into the prepared pan. Use a toothpick or paring knife to gently swirl the colors together for a marbled look.
- Chill and Set: Refrigerate the pan for at least 2 hours or up to overnight until the fudge is firm and set.
- Slice and Serve: Lift the fudge out of the pan using the parchment overhang and transfer it to a cutting board. Cut into 36 squares and enjoy.
Notes
- Use binder clips to hold parchment paper in place for easier handling while preparing the fudge.
- Work quickly when coloring and swirling fudge to prevent it from setting prematurely.
- Store the fudge refrigerated in an airtight container to maintain freshness.
- You can substitute vanilla bean paste with an equal amount of vanilla extract.
- For a firmer texture, refrigerate the fudge overnight before slicing.
Nutrition
- Serving Size: 1 square (approx. 28g)
- Calories: 130
- Sugar: 20g
- Sodium: 30mg
- Fat: 6g
- Saturated Fat: 4g
- Unsaturated Fat: 2g
- Trans Fat: 0g
- Carbohydrates: 20g
- Fiber: 0g
- Protein: 1g
- Cholesterol: 10mg

