

These Mini Lunchbox Pizzas are a game-changer for busy parents and pizza lovers alike! Made with just a handful of simple ingredients, these perfectly portable pizzas come together in under 30 minutes with a fluffy, yogurt-based dough that requires zero rising time. They’re ideal for lunchboxes, after-school snacks, or even as a quick dinner solution when time is tight.
Why You’ll Love This Recipe
- Incredibly Fast: From mixing bowl to table in about 25 minutes – perfect for those “I need food now” moments!
- Kid-Friendly: Little ones can help make their own pizzas, and they’ll actually eat them!
- No Yeast Required: The yogurt and self-raising flour create a wonderfully soft base without the usual pizza dough waiting time.
- Customizable: Use the base recipe as your canvas and let everyone create their own favorite flavor combinations.
- Lunchbox Perfect: These pizzas pack well, taste great at room temperature, and won’t make sandwiches soggy!

Ingredients You’ll Need
- Self-raising flour: The backbone of our quick dough that gives these mini pizzas their fluffy texture. The leavening agents in the flour help the dough rise without yeast.
- Greek yogurt: Full-fat Greek yogurt adds tang and creates a tender dough. The protein content helps create structure while keeping everything moist.
- Tomato paste: Concentrated tomato flavor that spreads easily without making the dough soggy. Much better than regular pasta sauce which can make these pizzas too wet.
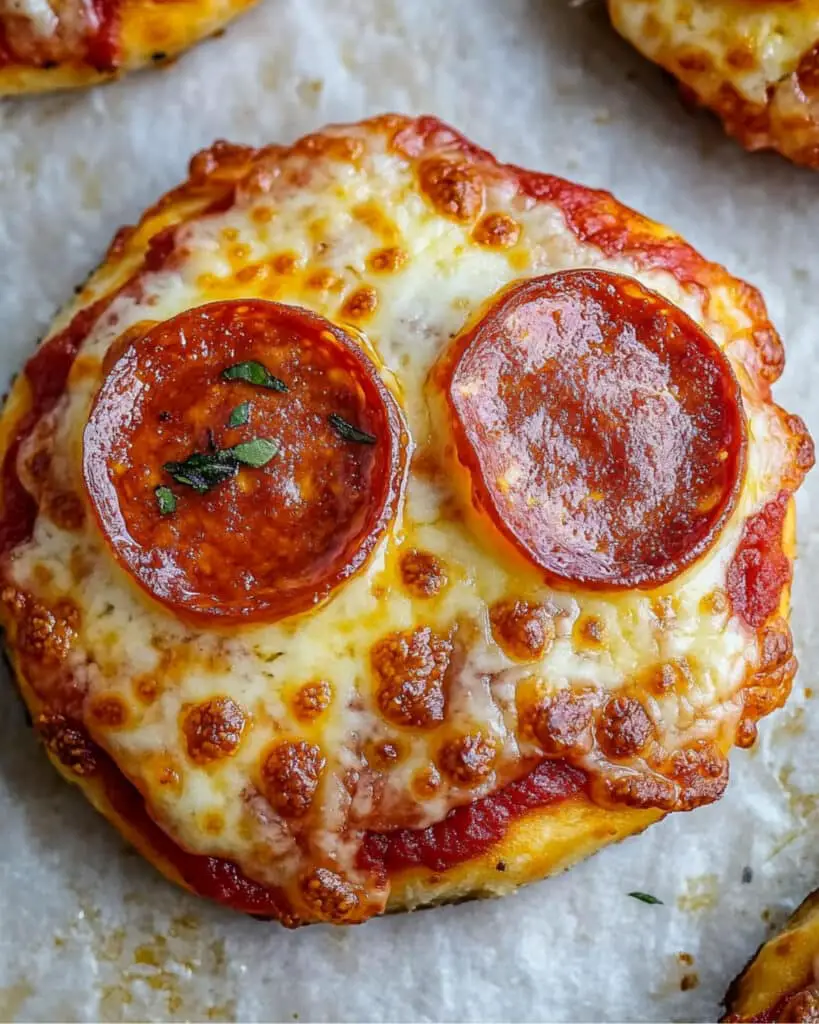
- Mozzarella cheese: Freshly shredded mozzarella melts beautifully and gives you that classic pizza stretch when you take a bite. Pre-shredded works in a pinch, but fresh always melts better.
- Pepperoni: Adds that classic pizza flavor and a bit of spice. The oils from the pepperoni also infuse into the cheese for extra flavor.
Note: If you only have plain flour, don’t worry! Just add 4 teaspoons of baking powder to your 2 cups of flour and you’re good to go.
Note: You’ll find the complete list of ingredients, along with their exact measurements, in the printable recipe card at the bottom of this post.
Variations
These mini pizzas are incredibly versatile! Here are some fantastic variations to try:
- Veggie Delight: Top with bell peppers, mushrooms, and olives for a vegetarian version.
- BBQ Chicken: Swap tomato paste for BBQ sauce and top with cooked shredded chicken and red onion.
- Hawaiian Style: Add pineapple chunks and ham for that sweet and savory combination.
- Margherita: Keep it simple with tomato paste, fresh mozzarella slices, and basil leaves added after baking.
- Breakfast Pizza: Top with scrambled eggs, bacon bits, and cheddar cheese.
- Dessert Pizza: Spread with Nutella and top with sliced strawberries and banana after baking.
How to Make Mini Lunchbox Pizzas
Step 1: Prepare Your Oven and Tray
Preheat your oven to 200°C (400°F) or 180°C fan-forced. Line a baking tray with baking paper to prevent sticking and make cleanup easier.
Step 2: Make the Simple Dough
In a large bowl, mix the self-raising flour and Greek yogurt. Start with a spoon until you get large flakes, then dive in with your hands. Knead the mixture for about 1-2 minutes until you have a soft, cohesive dough.
Don’t panic if it seems dry at first – keep kneading and it will come together! If it gets too sticky, just dust your hands with a little extra flour.
Step 3: Shape Your Pizzas
Lightly flour your work surface and roll the dough to about 1/2 inch thickness. Use a large mug or cookie cutter to cut out rounds. Gather scraps, re-roll, and cut more rounds until all the dough is used.
Step 4: Add Toppings
Place your dough rounds on the prepared baking tray. Spread a thin layer of tomato paste on each round, leaving a small border for the crust. Sprinkle with shredded mozzarella and top with pepperoni slices.
Step 5: Bake to Golden Perfection
Bake for 12-14 minutes until the dough turns golden brown and the cheese is bubbly and melted. If using two trays, place them on different oven racks – no need to swap them during cooking.
Step 6: Cool Slightly and Enjoy
Let the mini pizzas cool for a few minutes on the tray. This allows the cheese to set slightly and makes them easier to handle.
Pro Tips for Making the Recipe
- Cold yogurt works best: It helps keep the dough from getting too sticky during handling.
- Don’t overwork the dough: Just knead until it comes together for the tenderest results.
- Less is more with toppings: Too many wet toppings can make the pizzas soggy.
- Grate your own cheese: It melts much better than pre-packaged shredded cheese which contains anti-caking agents.
- Make a double batch: These freeze beautifully, so why not make extra for later?
- For extra flavor: Add 1/2 teaspoon of garlic powder or Italian seasoning to the dough.
How to Serve
These mini pizzas are incredibly versatile when it comes to serving:
Lunchbox Star:
Pack cooled pizzas in lunch containers. They taste great at room temperature and won’t get soggy by lunch time.
Family Dinner:
Serve with a simple green salad for a complete meal that everyone will love.
Party Food:
Make these for birthday parties or casual gatherings – they’re perfect finger food that both kids and adults will devour.
After-School Snack:
Keep them in the fridge for hungry kids to reheat after school – much healthier than processed snacks!
Make Ahead and Storage
Storing Leftovers
Store cooled pizzas in an airtight container in the refrigerator for up to 3 days. They maintain their texture surprisingly well!
Freezing
These mini pizzas freeze beautifully! Cool completely, then freeze in a single layer on a baking sheet. Once frozen, transfer to a freezer bag or container and store for up to 3 months.
Reheating
From refrigerated: Reheat in a 180°C (350°F) oven for 5-7 minutes or in the microwave for about 30 seconds until warmed through.
From frozen: Place directly in a 180°C (350°F) oven for 8-10 minutes until heated through and crisp again.
FAQs
-
Can I use non-dairy yogurt for this recipe?
Absolutely! Thick coconut yogurt works particularly well as a dairy-free alternative. Just make sure whatever you use has a similar consistency to Greek yogurt. You might need to adjust the flour slightly since plant-based yogurts can have different moisture levels.
-
My dough seems too dry. What should I do?
Keep kneading! This dough often feels dry at first but comes together with continued kneading. If after 2 minutes it’s still too dry, add one tablespoon of extra yogurt at a time until it reaches a workable consistency. Conversely, if it’s too sticky, add a little more flour.
-
Can I make one large pizza instead of mini ones?
Definitely! Just roll out the entire dough into one larger circle or rectangle and increase the baking time by 3-5 minutes. Check that the center is fully cooked before removing from the oven.
-
How can I make these even more nutritious?
Try using half whole wheat self-raising flour for added fiber. You can also sneak in very finely chopped vegetables into the tomato paste or add a thin layer of pureed spinach between the tomato paste and cheese for extra nutrients without changing the kid-friendly appeal.
Final Thoughts
These Mini Lunchbox Pizzas are what I call a “back-pocket recipe” – the kind you’ll turn to again and again when you need something delicious in a hurry. They strike that perfect balance between homemade goodness and convenience that we’re all searching for. Whether you’re packing lunches, feeding hungry kids after school, or just craving pizza without the delivery wait, these little rounds of joy deliver big flavor with minimal effort. Give them a try – I guarantee they’ll become a regular in your meal rotation!
Print
Mini Lunchbox Pizzas Recipe
- Prep Time: 10 mins
- Cook Time: 15 mins
- Total Time: 25 mins
- Yield: 4 servings 1x
- Category: Side-dishes
- Method: Baking
- Cuisine: Western
Description
These Mini Lunchbox Pizzas are a quick and easy snack option that’s perfect for on-the-go meals or a lunchbox treat. With a fluffy, homemade two-ingredient dough base, topped with rich tomato paste, melty mozzarella, and flavorful pepperoni, these mini pizzas are sure to be loved by kids and adults alike.
Ingredients
Dough
- 2 cups (300 g) self-raising flour (see note 1 if you only have plain/all-purpose flour)
- 1 cup (250 g) full-fat plain Greek yoghurt
Toppings
- 1/3 cup (90 g) tomato paste (concentrated puree)
- 1 cup (125 g) freshly shredded mozzarella
- 1/2 cup (80 g) pepperoni
Instructions
Instructions
- Preheat the Oven
Preheat your oven to 200°C (400°F) or 180°C (350°F) for fan-forced ovens. Line a baking tray with baking (parchment) paper to prevent sticking. - Prepare the Dough
In a large bowl, combine the self-raising flour and yoghurt. Mix with a spoon until the mixture forms large flakes. Then, use your hands to knead the mixture into a soft, pliable dough. This process will take around 1–2 minutes (see note 2 for additional tips). - Roll and Cut the Dough
Lightly flour a clean work surface. Roll out the dough to a thickness of about 1 cm (1/2 inch). Use a large mug or cookie cutter to cut circular rounds. Gather and re-roll any leftover scraps to form additional rounds until all the dough is used. - Assemble the Pizzas
Place the dough rounds on the prepared baking tray (you may need a second tray). Spread a small dollop of tomato paste evenly over each round. Top each round with shredded mozzarella, followed by a few pieces of pepperoni. Adjust the toppings to taste. - Bake
Bake the pizzas in the preheated oven for 12–14 minutes, or until the dough is golden brown and the cheese is melted. If using two trays, bake them simultaneously on different racks without needing to rotate. - Cool and Serve
Once baked, let the mini pizzas cool slightly on the tray before serving. These can be enjoyed warm or packed into lunchboxes for later.
Notes
- Note 1 – If you only have plain (all-purpose) flour, add 4 teaspoons of baking powder (2 teaspoons per cup of flour) to achieve the same fluffy dough consistency.
- Note 2 – The dough might initially feel too dry to combine, but keep kneading. It will come together into a smooth dough. If it becomes sticky, sprinkle some extra flour on your hands and the dough.
Nutrition
- Serving Size: 1 Serving
- Calories: 280kcal
- Sugar: 2g
- Sodium: 510mg
- Fat: 11g
- Saturated Fat: 6g
- Unsaturated Fat: 5g
- Trans Fat: 0g
- Carbohydrates: 30g
- Fiber: 1g
- Protein: 14g
- Cholesterol: 30mg


