

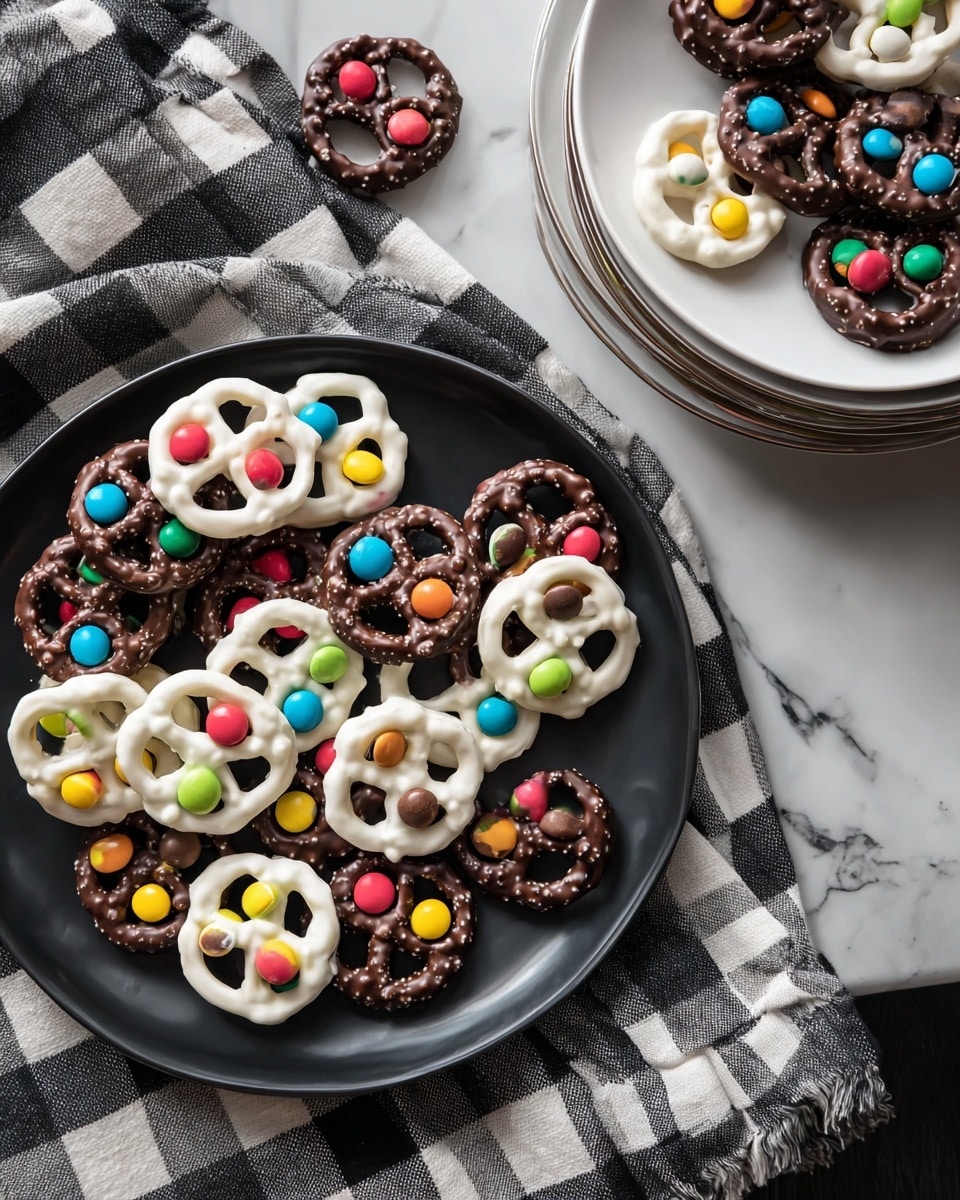
If you’re on the hunt for a fun, festive treat to wow your guests this fall, you’ve got to try my Halloween Pretzels Recipe. These little bites of crunchy, sweet, and colorful goodness are not only adorable—they’re ridiculously easy to make and perfect for sharing. I absolutely love how these turn out every time; they bring together playful Halloween vibes with a satisfying crunch that keeps everyone coming back for more. Stick around—I’m sharing all my insider tips to help you nail these festive snacks without breaking a sweat.
Why You’ll Love This Recipe
- Simplicity Meets Creativity: You only need a handful of ingredients, but the colorful, playful look makes each pretzel pop.
- Perfect for all ages: Kids and adults alike go crazy for these sweet and salty treats, making them perfect for parties or school snacks.
- Quick and fuss-free: From start to finish, you’ll have a batch ready in under 40 minutes, ideal for last-minute spooky celebrations.
- Customizable fun: You can easily tweak the colors, sprinkles, or pretzel types to match your Halloween theme (or whatever mood strikes).

Ingredients You’ll Need
These ingredients strike a beautiful balance between sweet and salty, with bright pops of Halloween colors that make your pretzels look festive and inviting. Plus, the candy melts melt smoothly, making decorating a breeze—you’ll see what I mean!
- Yogurt-covered pretzels (and/or milk chocolate-covered pretzels): The creamy coating on these pretzels makes them a fantastic canvas for your candy melts; I love mixing both types for varied flavors and textures.
- Colored candy melts (orange, red, green, yellow): These vibrant colors bring your Halloween pretzels to life and are super easy to melt and pipe, so don’t skip on quality candy melts here.
- Sprinkles, jimmies, nonpareils, or dots: Add a little whimsy and texture—mini M&Ms are a fun option too if you want a chocolatey surprise.
Variations
I love customizing this Halloween Pretzels Recipe to fit the vibe of each year’s party. Whether you want to swap colors to match your décor or make them allergy-friendly, there’s a way to tweak these without losing any of the fun.
- Allergy-Friendly: When I made these for a friend’s nut allergy, I swapped out chocolate-covered pretzels for yogurt-coated ones and used dairy-free candy melts—no one missed a thing!
- Flavor Twists: For a minty touch, try adding crushed peppermint candies on top after piping the candy melts; it’s a surprising hit.
- Color Themes: Beyond Halloween, I’ve switched up the candy melt colors to pastels for spring or red and green for Christmas—these pretzels are so adaptable.
- Extra Crunch: I’ve even sprinkled finely chopped nuts or crushed cookies on top for an extra texture burst—though this isn’t Halloween-themed, it’s a delicious variant.
How to Make Halloween Pretzels Recipe
Step 1: Prep Your Workspace and Pretzels
Start by laying out your yogurt-covered and/or milk chocolate-covered pretzels on a sheet of wax paper or parchment. This prevents sticking and makes cleanup a snap. I like to arrange them with enough room to decorate without crowding, so each pretzel gets its own spotlight.
Step 2: Melt the Candy Melts
Follow the instructions on your candy melts package—usually, a gentle microwave in 20- to 30-second bursts with stirring works best. I discovered this trick after nearly burning my first batch by heating straight through. Pour the melted candy into a piping bag or a small zip-top bag with a tiny snip in the corner, which helps you pipe neat “eyes” on the pretzels.
Step 3: Create the Eyes and Add Sprinkles
Pipe a small dollop of the candy melts into the top left and right holes of each pretzel to form “eyes.” While the candy is still wet, quickly press a sprinkle or mini M&M into each eye as the pupil. This part is fun for the kids to help with—just work quickly before the candy sets! I always set a timer because the melts can harden faster than you expect.
Step 4: Let It Set Completely
Once decorated, let your Halloween pretzels rest at room temperature until the candy melts have fully hardened. I like to pop mine in the fridge for about 10 minutes if I’m in a hurry, but just be sure they’re firm before handling, so you don’t smudge those cute eyes.
Step 5: Package and Store
After they’re set, store the pretzels in an airtight container to keep them fresh and crunchy. These are also fantastic for gifting—just toss them in a festive cellophane bag with some ribbon for a cute Halloween treat to share.
Pro Tips for Making Halloween Pretzels Recipe
- Prevent Candy Melt Seizing: Always stir candy melts gently and avoid water contact; moisture causes them to seize, so keep your utensils and workspace dry.
- Use Parchment Paper for Easy Cleanup: Wax paper works fine, but parchment is a bit sturdier and less prone to wrinkling as you go.
- Pipe With Confidence: If a piping bag isn’t handy, a sturdy zip-top bag with a tiny hole in a corner works just as well—and less cleanup!
- Work Fast When Adding Sprinkles: Candy melts set quickly, so have your sprinkles ready to go before piping to avoid frustration.
How to Serve Halloween Pretzels Recipe
Garnishes
I enjoy adding festive sprinkles for the pupils, but for an extra spooky touch, sometimes I dust the finished pretzels lightly with edible glitter or a little orange sanding sugar. It gives them a shimmery, magical vibe that makes them stand out on any snack table.
Side Dishes
These Halloween pretzels pair perfectly with classic treats like caramel apples, pumpkin spice popcorn, or even some creamy hot chocolate with whipped cream for dipping. Whenever I serve this trio, my family devours everything within minutes!
Creative Ways to Present
At our last Halloween bash, I put these pretzels in clear cups filled halfway with orange and black candy corn, then stuck a skewer through a few pretzels to mimic spooky eyeballs on sticks—talk about a conversation starter! You can also arrange them on a black or bone-patterned platter with some fall leaves and small pumpkins for that extra festive flair.
Make Ahead and Storage
Storing Leftovers
Leftover Halloween pretzels keep best in an airtight container at room temperature. I’ve found that they hold their crunch for up to a week, which is great if you want to spread out the Halloween fun or prep ahead for a party.
Freezing
Freezing works surprisingly well for this recipe. Just layer the pretzels between sheets of parchment paper in a freezer-safe container or bag. When you’re ready to enjoy, let them thaw at room temperature for about 30 minutes to retain that perfect crunch and candy melt integrity.
Reheating
Reheating isn’t typically necessary since these are cold treats, but if your candy melts soften a bit, just pop the pretzels in the fridge for a few minutes to firm back up. Avoid microwaving, as that can make the pretzels soggy or cause the candy to melt unevenly.
FAQs
-
Can I use regular chocolate instead of candy melts for this Halloween Pretzels Recipe?
You can, but candy melts are specially formulated to melt smoothly and harden quickly, making decorating much easier and neater. Regular chocolate can be trickier to work with because it requires tempering to get a shiny finish and firm set, so it might not give you the same crisp look or quick setting time.
-
What if I don’t have a piping bag for decorating?
No worries! A small zip-top plastic bag works great. Just spoon your melted candy into a corner of the bag, seal it, then snip a very small hole at the tip. This makes it easy to pipe out precise “eyes” without needing special equipment.
-
How long do these Halloween pretzels stay fresh?
Stored properly in an airtight container at room temperature, they stay fresh and crunchy for about a week. If you notice any softness or moisture, it’s best to enjoy them quickly to maintain that perfect texture.
-
Can kids help make this recipe?
Absolutely! Kids will have a blast piping the candy melts and adding sprinkles for eyes. Just supervise when handling melted candy and encourage quick work before the candy hardens. It’s a fun way to get everyone involved in Halloween prep.
Final Thoughts
This Halloween Pretzels Recipe has become one of my go-to festive treats because it’s so straightforward, fun, and reliably delicious. I love how simple ingredients come together to create something that feels so special and whimsical. Whether you’re whipping these up for a school party, a family snack, or a neighborhood gathering, you’ll find these pretzels bring a little extra joy to your spooky celebrations. Give them a try—you’ll have as much fun making them as you and your crew do eating them!
Print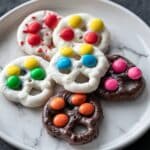
Halloween Pretzels Recipe
- Prep Time: 10 minutes
- Cook Time: 0 minutes
- Total Time: 40 minutes
- Yield: 8 servings 1x
- Category: Snack
- Method: No-Cook
- Cuisine: American
Description
These festive Halloween Pretzels are a fun and easy treat perfect for parties or trick-or-treaters. Yogurt or milk chocolate-covered pretzels are decorated with colorful candy melts and sprinkles to create spooky, eye-catching designs. Simple to prepare with minimal baking skills, they offer a sweet and salty snack with a festive Halloween twist.
Ingredients
Base
- 1 package yogurt-covered pretzels (or milk chocolate-covered pretzels)
Decorations
- Colored candy melts in orange, red, green, yellow (enough to melt and pipe)
- 1/2 cup sprinkles, jimmies, nonpareils, dots, or mini M&Ms for decorating
Instructions
- Prepare Pretzels: Lay out the yogurt or milk chocolate-covered pretzels evenly on a piece of wax paper to create a workspace for decorating.
- Melt Candy Melts: Following the package directions, heat the colored candy melts until fully melted and smooth. Transfer the melted candy into a piping bag for precise application.
- Decorate Eyes: Pipe the candy melts into the top left and right holes of each pretzel to form the eyes. While the candy is still warm and wet, immediately add sprinkles or mini candies to represent eyelids or pupils, creating a spooky or playful effect.
- Set Decoration: Allow the decorated pretzels to sit undisturbed at room temperature until the candy melts harden completely, ensuring the decorations stay intact.
- Store Properly: Once set, pack the pretzels in an airtight container to maintain freshness until ready to serve or gift.
Notes
- You can customize the pretzels by using different colored candy melts or types of sprinkles to match other party themes.
- If you don’t have a piping bag, a small zip-top bag with a tiny corner cut off works well for piping the melted candy.
- Work quickly when adding sprinkles or candies as the candy melts harden rapidly.
- For best results, store the decorated pretzels in a cool, dry place away from direct sunlight to prevent melting.
- These treats are best consumed within 3-5 days for optimal freshness and texture.
Nutrition
- Serving Size: 1 serving (approx. 3-4 decorated pretzels)
- Calories: 150
- Sugar: 12g
- Sodium: 180mg
- Fat: 7g
- Saturated Fat: 5g
- Unsaturated Fat: 1.5g
- Trans Fat: 0g
- Carbohydrates: 20g
- Fiber: 1g
- Protein: 2g
- Cholesterol: 5mg


