
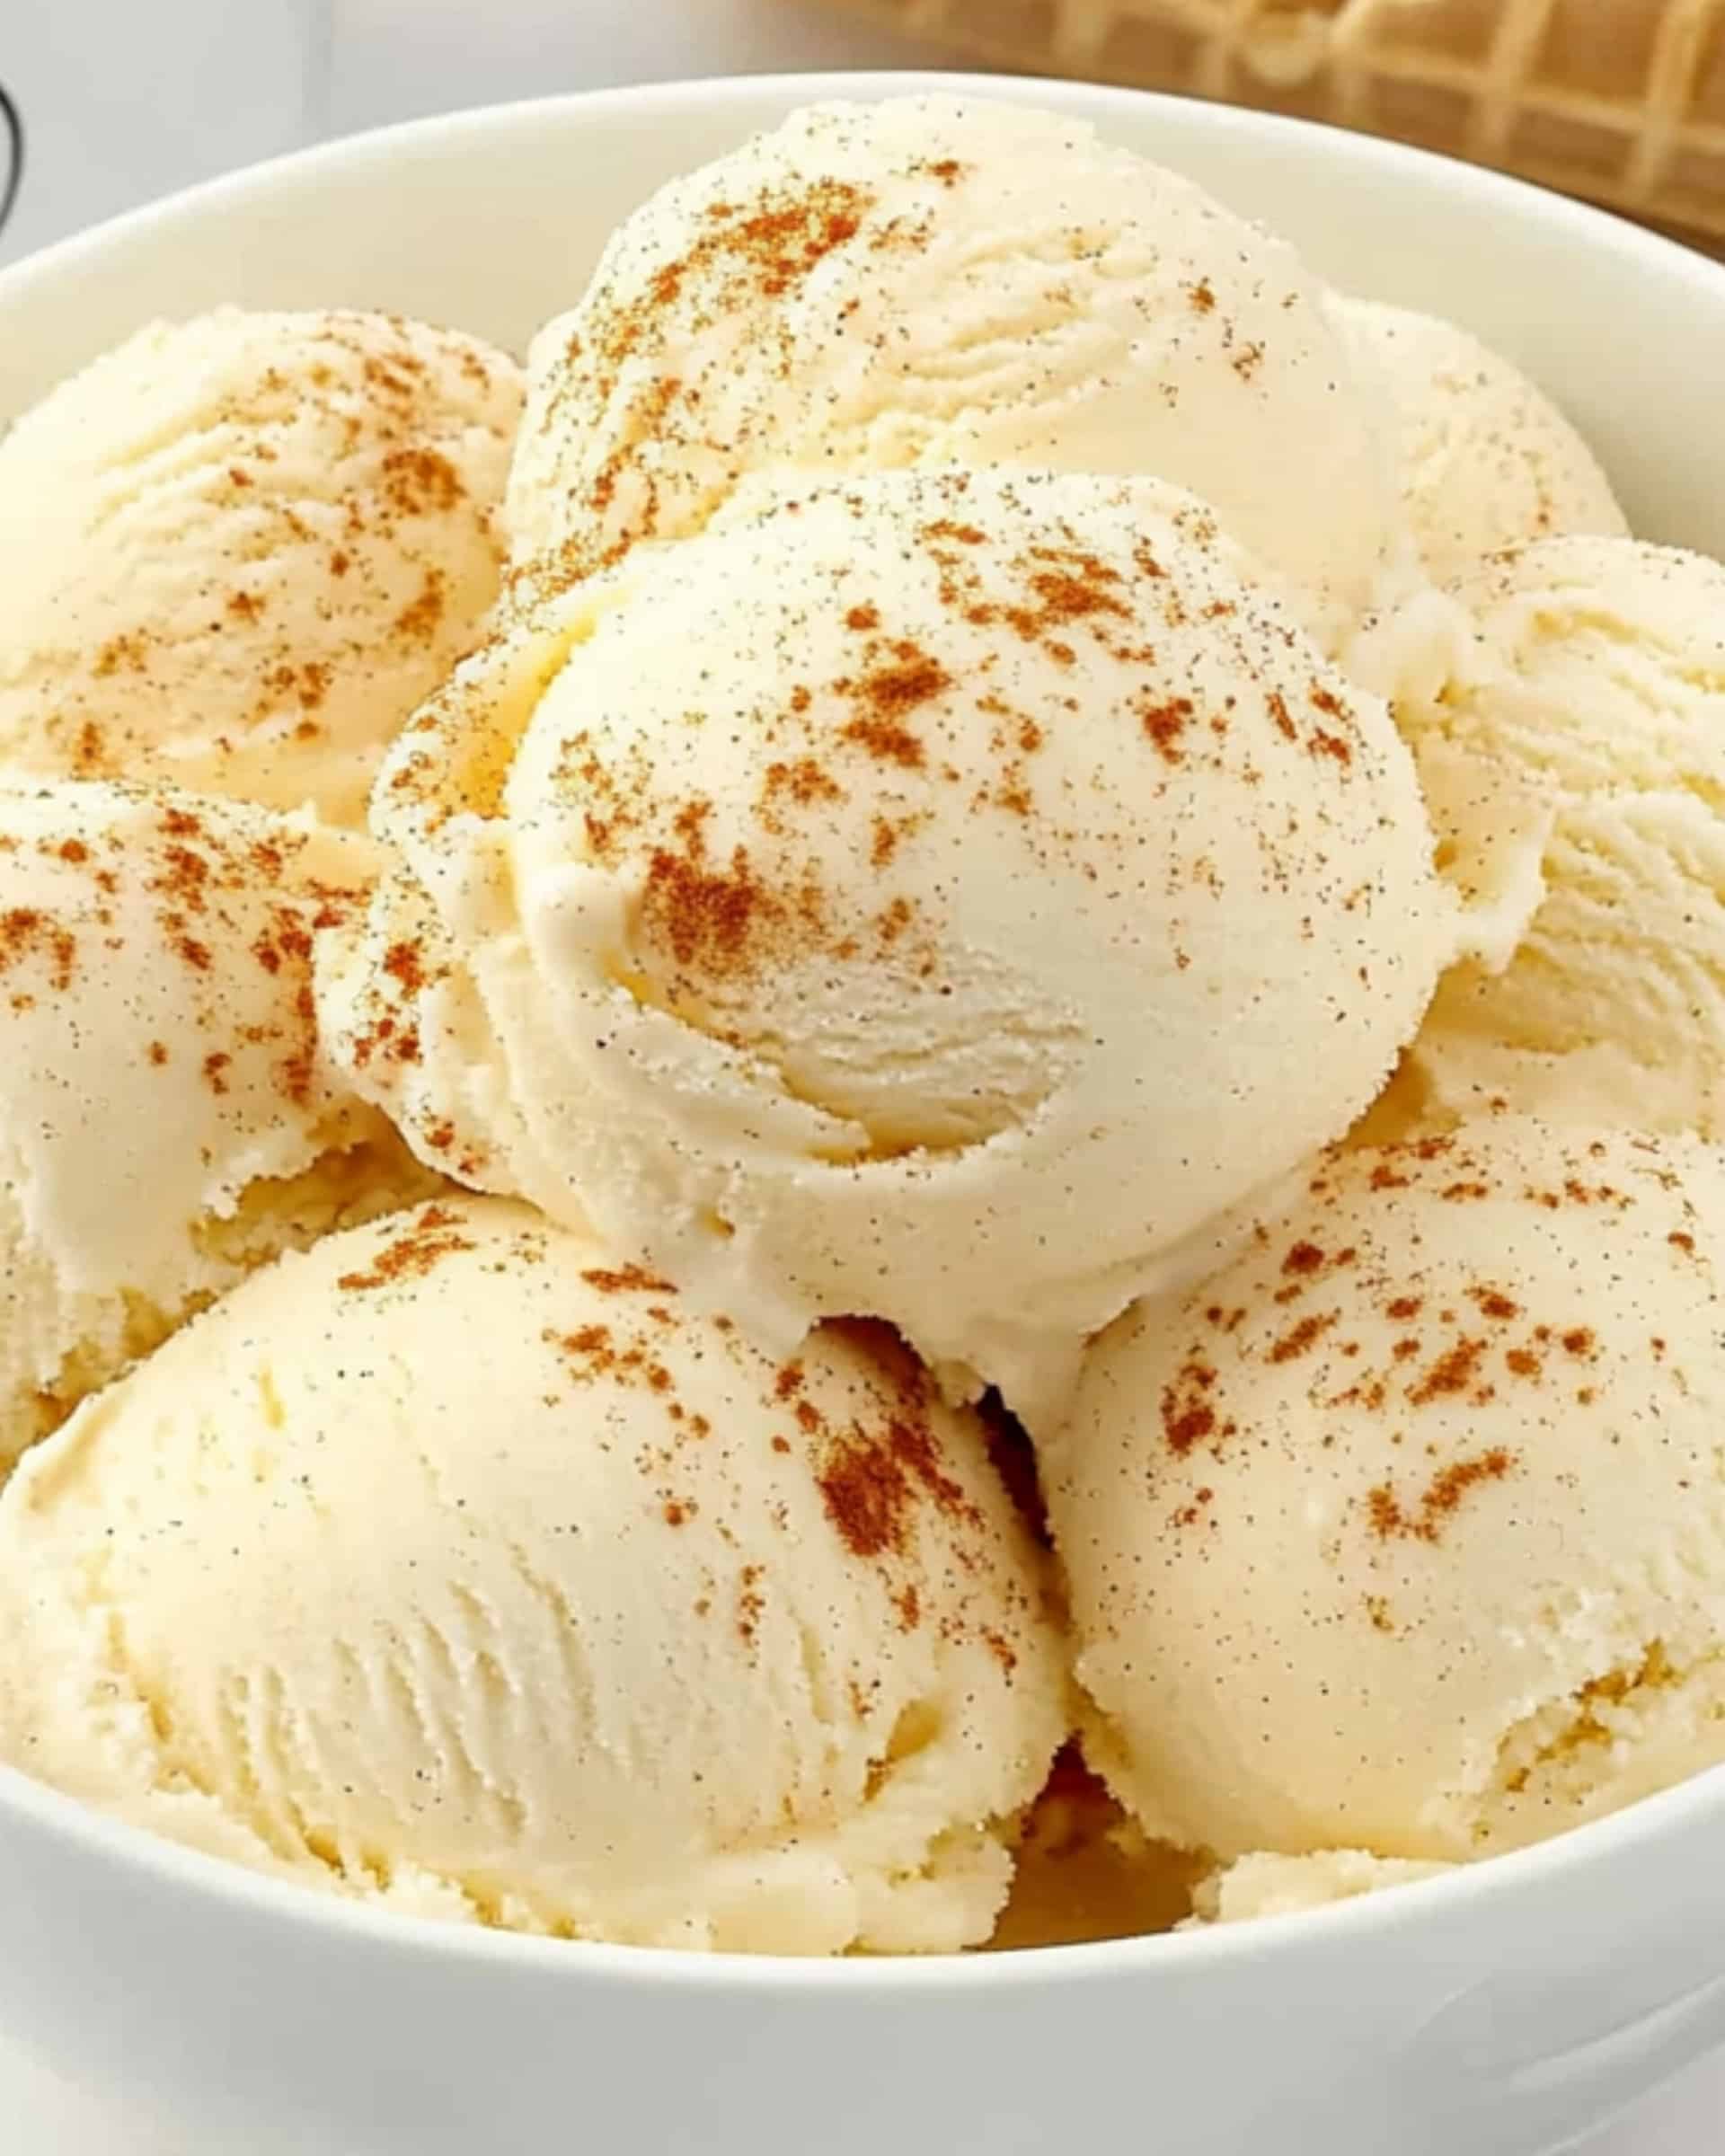
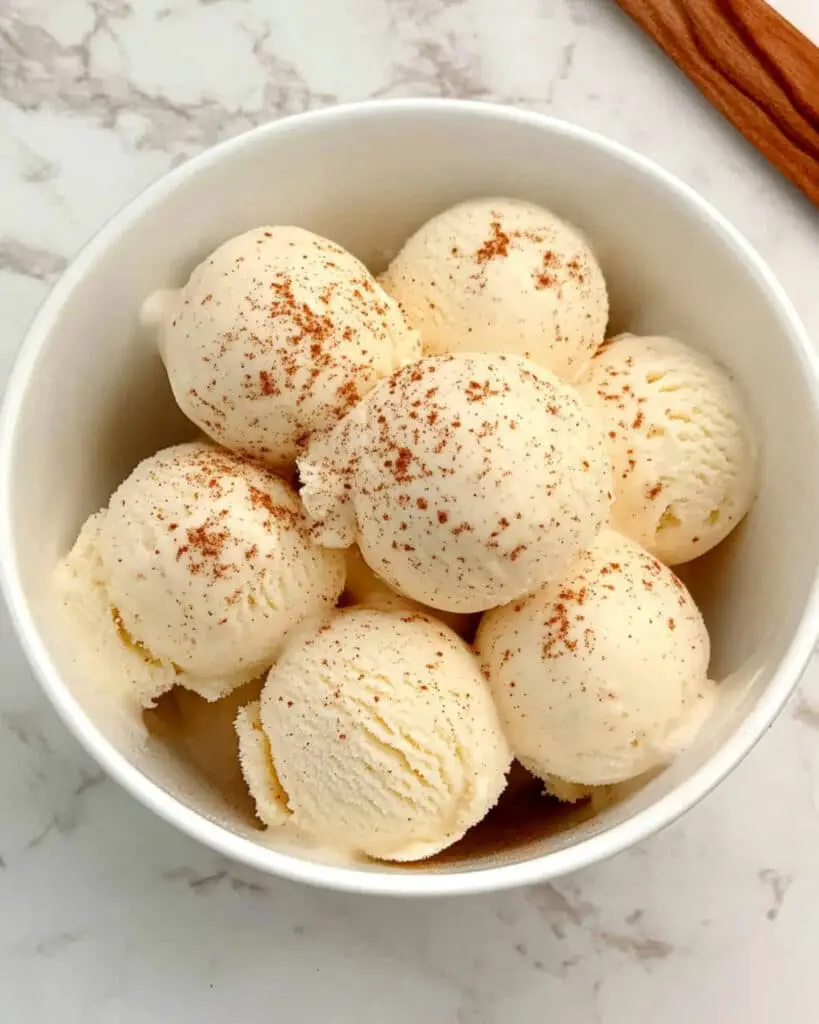
Rich, velvety, and bursting with warm holiday spices, Eggnog Ice Cream is the timeless treat you never realized you needed—even on the busiest days. Imagine the cozy, creamy goodness of traditional eggnog transformed into a dreamy frozen dessert that’s as festive as it is effortless. With minimal prep and a handful of kitchen staples, you can whip up a batch of this decadent ice cream in your own home—no advanced skills required. Whether you’re planning a special family gathering or just want something indulgent after a long day, this recipe will become your new go-to for easy, crowd-pleasing desserts.
Why You’ll Love This Recipe
- Fast, Fuss-Free Prep: If you’re short on time or patience (let’s be honest, most of us are!), you’ll be enchanted by how quickly the custard comes together with just a few simple steps.
- Unbeatable Flavors: Every spoonful is infused with the nostalgic blend of nutmeg and creamy vanilla—with just the right grown-up kick from your choice of brandy, bourbon, or rum.
- Perfect Texture, Every Time: Silky smooth and perfectly scoopable ice cream awaits—this is the kind of frozen treat you only thought you could get at an old-fashioned ice cream shop.
- Impress (With Little Effort!): This is one of those recipes that makes everyone think you spent hours in the kitchen, but you’ll know the secret—most of it was downtime in the fridge or freezer.

Ingredients You’ll Need
Gather these for the creamiest, most luxurious eggnog ice cream imaginable:
- Whole Milk: The base for a custard that’s lush, but not heavy—a balance that supports all those wonderful holiday flavors.
- Heavy Cream: Adds irresistible creaminess and helps your ice cream stay scoopable after freezing.
- Granulated Sugar: Used in both the custard and egg yolks for balanced sweetness and silky texture.
- Egg Yolks: The heart of classic ice cream custard—all about delivering that unbelievably smooth mouthfeel.
- Freshly Grated Nutmeg: Skip the pre-ground stuff. Fresh nutmeg delivers warmth and the signature festive flavor.
- Vanilla Extract: Adds depth and rounds out all the other flavors.
- Brandy, Bourbon, or Dark Rum: Extra flavor and a little holiday cheer; also keeps the ice cream extra soft and creamy.
Note: You’ll find the complete list of ingredients, along with their exact measurements, in the printable recipe card at the bottom of this post.
Variations
Creativity is the best part of home cooking, so here are a few ways to give your eggnog ice cream a personal twist:
- Alcohol-Free: Skip the booze entirely for a family-friendly treat, or add a splash of milk in its place for creaminess.
- Dairy-Free: Substitute coconut milk and coconut cream for the dairy products; it’ll be a little different but still satisfyingly rich.
- Mix-Ins: Try folding in crushed gingerbread cookies, white chocolate chips, or even a swirl of caramel after churning.
- Spice It Your Way: Add a pinch of cinnamon, clove, or even a bit of orange zest for a unique flavor profile.
How to Make Eggnog Ice Cream
Step 1: Prepare Your Cooling Set-Up
Set a fine mesh strainer over a medium bowl and rest this bowl in a larger bowl filled with ice water. This ensures your custard cools fast, keeping everything perfectly creamy.
Step 2: Heat the Milk and Cream
In a medium saucepan, combine whole milk, heavy cream, and part of the sugar. Warm gently over medium heat, stirring occasionally, until the mixture is hot and steaming—don’t let it boil.
Step 3: Whisk the Egg Yolks and Sugar
While the milk mixture heats, whisk your egg yolks and remaining sugar together in a separate bowl until velvety and pale.
Step 4: Temper and Combine
Gradually whisk some of the hot milk mixture into the eggs to temper them (prevents curdling). Pour this back into the saucepan with your remaining milk and cream. Stir gently over medium heat until it thickens slightly but never lets it boil—watch for that perfect custard consistency.
Step 5: Chill the Custard
Pour the hot custard through the mesh strainer into your prepared bowl. Let it chill over the ice bath, stirring occasionally until it cools to room temp. Add nutmeg and your spirit of choice, then cover tightly and pop it into the refrigerator until thoroughly cold.
Step 6: Churn and Freeze
Once chilled, add the vanilla. Then transfer everything to your ice cream maker and churn until you have beautiful, silky soft-serve. Scoop into an airtight container, press plastic wrap onto the surface, cover, and freeze for at least a few hours until scoopingly firm.
That’s it! You’ve just made homemade ice cream that rivals any specialty shop.
Pro Tips for Making the Recipe
- Don’t Skip Tempering: Whisking hot milk into your eggs slowly is the secret to ultra-smooth custard—never rush this step.
- Cool Thoroughly: Temperature matters. Don’t add hot custard to your churner! Start with a chilled base for that perfect texture.
- Use Fresh Nutmeg: It’s a game-changer and brings true holiday magic to your ice cream.
- Alcohol Adds More Than Flavor: A little alcohol keeps the ice cream extra scoopable, not icy. If you omit, consider adding a tablespoon of corn syrup to help with texture.
How to Serve
Eggnog Ice Cream is holiday happiness in a scoop, but don’t stop there!
- Classic: Serve in bowls or cones with a fresh grating of nutmeg on top.
- With Dessert: Pair with gingerbread, pecan pie, or any spiced cake.
- Affogato-Style: Pour a shot of hot espresso over a scoop for a grown-up treat that’s pure bliss.
- Ice Cream Sandwiches: Scoop between two sugar cookies or shortbreads for the ultimate hand-held dessert.
Make Ahead and Storage
Storing Leftovers
Keep any extra ice cream tightly sealed in the freezer. The flavors just keep improving, and it’ll stay creamy for up to 2 weeks.
Freezing
Let the ice cream set at least 2 hours (overnight, if you have the patience!). For best texture, store with a layer of plastic wrap pressed directly onto the surface to prevent iciness.
Reheating
No reheating necessary, but if your ice cream turns too hard, let it rest on the counter 5–10 minutes before scooping for the creamiest results.
FAQs
-
Can I make this ice cream without an ice cream maker?
Absolutely! Just pour the chilled custard into a freezer-safe dish, freeze for about an hour, and whisk vigorously every 30 minutes (or use a hand mixer) to break up ice crystals until it’s firm and creamy.
-
Does the alcohol make the ice cream unsafe for kids?
The tablespoon or two of spirits adds flavor and helps with scoopability, but it’s easily omitted. For a family-friendly version, simply skip the alcohol or use extra milk to keep the base creamy.
-
How do I know when my custard is ready to come off the heat?
When it coats the back of a spoon and holds a clean line when you run your finger through it, it’s good to go. Don’t let it boil, or you risk curdling.
-
Can I use pre-ground nutmeg instead of fresh?
If you must, but fresh nutmeg is strongly recommended for the brightest, most authentic flavor. It makes all the difference, especially when eggnog is the star.
Final Thoughts
Eggnog Ice Cream is a holiday classic reinvented—brimming with rich flavor and festive spirit, yet so simple you’ll want to make it on weeknights all year long. Give it a try, have fun with the process, and don’t be surprised if it disappears before you know it. There’s simply nothing like homemade ice cream to bring people together—enjoy every creamy, dreamy bite!
Print
Eggnog Ice Cream Recipe
- Prep Time: 15 minutes
- Cook Time: 20 minutes
- Total Time: 5 hours 35 minutes
- Yield: 1 quart 1x
- Category: Desserts
- Method: Stovetop
- Cuisine: American
- Diet: Vegetarian
Description
Eggnog Ice Cream is a rich, creamy frozen dessert with the festive flavors of classic eggnog—featuring nutmeg, vanilla, and a hint of brandy, bourbon, or rum. This homemade treat combines silky custard with a luscious texture, making it the perfect holiday dessert or winter indulgence.
Ingredients
Dairy
- 1 1/2 cups whole milk
- 1 1/2 cups heavy cream
Sugar
- 3/4 cup granulated sugar, divided
Eggs
- 4 large egg yolks
Flavorings & Alcohol
- 1 teaspoon freshly grated nutmeg
- 1 teaspoon vanilla extract
- 3 tablespoons brandy, bourbon, or dark rum
Instructions
- Prepare Ice Bath and Strainer: Set a fine mesh strainer over a medium-sized bowl and place the bowl over a large container filled with ice water. This will be used later to quickly cool the custard base after cooking.
- Heat Milk, Cream, and Sugar: In a medium saucepan over medium heat, combine the whole milk, heavy cream, and 1/2 cup of the granulated sugar. Stir occasionally, heating the mixture until it is steaming and hot (about 175°F/79°C), which should take around 5 minutes.
- Whisk Egg Yolks with Sugar: While the milk mixture is heating, whisk together the egg yolks and remaining 1/4 cup granulated sugar in a separate bowl until smooth and slightly pale.
- Temper the Egg Yolks: Slowly and gradually pour about 1 cup of the hot milk mixture into the egg yolks, whisking constantly to prevent curdling. Once incorporated, slowly whisk the tempered yolk mixture back into the saucepan with the rest of the hot milk mixture.
- Cook the Custard: Continue cooking the combined mixture over medium heat, stirring constantly, until it thickens and reaches 180-185°F (82-85°C), being careful not to let it simmer or boil.
- Cool the Custard: Pour the hot custard mixture through the mesh strainer into the bowl set in the ice bath. Stir it occasionally for about 10 minutes to help it cool down quickly.
- Add Nutmeg and Alcohol: Once slightly cooled, remove the bowl from the ice bath. Stir in the freshly grated nutmeg and your choice of brandy, bourbon, or dark rum. Cover tightly with plastic wrap and refrigerate until thoroughly chilled (at least 3 hours or until it reaches 40°F/4°C).
- Add Vanilla and Churn: After chilling, stir in the vanilla extract. Pour the custard mixture into your ice cream machine and churn according to manufacturer’s instructions, usually about 20 minutes, until the mixture has the consistency of soft-serve ice cream.
- Freeze Until Firm: Transfer the churned ice cream to an airtight container, pressing plastic wrap directly onto the surface. Cover and freeze until the ice cream is firm and scoopable, at least 2 hours before serving.
Notes
- Use freshly grated nutmeg for the best flavor.
- Chilling the custard fully before churning ensures a smoother texture.
- Alcohol adds traditional flavor and helps keep the ice cream softer; for a kid-friendly version, omit the alcohol.
- If you don’t have an ice cream maker, you can pour the chilled custard into a freezer-safe container and stir every 30 minutes until set, though the texture will be different.
Nutrition
- Serving Size: 1/2 cup
- Calories: 270
- Sugar: 23g
- Sodium: 55mg
- Fat: 18g
- Saturated Fat: 11g
- Unsaturated Fat: 6g
- Trans Fat: 0g
- Carbohydrates: 25g
- Fiber: 0g
- Protein: 4g
- Cholesterol: 120mg
