

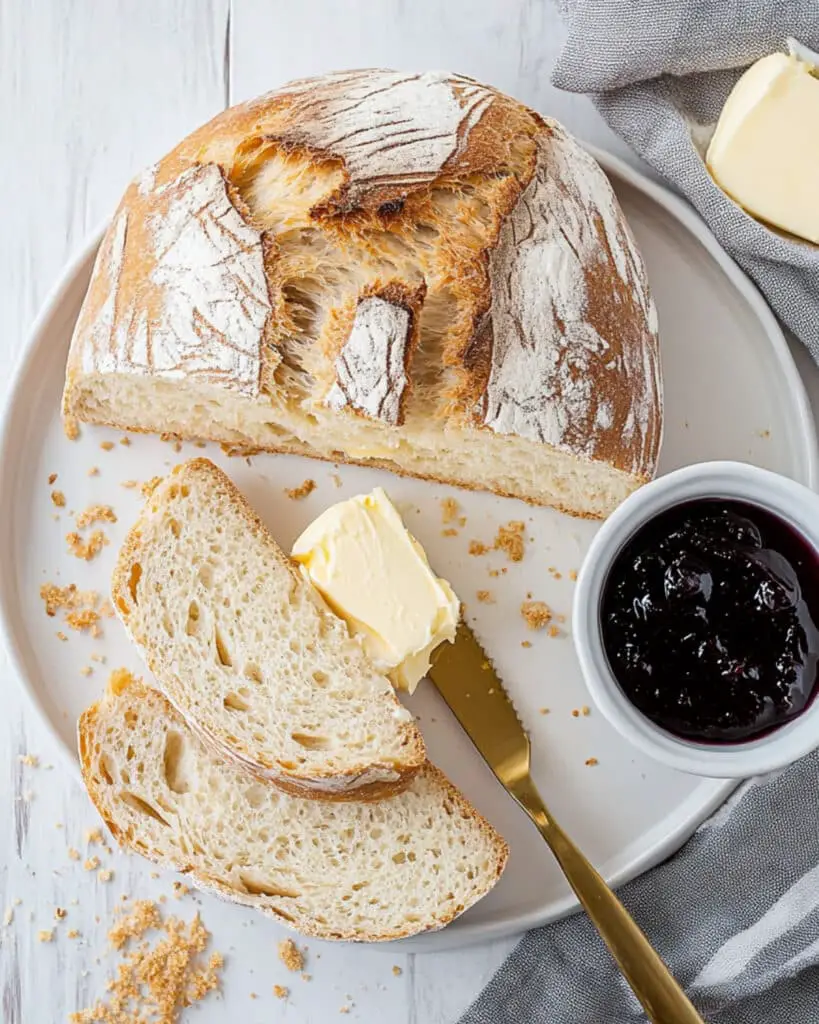
This deliciously rustic Easy Sourdough Bread recipe delivers that perfect combination of chewy interior and crackling crust that sourdough lovers dream about. Made with just four simple ingredients and baked in a Dutch oven to capture that authentic bakery-style finish, this recipe transforms your kitchen into an artisan bread shop without the fuss or complexity. The long fermentation process develops incredible flavor while requiring minimal hands-on time – perfect for busy home bakers!
Why You’ll Love This Recipe
- Simple Ingredients: Just flour, water, salt, and sourdough starter are all you need to create bakery-quality bread at home.
- Minimal Kneading: This recipe uses the “stretch and fold” technique instead of lengthy kneading, making it much easier on your hands and schedule.
- Incredible Flavor: The overnight fermentation develops that signature sourdough tang that’s impossible to achieve with quick breads.
- Impressive Results: The Dutch oven baking method creates that professional-looking crust that will have everyone thinking you’re a master baker.
- Flexible Timeline: Most of the time involved is hands-off, allowing you to fit breadmaking around your schedule, not the other way around.

Ingredients You’ll Need
- Bread Flour: Provides the structure and protein content needed for that perfect chewy texture. All-purpose flour works too, though your loaf may be slightly less chewy.
- Salt: Essential for flavor development and controlling fermentation. Don’t skimp here – salt is what makes bread taste like bread!
- Active Sourdough Starter: Your natural leavening agent that provides both rise and that distinctive sourdough flavor. Make sure it’s bubbly and active before using.
- Warm Water: Activates the fermentation process. The temperature matters – too hot will kill your starter, too cold will slow everything down.
Note: You’ll find the complete list of ingredients, along with their exact measurements, in the printable recipe card at the bottom of this post.
Variations
Different Flour Combinations
Try using 20% whole wheat flour for a nuttier flavor, or add 1/2 cup of rye flour for complexity. Just remember that whole grain flours absorb more water, so you might need to adjust accordingly.
Add-Ins for Flavor
Fold in herbs like rosemary or thyme, a handful of chopped olives, or even toasted walnuts and dried cranberries after the second set of stretches and folds.
Seed Crusted Loaf
Brush the top with water before baking and sprinkle with sesame, poppy, or sunflower seeds for added texture and flavor.
Flavored Sourdough
Add 2-3 tablespoons of honey for a touch of sweetness, or 1-2 tablespoons of garlic powder and dried herbs for a savory twist.
How to Make Easy Sourdough Bread
Step 1: Prepare Your Starter
Ensure your sourdough starter is active and bubbly before beginning. It should at least double in size after feeding and pass the float test (a small amount should float in water).
Step 2: Mix the Dough
In a medium-sized bowl, combine the flour and salt, then add your active starter. Pour in the warm water and mix everything together until you have a shaggy, somewhat sticky dough. Use your hands at the end to make sure all the flour is incorporated.
Step 3: Initial Rest
Cover the bowl with a damp cloth or plastic wrap and let the dough rest for 1-2 hours at room temperature. This autolyse period allows the flour to fully hydrate and gluten development to begin.
Step 4: Stretch and Fold Sequence
With wet hands to prevent sticking, perform your first set of stretch and folds. Pull one edge of the dough up and fold it over to the center, rotating the bowl and repeating until you’ve gone all the way around (usually 4-6 folds). Cover and rest for 30 minutes.
Step 5: Complete Remaining Folds
Repeat the stretch and fold process every 30 minutes for a total of 4 times. With each set, you’ll notice the dough becoming more elastic and developing strength.
Step 6: Bulk Fermentation
After your final set of folds, cover the dough and let it rise at room temperature for another 1-2 hours until it looks puffy and has increased in volume by about 50%.
Step 7: Cold Fermentation
Transfer the covered bowl to the refrigerator and let it rest overnight (or up to 24 hours). This slow fermentation develops flavor and makes the dough easier to handle.
Step 8: Shape the Loaves
Remove the dough from the refrigerator and let it sit at room temperature for about 2 hours. Divide it into two equal portions and shape each into a tight ball by pulling the edges toward the center and then turning it over so the seam side is down.
Step 9: Final Proof and Preheat
Line a Dutch oven with parchment paper and place one dough ball inside. Cover with the lid while your oven preheats to 450°F, with the second dough ball waiting covered at room temperature.
Step 10: Bake the Bread
Place the covered Dutch oven in the preheated oven and bake for 30-40 minutes. Remove the lid to allow the crust to develop its golden color and continue baking for another 10 minutes. Repeat with the second loaf.
Step 11: Cool Completely
Transfer the finished bread to a wire rack and let it cool for at least 30-40 minutes before slicing. This cooling period is crucial for the texture to set properly.
Pro Tips for Making the Recipe
- Starter Activity: Your starter should be at peak activity – usually 4-8 hours after feeding, when it’s doubled and full of bubbles.
- Dough Consistency: The dough will be sticky at first. Resist adding more flour; instead, use wet hands for handling.
- Room Temperature Matters: Ideal room temp is around 70-75°F. Cooler environments mean longer fermentation times, warmer means shorter.
- Score Before Baking: Right before placing in the oven, score the top of your loaf with a sharp knife or razor blade to control how it expands during baking.
- Steam Creation: The Dutch oven traps moisture from the dough to create steam, which is essential for that crispy crust. Keep the lid on for the first part of baking.
How to Serve
Perfect Pairings
Nothing beats warm sourdough with good quality butter or olive oil. For a complete experience, serve alongside aged cheeses, homemade soups, or hearty stews that can stand up to the bread’s robust flavor.
Breakfast Favorite
Toast thick slices and top with avocado, a soft-boiled egg, and a sprinkle of sea salt for a trendy, satisfying breakfast.
Sandwich Base
Day-old sourdough makes incredible sandwiches – the slight tang complements both savory fillings like roasted vegetables and meats, as well as sweeter options like nut butters and jams.
Make Ahead and Storage
Storing Leftovers
Homemade sourdough stays fresh at room temperature for 2-3 days when stored in a paper bag or bread box. Avoid plastic bags as they’ll soften that beautiful crust you worked so hard for.
Freezing
For longer storage, freeze whole or half loaves wrapped in plastic wrap and then aluminum foil. Frozen sourdough keeps well for up to 3 months.
Refreshing Stale Bread
Day-old bread can be revived by sprinkling it with water and heating in a 350°F oven for about 10 minutes. Alternatively, transform it into amazing French toast, bread pudding, or homemade croutons.
FAQs
-
How do I know if my sourdough starter is ready to use?
Your starter should be active and bubbly, roughly doubling in size after feeding. A good test is the “float test” – drop a small spoonful into a glass of water. If it floats, it’s ready to use. If it sinks, give it more time to develop or feed it again and wait.
-
Why did my bread turn out dense instead of light and airy?
Dense sourdough usually indicates either an insufficiently active starter, not enough proofing time, or poor tension during shaping. Make sure your starter is very active before mixing, allow adequate time for both bulk fermentation and final proofing, and work on creating tension when shaping your loaves.
-
Can I make this recipe with whole wheat flour instead?
Yes, but I wouldn’t recommend going 100% whole wheat for beginners. Start by replacing 20-30% of the bread flour with whole wheat. Whole wheat flour absorbs more water, so you’ll likely need to increase water by about 2 tablespoons per cup of whole wheat flour substituted.
-
How can I get a more sour flavor in my bread?
For a tangier loaf, try using a starter that’s been fed less recently (but is still active), extend the cold fermentation time to 24-48 hours, or use a portion of whole grain flour in your dough. The longer fermentation especially develops those complex sour notes that sourdough enthusiasts love.
Final Thoughts
This Easy Sourdough Bread recipe might take time, but most of it is hands-off – and the results are absolutely worth waiting for. There’s something truly magical about pulling a golden loaf from your oven, hearing that crackling crust, and slicing into bread you’ve created with your own hands. Don’t be discouraged if your first loaf isn’t perfect – sourdough baking is a journey, and each batch teaches you something new. Embrace the process, enjoy the delicious results, and soon you’ll be creating bakery-worthy bread with your own signature style!
Print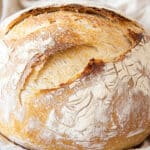
Easy Sourdough Bread Recipe in Dutch Oven
- Prep Time: 10 minutes
- Cook Time: 50 minutes
- Total Time: 1 hour
- Yield: 2 loaves 1x
- Category: Bread
- Method: Baking
- Cuisine: Artisan
Description
This Easy Sourdough Bread recipe creates a beautifully crusty artisan loaf with minimal effort. Using just four simple ingredients and a Dutch oven, this process maximizes flavor and texture through natural fermentation. Perfect for beginners and seasoned home bakers alike, this sourdough recipe yields a crispy crust, soft interior, and a depth of flavor that makes it irresistible.
Ingredients
Dry Ingredients
- 5 cups bread flour or all-purpose flour
- 1 tablespoon salt
Wet Ingredients
- 1 cup active starter
- 2 cups warm water (70-80°F)
Instructions
- Prepare the Active Starter
Before starting, ensure you have an active sourdough starter. It generally takes 5 days to create a full active sourdough starter. This starter is the foundation of a good sourdough loaf. - Mix the Dough
In a medium-sized bowl, combine your flour, salt, and active starter. Add the warm water gradually, mixing well to ensure the starter integrates with the water and flour. Use a dough scraper or spatula to stir, and then finish mixing with your hands to create a shaggy dough. Cover and let it rest for 1-2 hours at room temperature (up to 4-5 hours for deeper flavor). - Knead the Dough
Wet your hands and fold the dough. Pull the bottom of the dough upward onto the top repeatedly. Cover and let it rest for 30 minutes at room temperature. Repeat this folding process every 30 minutes for the next 2 hours (4 times in total). By the end, the dough should be elastic. - Bulk Fermentation
After finishing the folding, cover the dough again and allow it to rise for another 1-2 hours at room temperature until it becomes airy and puffy. Then, transfer it to the fridge and let it rest overnight to develop the flavor further. - Shape the Dough
Remove the dough from the fridge and let it come to room temperature for about 2 hours. Divide the dough into two equal portions and shape each into a round ball. - Prepare for Baking
Line a Dutch oven with parchment paper and place one of the dough balls in the center. Cover with the lid and let it rest while preheating the oven to 450°F. Keep the second dough ball covered until the first loaf is finished (or use a second Dutch oven if available). - Bake the Bread
Place the Dutch oven (with the lid on) into the preheated oven. Bake for 30-40 minutes until the bread turns light golden. Remove the lid and continue baking for another 10 minutes. The bread should sound hollow when tapped and have a golden brown color. Repeat the baking process for the second dough ball. - Cool the Loaf
Allow the baked sourdough bread to rest on a wire rack for 30-40 minutes. This helps maintain its perfect crust texture before slicing.
Notes
- Ensure your starter is very active for best results.
- Warm water (not hot) helps activate fermentation without killing the yeast.
- Patience is key; longer rise times develop deeper, tangier flavors.
- Use a Dutch oven to achieve a professional-grade crispy crust.
- Score the top of the bread dough for a decorative and practical artisan effect.
- Allow the bread to cool completely on a wire rack to ensure a crusty, crispy exterior.
Nutrition
- Serving Size: 2 loaves
- Calories: 800kcal
- Sugar: 0g
- Sodium: 1160mg
- Fat: 1g
- Saturated Fat: 0g
- Unsaturated Fat: 1g
- Trans Fat: 0g
- Carbohydrates: 160g
- Fiber: 6g
- Protein: 22g
- Cholesterol: 0mg


