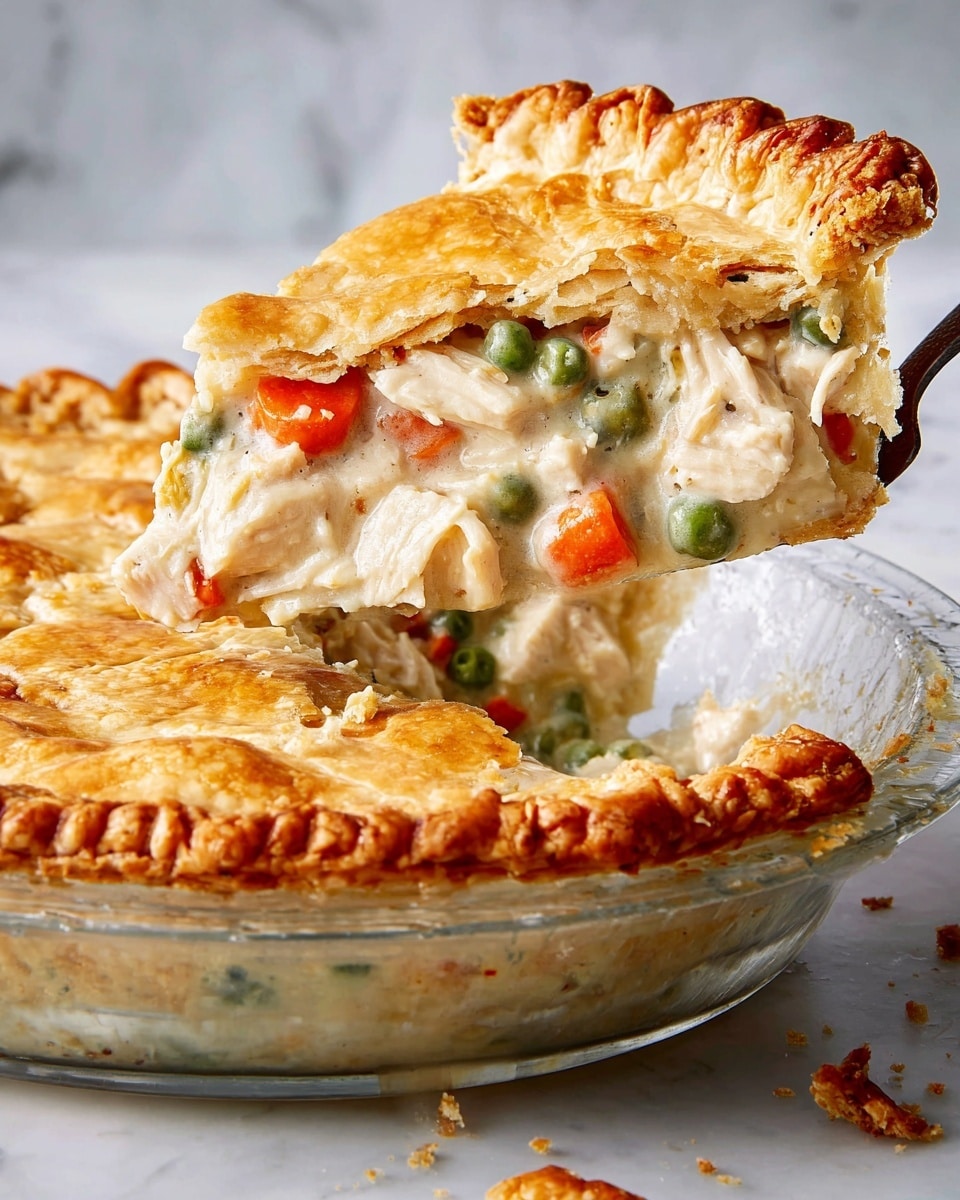
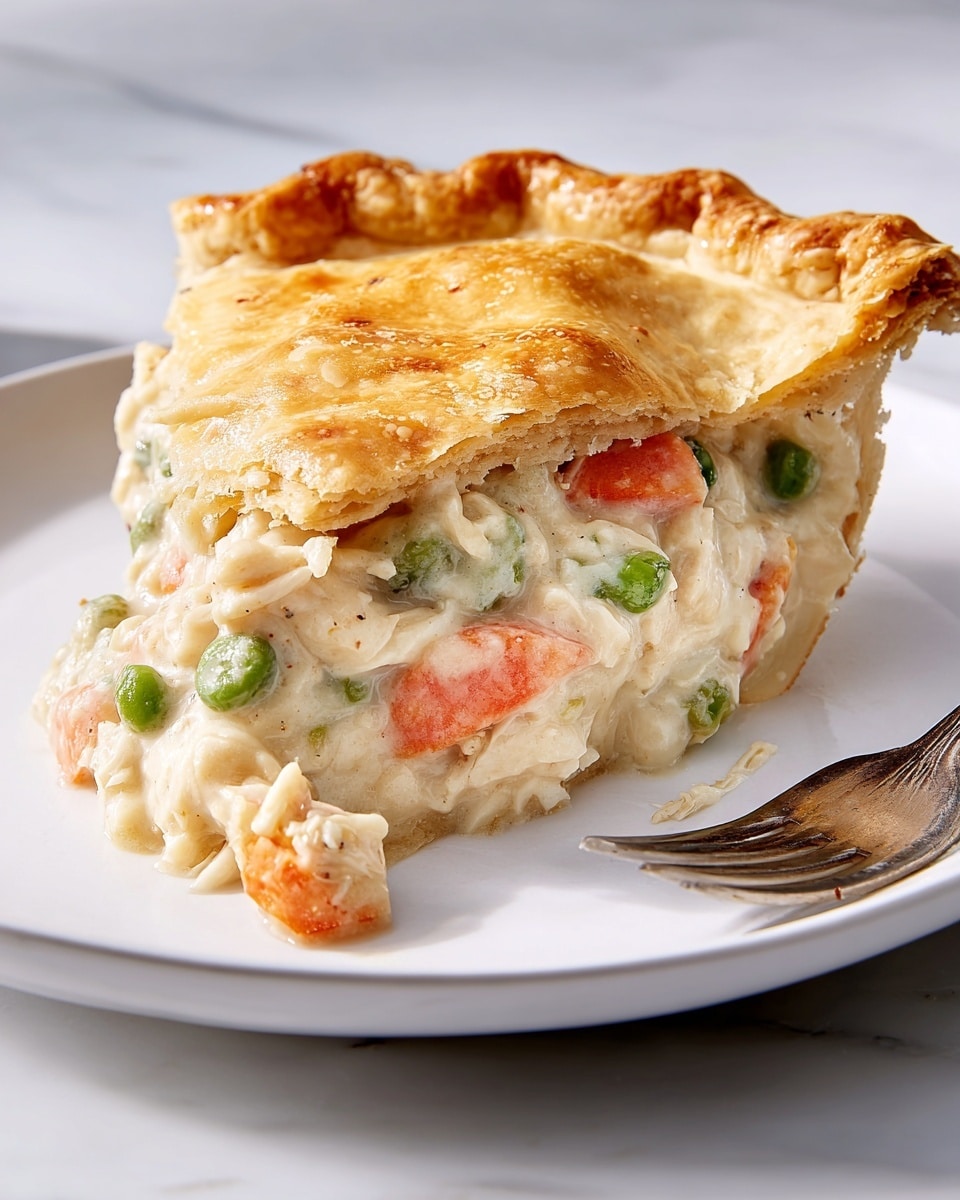
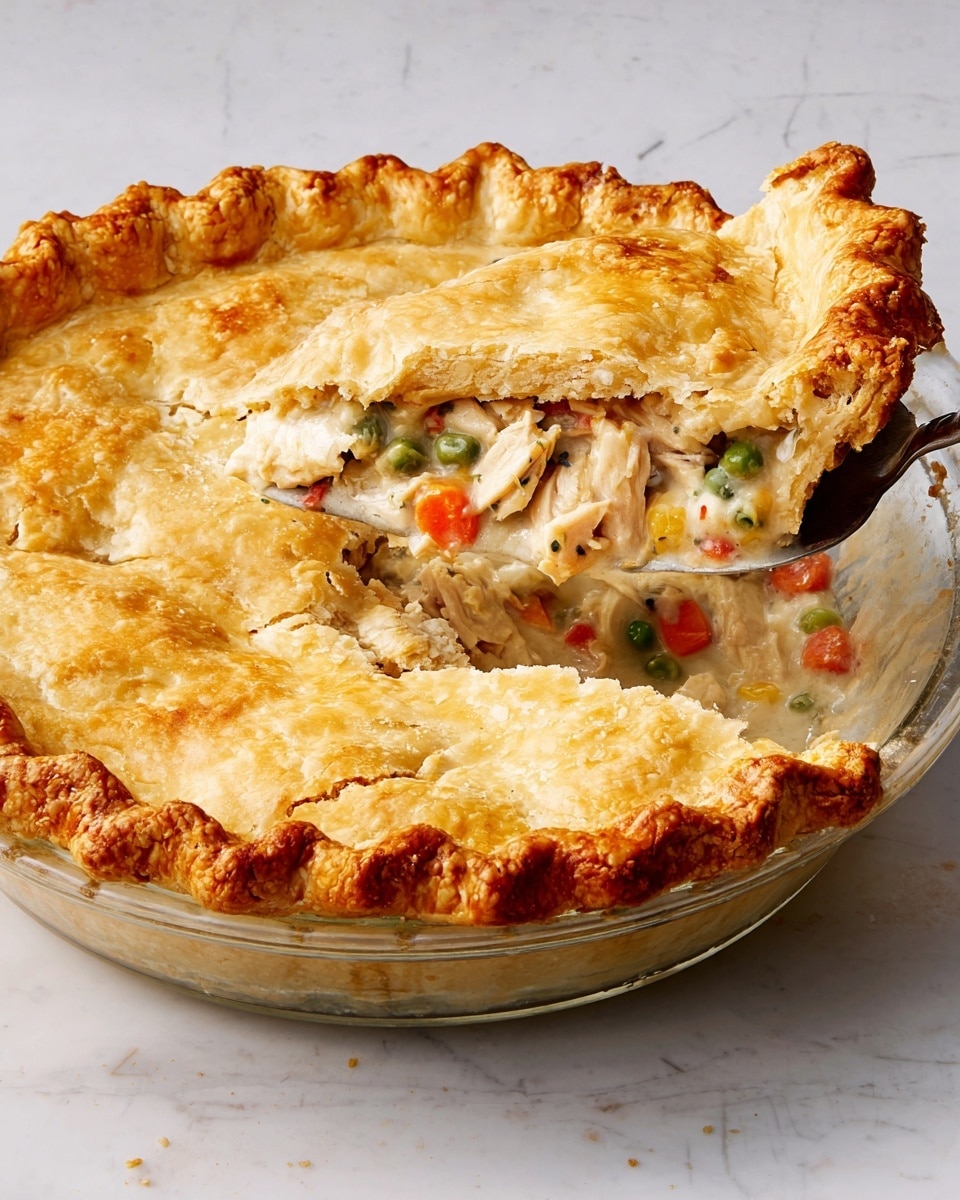
If comfort food had a crown jewel, this Classic Chicken Pot Pie Recipe would definitely be it. I absolutely love how this turns out every time — golden, flaky crust on the outside and rich, creamy filling packed with tender chicken and fresh veggies on the inside. It’s the kind of meal that feels like a warm hug after a long day, and I find it perfect for family dinners, chilly weekends, or anytime you want a little nostalgic indulgence.
When I first tried this recipe, I was blown away by how homemade pie crust made such a difference. You’ll find that rolling out your own dough and building that luscious filling from scratch is totally worth the effort. Plus, the leftovers heat up beautifully, so you get the joy of this classic dish more than once. Trust me, mastering this Classic Chicken Pot Pie Recipe is worth the bragging rights in your kitchen.
Why You’ll Love This Recipe
- Homemade Crust: The flaky, buttery crust is made from scratch, giving you a fresh and satisfying texture that store-bought just can’t match.
- Hearty and Flavorful Filling: A rich blend of tender chicken, garden veggies, and creamy sauce makes every bite comforting and delicious.
- Perfect for Any Occasion: Serve it for weeknight dinners, casual family gatherings, or even potlucks — it’s always a crowd-pleaser.
- Make-Ahead Friendly: You can prepare the crust and filling ahead of time, saving stress on busy days without sacrificing flavor.
Ingredients You’ll Need
This Classic Chicken Pot Pie Recipe uses familiar ingredients that come together in a way that’s both rich and comforting. I like to shop for the freshest veggies I can find because they really brighten up the filling, and making your own crust is the secret to that perfect flaky texture.
- All-purpose flour: The backbone of both crust and filling, so make sure it’s fresh for best texture and flavor.
- Unsalted butter: Key for rich flavor in the crust and silky smooth filling; I recommend using real butter, not margarine.
- Baking powder: Helps tenderize the crust, giving it that light, flaky quality.
- Kosher salt: Essential for flavor balance in dough and filling; enhances all the ingredients beautifully.
- Yellow onion: Adds savory sweetness once sautéed — chopping it finely is worth the time.
- Carrots: Bring subtle sweetness and texture; peel and chop them small so they cook evenly.
- Garlic cloves: Freshly minced garlic adds depth to the filling — avoid pre-minced for best taste.
- Low-sodium chicken broth: Use low-sodium so you can control salt levels easily in the filling.
- Heavy cream: Makes the filling luxuriously creamy without requiring floury thickeners alone.
- Boneless, skinless chicken breasts: Poached until tender, then cubed for perfect bite-sized pieces.
- Frozen peas: A pop of color and sweetness — no need to thaw before mixing them in.
- Fresh parsley and thyme: They brighten the filling with subtle herbal freshness.
- Freshly ground black pepper: Adds gentle heat and complexity.
- Large egg: Used for the egg wash to get that beautiful golden crust.
- Flaky sea salt: Sprinkled on top for a crunchy burst of flavor and eye-catching finish.
Variations
I like to keep the Classic Chicken Pot Pie Recipe traditional most of the time, but sometimes I switch things up depending on what I have in the fridge or my mood. Feel free to personalize it — this dish is very forgiving and adapts beautifully to different tastes and dietary needs.
- Vegetarian Version: Skip the chicken and add extra mushrooms, potatoes, and beans to keep it hearty and satisfying—I’ve tried this for friends who don’t eat meat and loved how it turned out.
- Use Rotisserie Chicken: In a pinch, shredded rotisserie chicken works well and saves poaching time without compromising much on flavor.
- Gluten-Free: Swap the all-purpose flour for a gluten-free blend (make sure it contains xanthan gum) and use gluten-free chicken broth for a safe alternative.
- Herb Twists: Experiment with rosemary or sage instead of thyme to add a new herbal note to the filling.
How to Make Classic Chicken Pot Pie Recipe
Step 1: Chill Your Flour and Butter for That Flaky Crust
This little step makes a huge difference. Freeze your flour and butter separately for about 30 minutes before you start. When you’re ready, pulse the flour, baking powder, and salt in a food processor, then add the cold butter and pulse until you get pea-sized pieces. Slowly drizzle in ice water while the machine runs until the dough feels just moist enough to hold together, but not sticky. It’s a balancing act, but you’ll learn to feel it with time!
Step 2: Form, Chill, and Rest Your Dough
Turn the dough onto a floured surface and divide it into two balls, then flatten each into discs. Cover with plastic wrap and chill them in the fridge for at least 30 minutes; this resting time helps the gluten relax and keeps that crust tender and flaky when baked. You can refrigerate the discs for up to three days if you want to prep in advance.
Step 3: Build the Flavorful Filling
In a large pot over medium heat, melt butter and gently soften the onions and carrots for about 10 minutes — patience here brings sweetness that’s key to the dish’s depth. Add garlic and cook just until fragrant, then sprinkle in flour and stir constantly until it turns golden and bubbly. Gradually whisk in chicken broth, bringing it to a boil and stirring until thickened like a creamy sauce. Once off heat, stir in cream, chicken, peas, fresh herbs, and seasoning. Let this filling cool — it’s easier to handle and less likely to mess up the crust when assembling.
Step 4: Roll Out and Assemble Your Pot Pie
Preheat your oven to 375°F and position a rack in the center. On a floured surface, roll out one dough disc into a large circle about ¼-inch thick—don’t worry if it’s not perfectly round; rustic charm is part of the appeal. Gently fit it into a deep 9-inch pie dish, then spoon in the cooled filling. Roll out the second disc and lay it over the top. Crimp the edges well to seal, trim any excess dough, then fold under the overhang and pinch or crimp to create that classic look. Brush the top with your beaten egg wash, cut little slits for steam to escape, and sprinkle with flaky sea salt for that final savory touch.
Step 5: Bake and Let It Rest
Bake your pot pie for about 45 minutes until the crust turns a gorgeous golden brown and the filling is bubbling beneath. Don’t rush this part—letting it cool for at least 15 minutes before slicing helps everything set so you get clean, beautiful slices. I used to slice mine too soon and ended up with a filling spillover—lesson learned the hard way!
Pro Tips for Making Classic Chicken Pot Pie Recipe
- Keep Ingredients Cold: Cold butter and flour are your best friends for a flaky crust, so don’t skip the chilling steps.
- Patience With Veggies: Slowly cooking onions and carrots unlocks their sweetness and makes for a richer filling.
- Watch Your Dough Thickness: Aim for about ¼-inch thickness to avoid a crust that’s too thick and doughy or too fragile.
- Rest Before Slicing: Let your pie cool before cutting to keep the filling intact and the crust crisp.
How to Serve Classic Chicken Pot Pie Recipe
Garnishes
I keep it simple here, usually a few sprigs of fresh parsley or thyme on top for color and a subtle fresh note. Sometimes a tiny drizzle of extra cream on the plate perks it up if I’m feeling fancy. These small touches make it look inviting without overwhelming that perfect crust you worked on.
Side Dishes
When I serve this pot pie, I like something light on the side to balance the richness—simple mixed greens dressed with lemon vinaigrette or roasted Brussels sprouts work wonderfully. Steamed green beans or a crisp cucumber salad also pair nicely and keep the meal feeling fresh.
Creative Ways to Present
For special occasions, I’ve baked individual pot pies in ramekins using the same filling and mini disc crusts—it’s charming and fun to serve each person their own. Mini pot pies also freeze beautifully for easy make-ahead meals or party snacks. Adding decorative dough cutouts shaped like leaves or chickens on top is my go-to for when I want to impress guests with a festive touch.
Make Ahead and Storage
Storing Leftovers
I store leftovers tightly wrapped in the fridge and usually they’re good for 3 to 4 days. When reheating, you can cover with foil and warm it back up in the oven to keep that crust crisp rather than soggy like the microwave might do.
Freezing
This pot pie freezes beautifully before baking. I usually freeze it assembled but unbaked—wrapped tightly in plastic and foil. When I’m ready to bake, I thaw it overnight in the refrigerator and then bake as usual. This saves so much time on busy days and still delivers fresh-baked flavor.
Reheating
Reheat leftovers in the oven at about 350°F, loosely covered with foil for 15-20 minutes, then remove the foil for the last 5 minutes to refresh the crust’s crispness. This method keeps the filling warm and creamy while preserving that delightful crunch on top.
FAQs
-
Can I use store-bought pie crust instead of making my own?
Absolutely! While I love the homemade crust for its flakiness and flavor, store-bought crust works fine if you’re short on time. Just keep an eye on baking times and make sure to prick the crust edges if needed to prevent sogginess.
-
How do I know when the filling is thick enough?
You want the filling to coat the back of a spoon without running off immediately. After adding the broth and cooking, it should thicken nicely in about 5 minutes. If it’s too thin, cook it a little longer, stirring frequently to avoid burning.
-
Can I make this recipe ahead of time?
Definitely! You can prepare both the crust and filling up to 3 days ahead. Keep the dough discs wrapped well in the fridge and store the filling in an airtight container. Assemble and bake when you’re ready for a fresh, warm meal.
-
What’s the best way to poach chicken breasts for the filling?
Place chicken breasts in a single layer in a pot, cover with cold water or low-sodium chicken broth, and gently simmer (not boil) for 12-15 minutes until cooked through. Let them cool before cubing to keep the meat tender and juicy.
Final Thoughts
There’s something deeply satisfying about making this Classic Chicken Pot Pie Recipe from scratch, especially when you see the smiles around the table as everyone digs in. It’s a recipe that feels like home in every bite, and I’m confident you’ll find joy in the process as much as the delicious outcome. Next time you’re craving comfort food that’s truly special, give this a try—I promise it’ll become a beloved favorite in your kitchen, just like it did in mine.

