
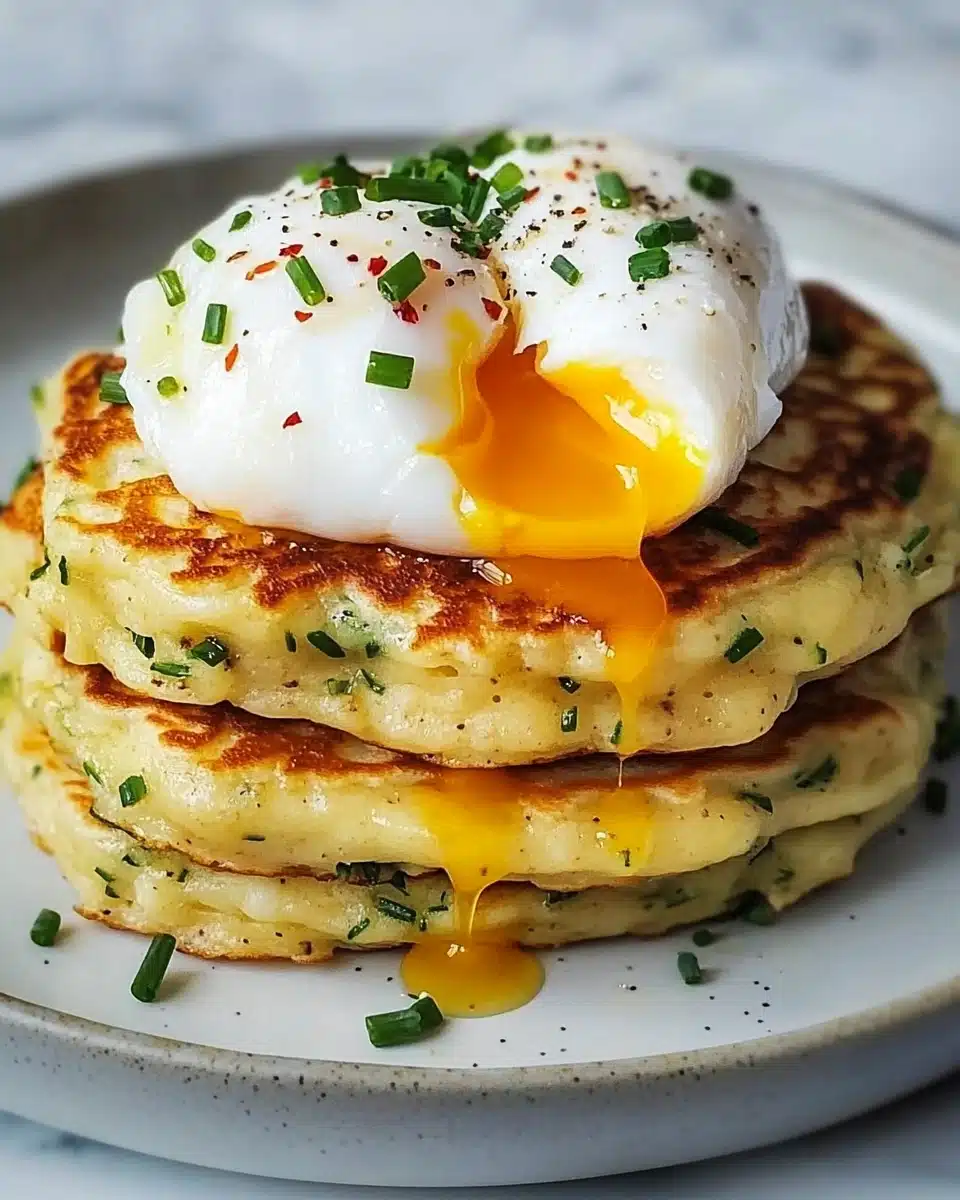
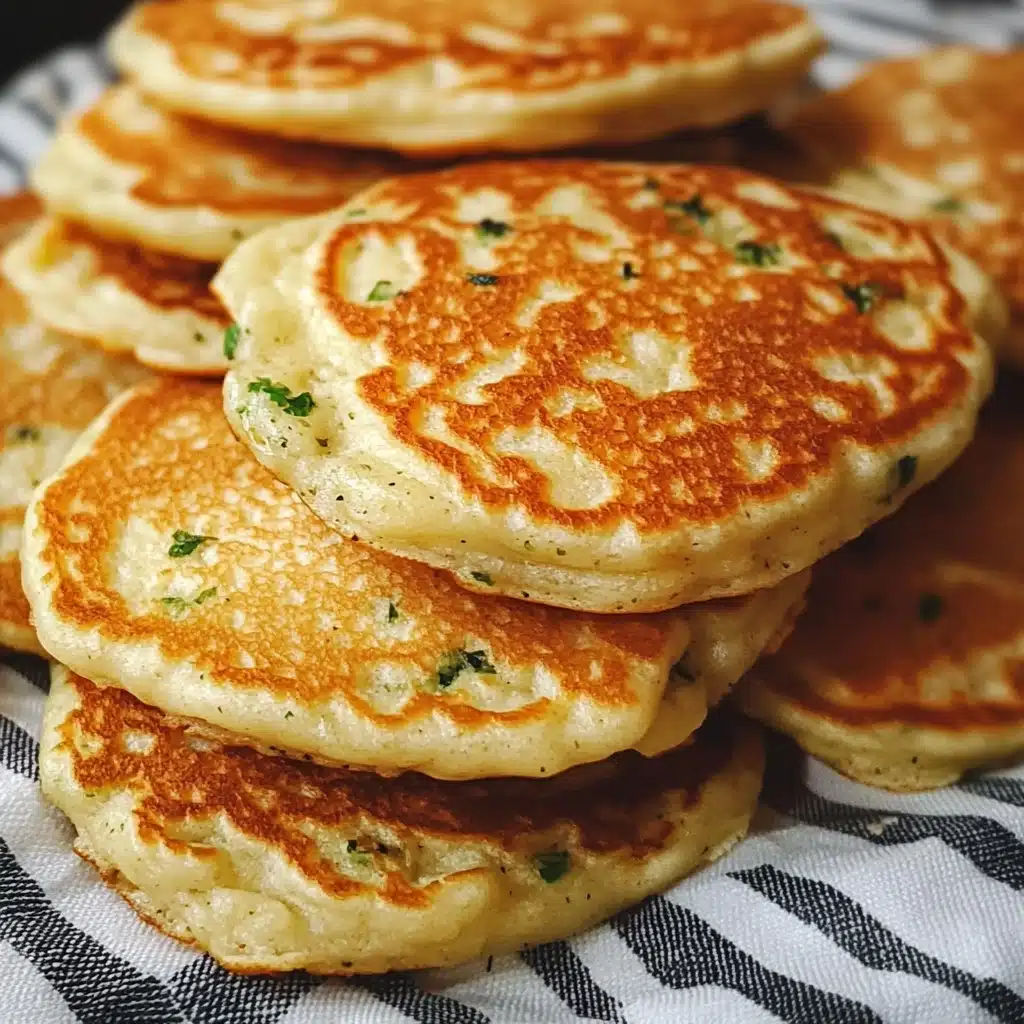
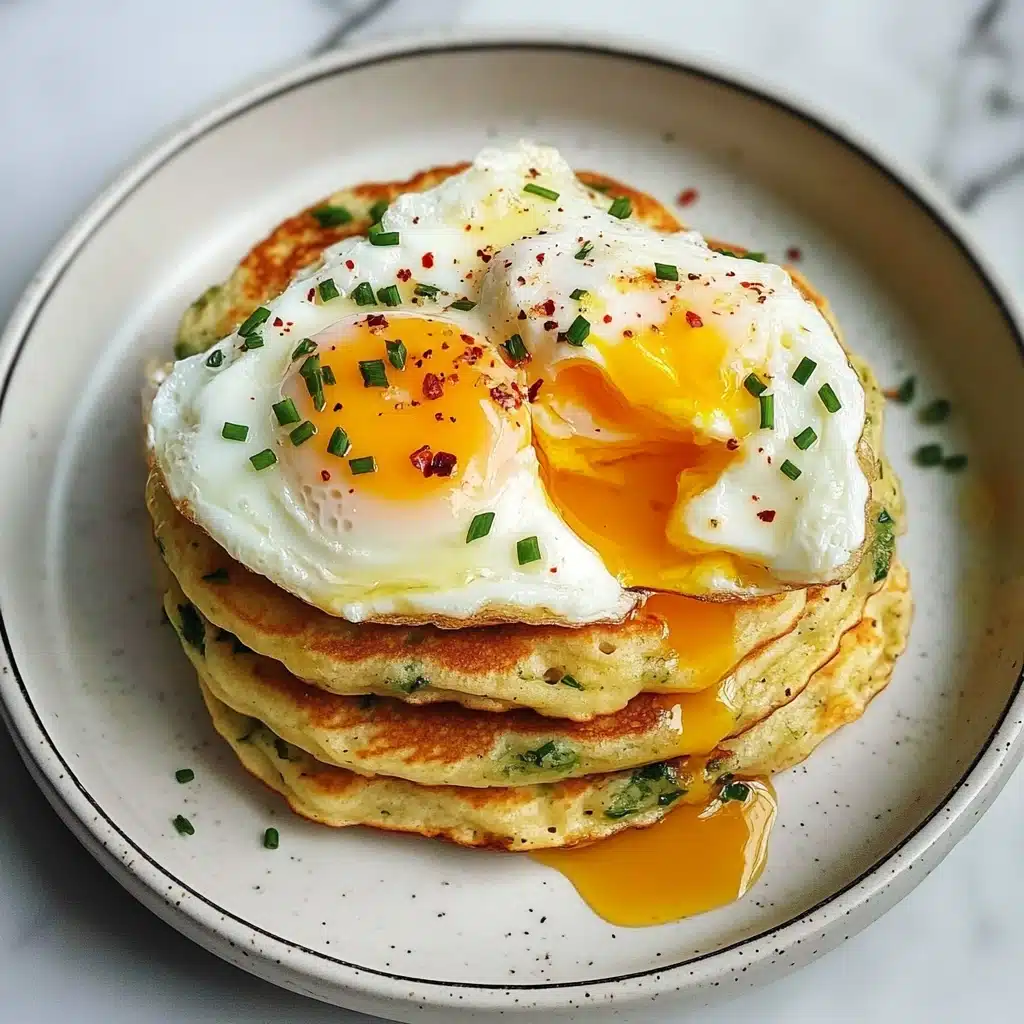
If you love savory breakfasts or crave something beyond the typical sweet stack, these Cheese & Chive Pancakes are about to steal your heart (and maybe your lunchbox). Packed with golden, melty cheese and fresh chives in every bite, they’re fluffy, flavorful, and bring a comforting twist to classic pancakes you’ll want to make again and again.
Why You’ll Love This Recipe
- Seriously Cheesy Goodness: Every pancake is loaded with a duo of Cheddar and Parmesan for maximum flavor and those irresistible pockets of melty cheese.
- Fresh Chive Power: The bright, oniony punch from real chives lifts each bite and adds a burst of color.
- Easy, Crowd-Pleasing Brunch: The straightforward batter comes together in minutes, perfect for lazy weekends or impromptu guests.
- Customizable for Every Occasion: These pancakes fit in at breakfast, lunch, dinner, or even as a snack—endlessly adaptable for your mood and pantry.
Ingredients You’ll Need
The magic of these Cheese & Chive Pancakes is in their simplicity—every ingredient is there for a reason! Each one adds its own little spark, whether that’s fluffiness, gooeyness, or a pop of green, so make sure to grab the best you can find.
- Self-raising flour: Gives the pancakes their signature soft height and tender crumb—no extra baking powder needed.
- Salt: Just a teaspoon amplifies all the cheesy, savory flavors in the batter.
- Milk: Whole milk works beautifully, but any will do; it brings everything together for a silky-smooth batter.
- Egg: Essential for that rich, custardy texture and to help bind all the goodness.
- Mature Cheddar cheese (grated): The main event—bold, sharp, and ultra-melty, it’s the heart of the pancakes.
- Parmesan cheese (finely grated): Adds depth and a little salty, nutty kick that balances out the Cheddar.
- Chives (finely chopped): Their mild onion flavor cuts through the cheese and gives every bite a burst of freshness and color.
- Butter + oil (for cooking): The dream team for pancakes—together they create those crisp, golden edges while keeping things light.
- To Serve (optional): More butter and grated cheese; because who doesn’t love a little extra on top?
Variations
One of the joys of Cheese & Chive Pancakes is how easily you can riff on the basic recipe. Don’t be afraid to experiment—this is your permission slip to play and make them your own!
- Swap the Cheeses: Try Gruyère, Emmental, or even blue cheese for a punchy twist—each one brings new flavor dimensions.
- Herb It Up: If chives aren’t your thing or you’re out, toss in finely chopped parsley, scallions, or a little dill for a different herbal pop.
- Go Gluten Free: Use your favorite self-raising gluten-free flour blend—these pancakes are very forgiving.
- Add-Ins Galore: Fold in some cooked bacon bits, sautéed mushrooms, or even a handful of sweetcorn for extra color and taste.
How to Make Cheese & Chive Pancakes
Step 1: Sift and Prep the Dry Ingredients
Start by sifting the self-raising flour and salt together into a big mixing bowl. This aerates the flour, making your pancakes extra light and ensuring that salt is perfectly dispersed for flavor balance in every bite.
Step 2: Whisk the Wet Ingredients
In a separate jug or bowl, whisk together the milk and egg until smooth and homogenous. This will help the wet ingredients combine seamlessly with the dry ones, giving you zero lumps and maximum fluffiness.
Step 3: Make Your Batter
Make a little well in the flour, then gradually pour in your milk and egg mixture, whisking as you go. It’s easiest to go slowly here so your batter comes out silky and lump-free—a little patience is all it takes!
Step 4: Fold in Cheese & Chives
Once your batter is smooth, gently fold in the grated cheddar, parmesan, and fresh chives. Stir just enough to distribute—the less mixing, the fluffier your pancakes will be, and you want those glorious cheesy pockets scattered throughout.
Step 5: Preheat and Grease the Pan
While your batter rests for a moment, melt together the butter and oil in a small saucepan. Heat a large frying pan or griddle to medium-hot, then brush with a thin layer of your melted butter-oil combo. You’ll know it’s ready when it sizzles right away—this means perfect golden edges every time.
Step 6: Cook the Pancakes
Drop a heaping tablespoon of batter per pancake onto the pan, spacing them so they don’t touch. Cook until you spot little bubbles forming around the edges and the bottom is deeply golden—about 2½ minutes per side (give or take). Flip and cook the other side until equally lovely and golden-brown. Adjust the heat if your first one cooks too slow or fast—a test pancake never hurts!
Step 7: Keep Warm & Serve
As you finish each batch, wrap the pancakes in a clean tea towel to keep them warm and fluffy while you finish up. Remember to lightly re-grease your pan between batches for the best results. Serve up your Cheese & Chive Pancakes warm, preferably with extra butter and a snowfall of grated cheese on top.
Pro Tips for Making Cheese & Chive Pancakes
- Batter Bliss: Don’t overmix once the cheese and chives go in—the key to fluffiness is a light hand and a few streaks of flour left behind.
- Golden Edges Every Time: Use the melted butter-and-oil mix for greasing—it combines flavor plus a higher smoke point so your pancakes don’t burn as you work through the batch.
- Test Pancake Secret: Always cook a small “tester” first—it helps you fine-tune the pan temperature and gives the first taste of cheesy goodness!
- Chive Freshness: Add chives just before cooking—their flavor is brightest and most vibrant before the batter sits for too long.
How to Serve Cheese & Chive Pancakes
Garnishes
Top your Cheese & Chive Pancakes with a generous dab of salted butter, a sprinkle of extra grated cheese, and a scatter of fresh chives for that gorgeous, just-made look. Even a twist of black pepper or a pinch of flaky salt adds a lovely finishing touch!
Side Dishes
These pancakes are stars on their own, but make a perfect match with crispy bacon, smoked salmon, creamy scrambled eggs, or a tangle of peppery arugula. For lunch, add a colorful salad or roasted tomatoes for a satisfying meal that feels like café-style comfort at home.
Creative Ways to Present
Mini pancakes make a fun brunch platter, especially with toppings like sour cream and fresh herbs. Stack them high for dramatic effect, layer with sautéed greens for a vibrant twist, or cut into fingers for a kid-approved lunchbox surprise.
Make Ahead and Storage
Storing Leftovers
Cool any leftover Cheese & Chive Pancakes to room temperature, then place in an airtight container—they’ll keep happily in the fridge for 2-3 days without losing their flavor or soft texture.
Freezing
These beauties freeze brilliantly! Layer them with parchment paper between each one and store in a freezer bag or container for up to two months. Thaw overnight in the fridge or at room temp for a quick snack or lunch.
Reheating
Gently reheat Cheese & Chive Pancakes in the microwave (they stay fluffy this way), or pop in a dry skillet over low heat for a couple minutes per side to restore golden edges and get that cheese aroma wafting through your kitchen all over again.
FAQs
-
Can I make Cheese & Chive Pancakes in advance?
Absolutely! You can make the pancakes ahead of time and store them in the refrigerator for up to 3 days. They reheat beautifully in the microwave or skillet, so they’re perfect for meal prep or fast weekday breakfasts.
-
What’s the best cheese for Cheese & Chive Pancakes?
Mature Cheddar and Parmesan give the ideal balance of meltiness and sharp, savory depth, but you can swap in any of your favorite semi-hard cheeses—just make sure they are flavorful enough to shine through the batter.
-
How do I stop my pancakes from sticking to the pan?
Make sure your pan is properly preheated and lightly coated with the butter–oil mixture before each batch. A non-stick pan or well-seasoned griddle makes the process smooth and easy, and prevents sticking every time.
-
Can I make these Cheese & Chive Pancakes gluten-free?
Yes! Just use a self-raising gluten-free flour blend (or add baking powder to your favorite gluten-free plain flour) and the recipe stays every bit as delicious and fluffy.
Final Thoughts
Give these Cheese & Chive Pancakes a spot in your regular rotation and watch them disappear! They’re warm, inviting, and almost too easy to whip up—perfect for sharing with friends or indulging in a quiet, cozy breakfast all to yourself. Happy flipping!
Print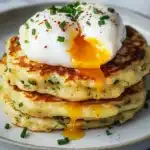
Cheese & Chive Pancakes Recipe
- Prep Time: 10 minutes
- Cook Time: 20 minutes
- Total Time: 30 minutes
- Yield: 16 pancakes 1x
- Category: Breakfast
- Method: Pan-frying
- Cuisine: American
- Diet: Vegetarian
Description
These Cheese & Chive Pancakes are a savory twist on a classic breakfast favorite. Packed with two types of cheese and fresh chives, these pancakes are fluffy, flavorful, and perfect for a hearty start to your day.
Ingredients
Pancake Batter:
- 200 g self-raising flour
- 1 tsp salt
- 250 ml milk
- 1 egg
- 110 g mature Cheddar cheese, coarsely grated
- 40 g Parmesan cheese, finely grated
- 10–15 g chives, finely chopped
For Cooking:
- 10g butter + 1 tsp oil
- To serve (optional): butter, grated cheese
Instructions
- Sift the flour and salt: Into a large mixing bowl.
- Whisk together milk and egg: In a jug.
- Make the batter: Gradually add the milk and egg mixture to the flour, whisking to make a smooth batter.
- Fold in cheese and chives: Mix until well combined.
- Prepare the pan: Heat butter and oil until melted in a saucepan. Heat a frying pan or griddle.
- Cook the pancakes: Spoon batter onto the pan, cook until bubbles form, then flip and cook the other side.
- Serve: With butter and extra cheese if desired.
- Storage: Store cooked pancakes in the fridge for 2-3 days or freeze for later.
Nutrition
- Serving Size: 1 pancake
- Calories: 160
- Sugar: 2g
- Sodium: 320mg
- Fat: 8g
- Saturated Fat: 4g
- Unsaturated Fat: 3g
- Trans Fat: 0g
- Carbohydrates: 15g
- Fiber: 1g
- Protein: 7g
- Cholesterol: 35mg

