

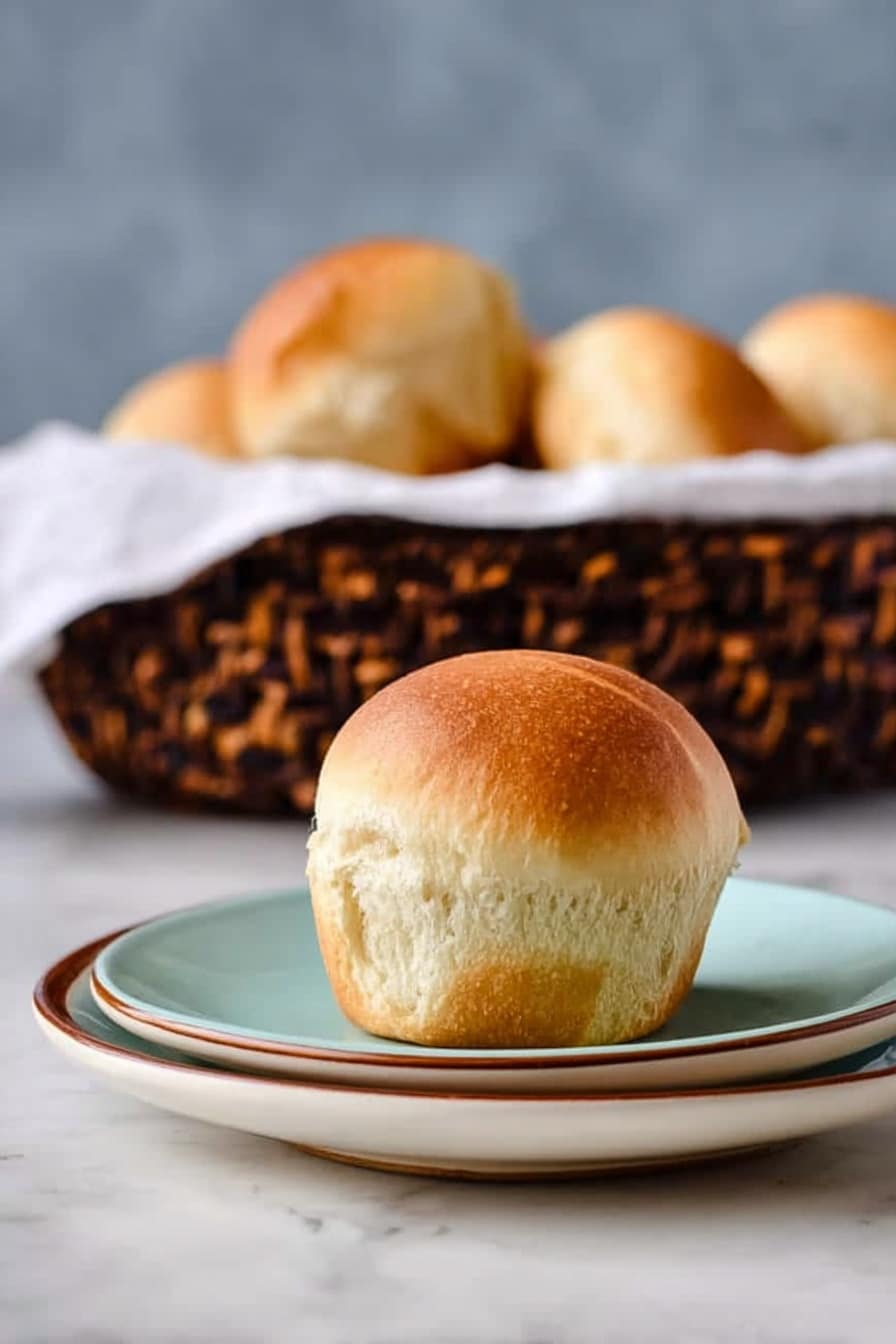
If you’re looking for a soft, fluffy, and irresistibly rich bread to elevate any meal, I’ve got just the thing for you — the Buttery Cloverleaf Rolls Recipe. These rolls are the ultimate crowd-pleaser, with tender layers that melt in your mouth and a buttery finish that simply can’t be beat. When I first tried this recipe, I was amazed at how easy it was to get bakery-quality rolls right at home. Stick with me, and I’ll guide you through every step to make sure your rolls come out perfect every time.
Why You’ll Love This Recipe
- Soft, Fluffy Texture: Thanks to the warm milk and honey, these rolls turn out tender and irresistibly soft on the inside.
- Rich Buttery Finish: Brushing melted butter multiple times gives the rolls that glossy, flavorful crust that people swoon over.
- Fun and Unique Shape: The cloverleaf design is not only cute but also makes pulling apart the rolls effortless and satisfying.
- Perfect for Any Occasion: Whether it’s a holiday dinner or a casual family meal, these rolls are a surefire hit every time.

Ingredients You’ll Need
Each ingredient in this Buttery Cloverleaf Rolls Recipe plays a crucial role to bring out the perfect balance of flavor and texture. You’ll want to use fresh yeast and quality butter to get the best results.
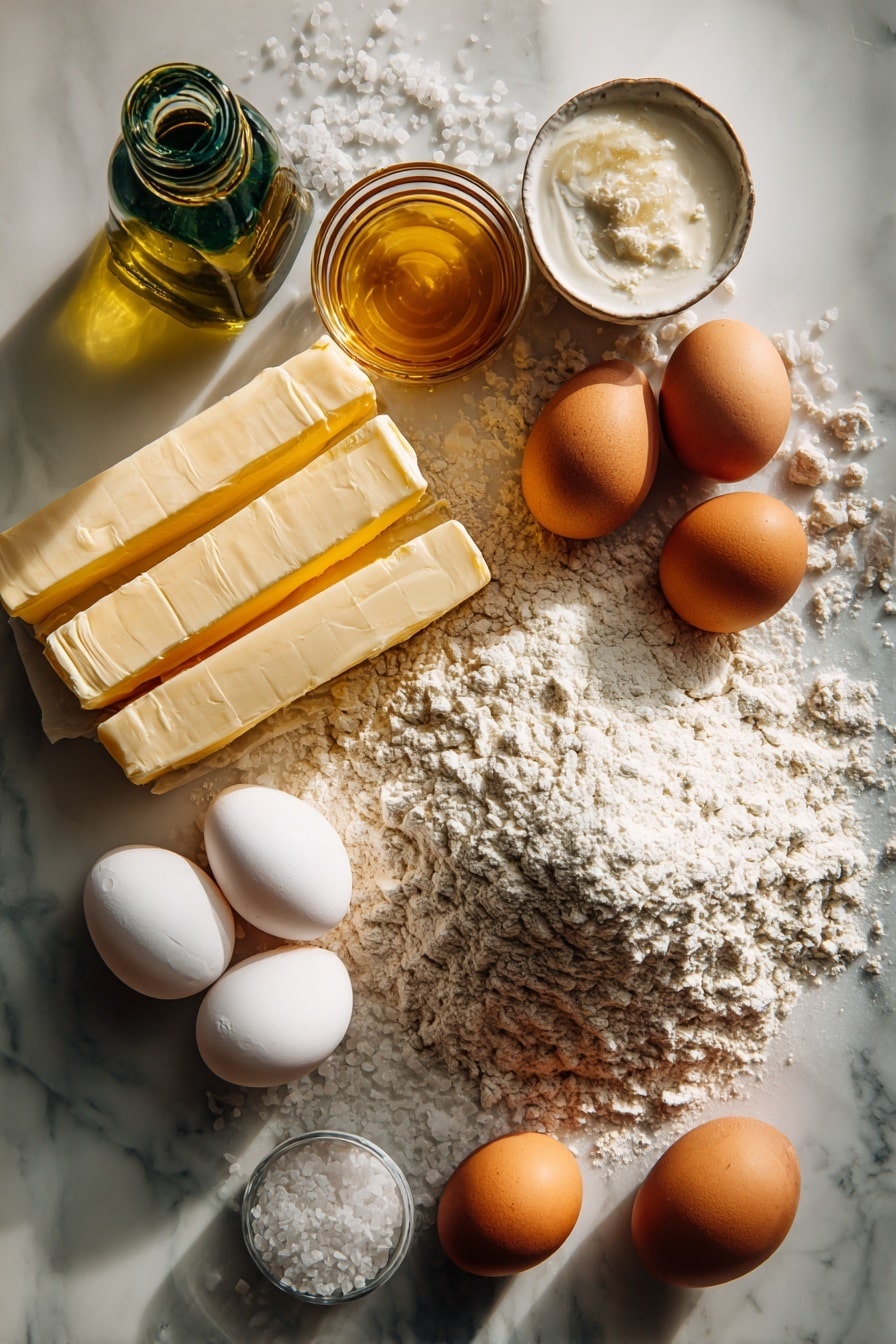
- Active dry yeast: Vital for that beautiful rise and airy texture—make sure it’s fresh and not expired for best results.
- Warm water: Activates the yeast; keep it warm but not hot to avoid killing the yeast.
- Warm milk: Adds richness and tenderness; the warmth also helps the yeast work its magic.
- Honey: Adds subtle sweetness and helps the crust brown beautifully—you can replace it with sugar in a pinch, but honey gives a lovely flavor.
- Olive oil: Helps keep the dough soft and adds a subtle depth of flavor; don’t swap this out for other oils for the same effect.
- Large egg: Incorporates richness and helps bind the dough.
- Unsalted butter (softened): Infuses the dough with that classic buttery goodness.
- Salt: Balances all the flavors and strengthens the dough’s gluten network.
- All-purpose flour: The foundation of the dough—adding just enough to get a smooth, slightly tacky feel.
- Melted butter (for brushing): Key to that golden, glossy finish and added flavor during baking.
Variations
I love putting my own spin on this recipe depending on the season or what I have on hand—you’re more than welcome to make these rolls your own! Here are some ideas based on what I’ve tried and enjoyed.
- Herb-Infused Rolls: Adding fresh rosemary or thyme to the dough adds a fragrant twist—my family can’t get enough of these with dinner.
- Garlic Butter Variation: Mix minced garlic into the melted butter for brushing, turning these into mouthwatering garlic rolls.
- Whole Wheat Cloverleaf Rolls: Substitute half of the flour with whole wheat flour for a nuttier flavor and extra fiber (just add a touch more liquid as whole wheat absorbs more).
- Dairy-Free Option: Swap the butter for coconut oil and use a dairy-free milk alternative like almond or oat milk.
How to Make Buttery Cloverleaf Rolls Recipe
Step 1: Activate the Yeast
Start by combining warm water, yeast, olive oil, and a tablespoon of honey in the bowl of your stand mixer fitted with the dough hook. I always test the water temperature on my wrist—it should feel warm but not hot to the touch (around 110°F). Let this sit for about 10-15 minutes until it’s foamy on top. If it doesn’t foam, don’t worry—your yeast might be old or the water too hot, so start over to make sure your rolls rise beautifully.
Step 2: Mix in the Wet Ingredients and Flour
Once your yeast mixture is bubbly, add warm milk, remaining honey, egg, and softened butter. Mix on low speed until everything is just combined. Next, add 2 cups of flour and the salt. Gradually increase to medium speed as you slowly add the remaining flour, about a cup at a time, up to 5 cups. The dough will come together and start to pull away from the sides of the bowl.
Step 3: Knead the Dough
Keep kneading on medium speed for around 4-5 minutes until the dough feels smooth and elastic. You want it slightly sticky to the touch, not dry and crumbly, so add more flour sparingly if it’s too wet. This tackiness contributes to that soft, pillow-like texture once baked. Then, take the dough out, sprinkle a little flour on your hands, and shape it into a ball.
Step 4: First Rise
Brush a large bowl with melted butter and place your dough inside, turning it once or twice to coat with the butter all around. Cover with a clean towel and set in a warm spot for 1 1/2 to 2 hours until doubled in size. This slow rise really develops flavor and lightness.
Step 5: Shape the Cloverleaf Rolls
Punch down the dough gently to release air, then turn it onto a floured surface. Tear off about 90 small pieces, each a little bigger than an inch, and roll each piece into a smooth ball. Lightly butter a muffin tin and place 3 dough balls into each cup, forming the iconic cloverleaf shape. Cover again and let them rise for about an hour until puffy.
Step 6: Bake and Butter ‘Em Up
Preheat your oven to 375°F (190°C). Before baking, brush the tops of each cloverleaf roll generously with melted butter—you’ll thank me later! Bake for 11-12 minutes until the tops turn a perfect golden brown. As soon as they come out, brush them with more melted butter two or three times while they cool to lock in moisture and add shine. This buttery layering step is what makes these rolls stand out.
Pro Tips for Making Buttery Cloverleaf Rolls Recipe
- Perfect Yeast Activation: Always proof your yeast in warm water with a little honey to ensure it’s alive and ready to make your dough rise like a champ.
- Don’t Over-Flour: Adding too much flour can make your rolls tough; the dough should feel slightly sticky for the softest crumb.
- Butter Brushing Magic: Multiple butter brushings after baking create a tender crust and gorgeous sheen that your friends will rave about.
- Warm Rise Area: If your kitchen is cold, placing the dough in an oven with just the light on makes rising perfectly reliable every time.
How to Serve Buttery Cloverleaf Rolls Recipe
Garnishes
I typically keep these rolls simple so their buttery flavor really shines, but sometimes I top them with a sprinkle of flaky sea salt right after the last butter brushing—it adds a lovely contrast. Fresh herbs like finely chopped parsley or chives sprinkled on top can also add a nice pop of color and aroma.
Side Dishes
These rolls pair beautifully with creamy mashed potatoes, hearty soups, or your favorite Sunday roast. I especially enjoy serving them with classic comfort foods like pot roast or chicken and gravy, where their softness soaks up all those tasty sauces.
Creative Ways to Present
For holiday dinners, I’ve arranged these cloverleaf rolls in a braided wreath shape or tucked them into a large cast-iron skillet for a rustic pull-apart bread centerpiece. You can also serve them warm in a basket lined with a festive cloth napkin for a cozy family vibe.
Make Ahead and Storage
Storing Leftovers
If you have any leftovers, let the rolls cool completely and place them in an airtight container or resealable bag at room temperature. I usually eat them within a day or two, but they’ll still be decent for up to three days, just not quite as soft as fresh.
Freezing
I freeze any extras by wrapping the cooled rolls tightly in plastic wrap and then in foil or a freezer-safe bag. When you’re ready, thaw them overnight in the fridge or on the counter for a few hours before reheating. Freezing works surprisingly well without sacrificing texture.
Reheating
I reheat these rolls in a 350°F oven for about 8-10 minutes wrapped in foil to keep them moist. A quick brush with melted butter after reheating freshens them up perfectly, like they just came out of the oven again.
FAQs
-
What makes these rolls “cloverleaf” style?
The cloverleaf shape comes from placing three small balls of dough into each muffin cup; as they bake, they expand and stick together, creating a charming pull-apart shape that resembles a cloverleaf.
-
Can I make these rolls without a stand mixer?
Absolutely! You can mix and knead this dough by hand. It might take a bit more elbow grease to get the dough smooth and elastic, but it’s totally doable and very rewarding.
-
Why do I have to brush the rolls with butter multiple times?
Brushing several times while the rolls cool traps moisture in the crust, keeps them soft longer, and boosts that rich buttery flavor while giving a beautiful shiny finish. It’s a small step that makes a big difference.
-
Can I prepare the dough the day before?
You can prepare the dough up to the first rise and refrigerate overnight. Just make sure to bring it back to room temperature before shaping and second rise. This is a great option if you’re short on time on the day you want to bake.
Final Thoughts
I absolutely love how this Buttery Cloverleaf Rolls Recipe turns out every time I make it. They bring such a cozy, homemade feeling to the table, and my family just goes crazy when these rolls are fresh from the oven. If you’ve ever felt intimidated by making rolls, this recipe is going to change your mind—they’re straightforward, forgiving, and delicious. So grab your mixing bowl, and give these lovely, buttery rolls a try; I promise they’ll become a staple in your kitchen just like they are in mine.
Print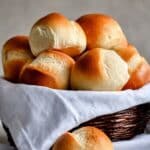
Buttery Cloverleaf Rolls Recipe
- Prep Time: 30 minutes
- Cook Time: 12 minutes
- Total Time: 3 hours 30 minutes
- Yield: 30 rolls 1x
- Category: Bread
- Method: Baking
- Cuisine: American
Description
These Buttery Cloverleaf Rolls are soft, fluffy, and full of rich buttery flavor. Made with a tender yeast dough and baked in muffin tins for a charming cloverleaf shape, these rolls are perfect for holiday dinners, family gatherings, or any occasion when you want a comforting, homemade bread. The rolls are brushed generously with melted butter before, during, and after baking to create a golden, flavorful crust.
Ingredients
Dough Ingredients
- 4 1/2 teaspoons (2 packets) active dry yeast
- 1/2 cup warm water
- 1 1/2 cups warm milk
- 1/4 cup honey
- 1 tablespoon olive oil
- 1 large egg
- 1/4 cup unsalted butter, softened
- 2 teaspoons salt
- 5 1/2–6 cups all-purpose flour, or more if needed
For Brushing
- Melted butter for brushing
Instructions
- Activate Yeast: In the bowl of your electric mixer fitted with a dough hook, combine warm water, yeast, olive oil, and 1 tablespoon honey. Stir gently and let it sit for 10-15 minutes until the mixture becomes foamy, indicating the yeast is active.
- Mix Dough: Add warm milk, the remaining honey, egg, and softened butter to the yeast mixture. Mix on low speed until just combined. Then add 2 cups of flour and salt. Gradually increase speed to medium as flour incorporates.
- Add Remaining Flour and Knead: Slowly add the remaining flour, one cup at a time, up to 5 cups. Knead the dough on medium speed for 4-5 minutes. Check the dough’s texture; if too sticky, add a little more flour and knead until smooth but still slightly sticky to the touch. Remove dough from the bowl and form into a ball, dusting with flour as needed to prevent sticking.
- First Rise: Brush a large bowl with melted butter. Place the dough in the bowl and turn it once or twice to coat all sides with butter. Cover the bowl with a towel and let the dough rise in a warm place for 1 1/2 to 2 hours, until doubled in size.
- Shape Rolls: Punch down the risen dough and transfer it to a floured surface. Tear off small pieces and roll each into balls slightly larger than one inch. You should get about 90 small dough balls.
- Prepare Muffin Tins and Second Rise: Brush muffin tins generously with melted butter. Place three dough balls per muffin cup. Cover and let the dough rise again in a warm spot for about 1 hour, until puffed.
- Preheat Oven & Prepare for Baking: Preheat your oven to 375°F (190°C). Brush the tops of the dough balls with melted butter generously before baking.
- Bake: Bake the rolls for 11-12 minutes until the tops are just golden brown.
- Finish with Butter: Remove rolls from oven and immediately brush the tops with melted butter. Repeat brushing with butter every few minutes as the rolls cool to keep them soft and flavorful.
- Serve and Store: Remove rolls from the muffin tins to serve. For best taste, enjoy them the same day. If storing overnight, let the rolls cool completely and keep in an airtight container to maintain freshness.
Notes
- Make sure the water and milk are warm, not hot, to properly activate the yeast without killing it.
- Do not add too much flour; the dough should be slightly sticky for the softest rolls.
- Brushing the dough and bowls with melted butter adds richness and helps keep the rolls soft.
- These rolls are best eaten the day they are baked but can be stored in an airtight container after cooling.
- Shaping the dough into very small balls and baking three per muffin cup gives the classic cloverleaf shape.
- You can substitute honey with sugar, but honey adds a nice subtle flavor and moisture.
Nutrition
- Serving Size: 1 roll
- Calories: 150
- Sugar: 3g
- Sodium: 220mg
- Fat: 5g
- Saturated Fat: 2.5g
- Unsaturated Fat: 2g
- Trans Fat: 0g
- Carbohydrates: 22g
- Fiber: 1g
- Protein: 4g
- Cholesterol: 25mg


