

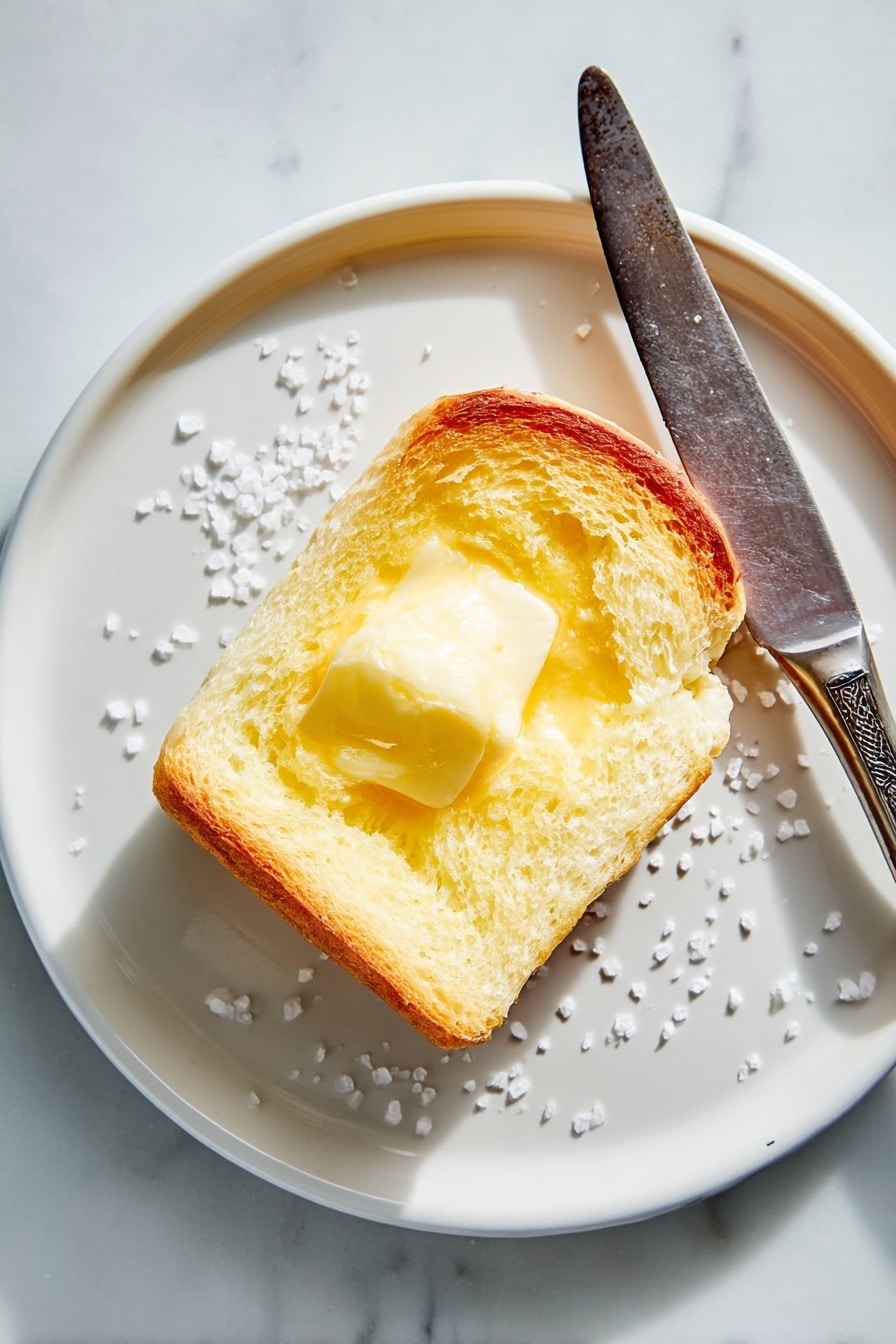
I’ve gotta say, there’s something truly magical about homemade bread that just makes your whole kitchen feel cozy—and that’s exactly why I’m so excited to share this Parker House Rolls Recipe with you. These rolls are irresistibly soft, buttery, and fluffy; they practically melt in your mouth. They’ve been a staple at my family dinners for years, and once you try this recipe, you’ll understand why everyone asks for seconds (and thirds!). So grab your apron and let’s make some seriously fan-freaking-tastic rolls together.
Why You’ll Love This Recipe
- Buttery Softness: The generous butter and milk create a tender crumb that’s just dreamy.
- Classic Nostalgia: Parker House rolls have that old-school charm that brings warmth to any occasion.
- Perfect for Any Meal: Whether it’s a holiday feast or a simple weeknight dinner, these rolls shine.
- Hands-On Baking Joy: The process is straightforward, and you’ll enjoy watching the dough transform during rising and baking.

Ingredients You’ll Need
All the ingredients here come together to deliver that signature rich, tender texture. The key is using whole milk and real butter, plus fresh yeast to get that perfect rise. I always recommend picking the best quality butter you can find — your rolls will thank you!
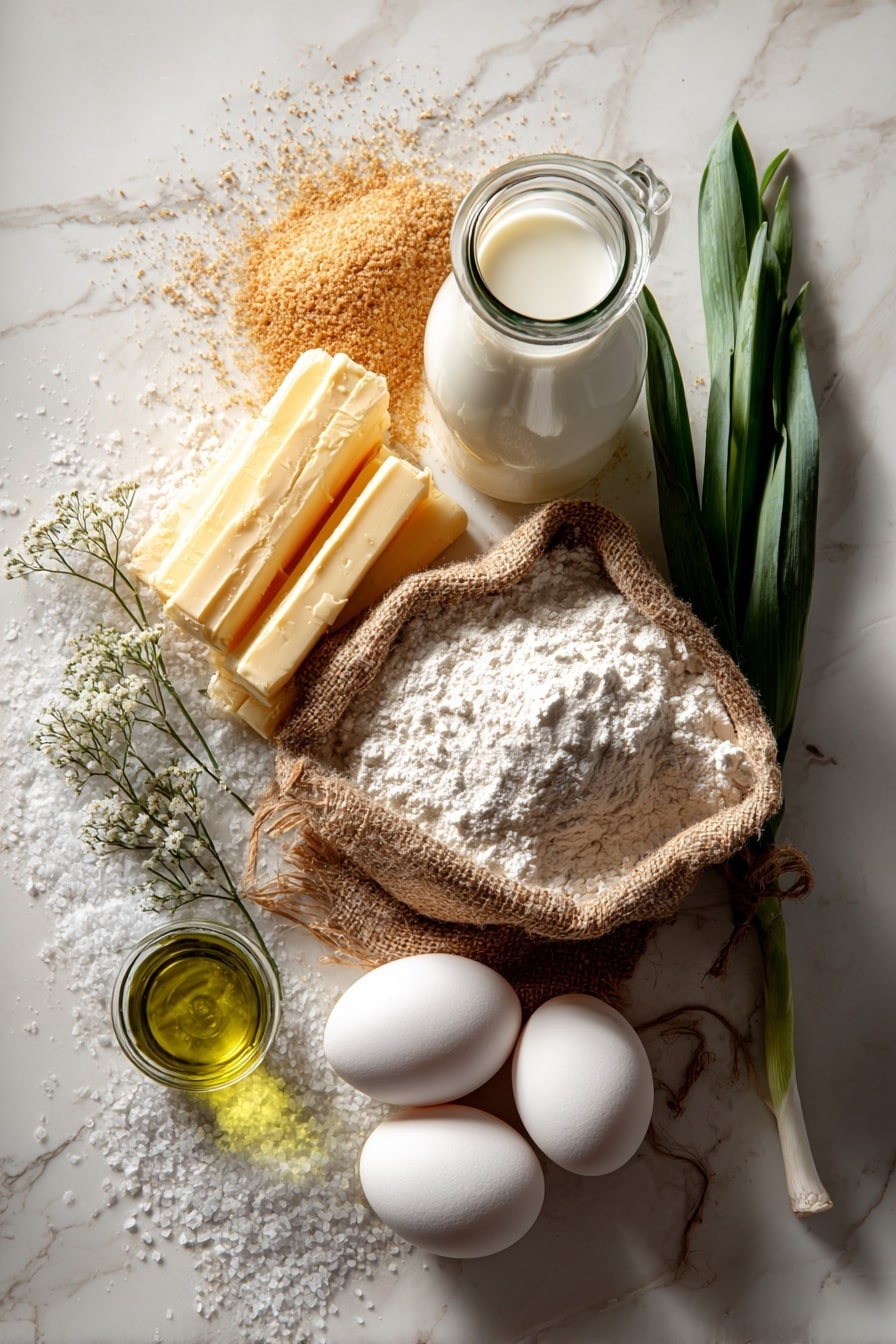
- Whole Milk: Provides richness and moisture, essential for soft rolls.
- Salted Butter: Gives flavor and adds to the tender crumb; be sure to add extra for greasing and brushing.
- Sugar: Just a touch to feed the yeast and balance flavors.
- Active Dry Yeast: Your rising agent—make sure it’s fresh and active.
- Eggs: Add structure and richness, making the dough more tender.
- All-Purpose Flour: The bulk of the dough; you want to measure carefully and add more flour only as needed.
- Vegetable Oil: Used for greasing the bowl—prevents sticking without overpowering flavors.
- Flaky Salt: A final sprinkle on top to give wonderful bursts of salty crunch.
Variations
One of my favorite things about this Parker House Rolls Recipe is how easy it is to make your own twists. You can tweak the texture or flavor to suit your mood or the season—and trust me, your guests will appreciate the personal touch.
- Herb-Infused Rolls: I’ve added a little chopped rosemary or thyme to the dough before rising—brings a subtle aromatic note that pairs beautifully with butter and flaky salt.
- Whole Wheat Variation: For a heartier roll, swap half the flour for whole wheat; it’s a bit denser but still delicious, especially toasted the next day.
- Garlic Butter Rolls: After baking, brush the rolls with garlic-infused melted butter—this is a game changer for serving alongside pasta or soups.
- Dairy-Free Version: Use a plant-based “milk” substitute and vegan butter. While the texture shifts slightly, it’s still amazing for those with dietary restrictions.
How to Make Parker House Rolls Recipe
Step 1: Warm and Soften Your Ingredients
Start by gently heating the milk and half of your butter in a small saucepan over low heat. You just want the butter melted and the liquid warm—not hot! Removing it from the heat and stirring in the sugar helps cool it to just the right temperature for yeast — around room temperature. I discovered this trick early on; if the milk’s too hot, you risk killing your yeast and flat rolls, so be patient with this step.
Step 2: Activate the Yeast
In a small bowl, combine your yeast with warm water (around 110°F) and let it sit until foamy, about two minutes. You’ll know it’s alive when it bubbles up nicely—this means your rolls will rise beautifully. If it doesn’t foam, don’t fret; try again with fresh yeast or warmer water.
Step 3: Mix and Knead the Dough
Use a stand mixer with a dough hook if you have one—it makes your life way easier! Add the milk mixture, eggs, yeast mixture, and half your flour to the mixer bowl. Mix on low until just combined, then add the remaining flour and crank the speed to medium. Knead for 5-7 minutes until the dough becomes smooth and elastic—this is where you’ll start to see the magic happen. If you don’t have a mixer, knead by hand on a floured surface; it takes a few extra minutes but worth the arm workout!
Step 4: First Rise
Grease a large bowl with vegetable oil (helps your dough not stick and rise properly). Transfer the dough there and cover loosely with plastic wrap. You want it to double in size — usually about 1½ to 2 hours at room temp. Here’s a tip I learned: if you’re prepping ahead, pop it in the fridge to let it rise slowly over 12-24 hours. The flavor deepens, and the texture gets even better!
Step 5: Shape Your Rolls
Melt the remaining butter and grease a 9×13-inch baking dish. Punch down the dough gently and transfer it to a floured surface. Divide the dough into four parts. Roll each out into a 12×8-inch rectangle. Cut each rectangle lengthwise into two 12×4-inch strips, then cut each strip into six pieces. Brush each piece with butter, then fold in half with a slight ¼-inch overhang. Place the rolls in the dish snugly so they just barely overlap. You’ll have 6 rows of 8 rolls ready to puff up.
Step 6: Second Rise
Brush the tops with remaining melted butter, cover with plastic wrap, and let the rolls rise again until doubled, about 30-40 minutes at room temp. If you’re short on time, you can refrigerate for 6 hours up to overnight—this flexibility is a lifesaver on busy days!
Step 7: Bake to Golden Perfection
Preheat your oven to 375°F with the rack in the middle. Bake your rolls for 20-25 minutes until beautifully golden. Here’s what I always do: as soon as they come out, brush them again with melted butter and sprinkle flaky salt over the tops. It’s this little finish that keeps the rolls soft and gives you that signature Parker House flavor explosion.
Pro Tips for Making Parker House Rolls Recipe
- Don’t Rush the Rise: Patience pays off—your rolls will be fluffier when you allow the dough to rise fully between steps.
- Butter Makes It Better: Generously brushing and folding with melted butter seals in moisture and creates that signature soft crust.
- Use Room Temperature Eggs: This helps everything blend smoothly and encourages better yeast activity.
- Avoid Over-Flouring: Dust your surface lightly—too much flour can make the rolls dense.
How to Serve Parker House Rolls Recipe
Garnishes
When it comes to garnishes, I almost always stick with that classic flaky sea salt sprinkled fresh out of the oven—such an elegant touch that makes every bite pop. Sometimes, I swirl softened garlic butter on top before serving for an extra indulgent treat. Fresh herbs like finely chopped parsley can also add a vibrant color and subtle flavor.
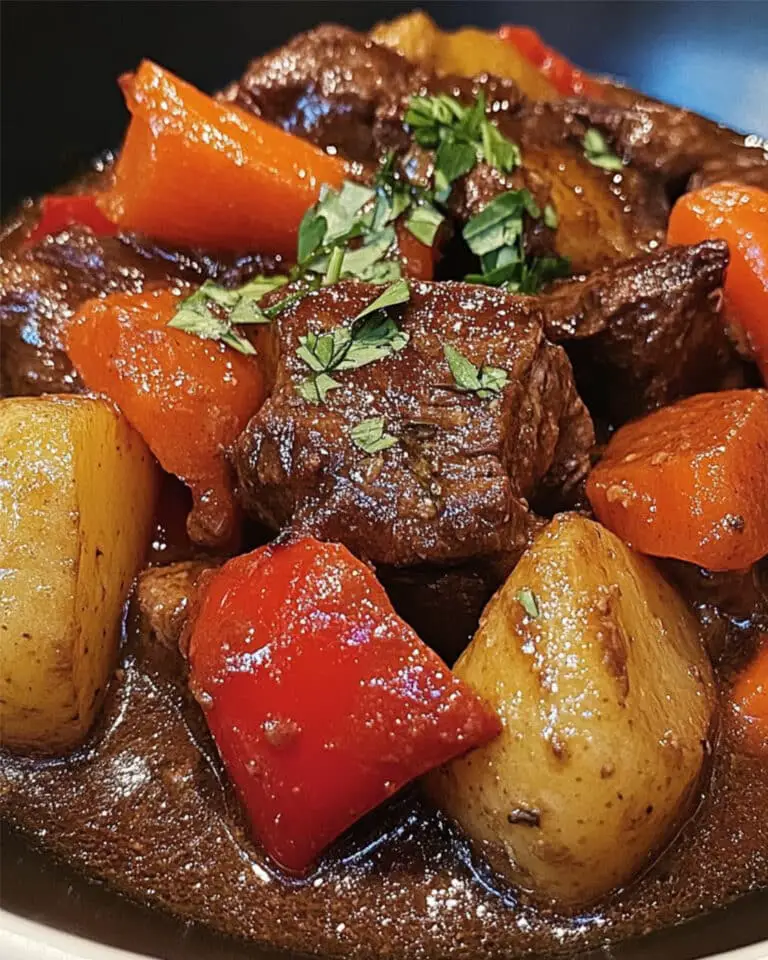
Side Dishes
These rolls are ultra-versatile. I love serving them with hearty stews, creamy mashed potatoes, or alongside a holiday turkey. They soak up gravy or soup broth like little sponges of happiness! For a simple weeknight, they’re perfect with butter and a side salad too.
Creative Ways to Present
For special occasions, I’ve arranged the rolls in festive shapes—like a wreath by baking in a round pan—or brushed with colored butter (think herbs or spices like paprika for a warm hue). Serving them warm in a butter-lined basket with linen napkins always feels like a restaurant touch that wows guests.
Make Ahead and Storage
Storing Leftovers
Leftover Parker House rolls? No problem. I wrap them tightly in plastic wrap and store them in an airtight container at room temperature for 2-3 days. To keep them soft, I sometimes sneak a tiny slice of apple in the container—it helps keep moisture in.
Freezing
I freeze extras regularly. Once the rolls have cooled completely, I wrap them individually in foil or plastic wrap and place them in a freezer-safe bag. They can last for up to 3 months. When you’re ready, thaw them overnight in the fridge or on the counter, then warm gently in the oven.
Reheating
To reheat, I pop them in a 350°F oven for about 10 minutes, sometimes loosely covered with foil to avoid over-browning. You’ll get that fresh-from-the-oven warmth and softness back. If you’re in a hurry, a few seconds in the microwave wrapped in a damp paper towel works too.
FAQs
-
Can I make Parker House Rolls Recipe without a stand mixer?
Absolutely! You can knead the dough by hand on a floured surface. It might take a few extra minutes to reach a smooth and elastic texture, but the process is very forgiving. Just be sure to knead until the dough passes the “windowpane test”—stretch it gently and make sure it’s thin without tearing.
-
What is the best way to check if the dough has risen enough?
One of my go-to tricks is the “poke test.” Gently press your finger into the dough about half an inch deep—if the indentation springs back slowly and partially, the dough has risen well. If it springs back quickly, it needs more time; if it doesn’t bounce back at all, it might be over-proofed.
-
Can I make these rolls ahead of time?
Yes! You can prepare the dough the day before and let it rise slowly in the fridge. Shape and do the second rise either later that day or in the morning before baking. This slow fermentation adds flavor and makes last-minute preparation super manageable.
-
Why do my Parker House rolls sometimes come out dense?
Dense rolls usually mean the dough didn’t rise enough or had too much flour. Make sure your yeast is fresh and active, give the dough enough time to double in size during both rises, and avoid adding excess flour when shaping. Also, be gentle when punching down dough—you want to keep some of the air bubbles intact!
Final Thoughts
Making these Parker House Rolls Recipe from scratch might feel like a bit of a project, but trust me, it’s so worth it—each buttery, fluffy bite will remind you why homemade bread is such a labor of love. My family goes crazy for these rolls at every gathering, and I love the little rituals around shaping and rising that make the kitchen buzz with warmth. So, if you’re looking to impress your next meal or just treat yourself to some fresh, buttery rolls, give this recipe a try—you’re going to love how they turn out!
Print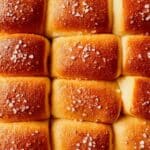
Parker House Rolls Recipe
- Prep Time: 3 hrs 30 min
- Cook Time: 30 min
- Total Time: 4 hrs
- Yield: 48 Rolls 1x
- Category: Bread
- Method: Baking
- Cuisine: American
Description
Classic Parker House Rolls that are soft, buttery, and golden brown, perfect as a comforting side for any meal. These rolls are made from a tender yeast dough enriched with milk, butter, and eggs, then baked to perfection and brushed with more butter for an irresistible flaky crust.
Ingredients
Dough Ingredients
- 1½ cups whole milk
- 1 cup (2 sticks) salted butter, plus more for greasing and serving
- ¼ cup sugar
- 1 package active dry yeast (about 2 ¼ teaspoons)
- 3 large eggs
- 6 cups all-purpose flour, plus more for dusting
- 2 teaspoons vegetable oil
For Serving
- Flaky salt, for sprinkling
Instructions
- Prepare milk and butter mixture: Heat the milk and ½ cup of the butter in a small saucepan over low heat until the butter is melted. Remove from heat and stir in the sugar. Let the mixture cool to room temperature to avoid killing the yeast in the next step.
- Activate the yeast: In a small bowl, combine the yeast with ½ cup of warm water (about 110°F). Let sit for about 2 minutes until the mixture is foamy and the yeast is dissolved.
- Mix dough: In the bowl of a stand mixer fitted with a dough hook, add the cooled milk mixture, eggs, yeast mixture, and 3 cups of flour. Mix on low speed until smooth, then add the remaining 3 cups of flour. Increase mixer speed to medium and knead for 5-7 minutes until the dough is smooth and elastic.
- First rise: Grease a large bowl with vegetable oil, transfer the dough to the bowl, and cover loosely with plastic wrap. Let it rise at room temperature for 1½ to 2 hours until doubled in size. Alternatively, you can refrigerate it for 12 to 24 hours for a slower rise that develops more flavor.
- Prepare rolls: Melt the remaining ½ cup butter and grease a 9×13-inch baking dish with some of it. Punch down the risen dough onto a floured surface. Divide into 4 equal pieces. Roll each piece into a 12×8-inch rectangle, cut lengthwise into two 12×4-inch strips, then cut each strip into 6 pieces. Brush each piece with melted butter, fold in half with a ¼-inch overhang, and place in the baking dish so the overhangs overlap slightly, creating 6 rows of 8 rolls.
- Second rise: Brush the tops of the rolls with remaining melted butter. Cover with plastic wrap and let rise at room temperature for 30-40 minutes until doubled in size, or refrigerate for 6 hours up to overnight for a slower rise.
- Bake: Preheat the oven to 375°F with a rack in the center. Bake the rolls for 20-25 minutes until golden brown. While still warm, brush the tops with melted butter and sprinkle with flaky salt before serving.
Notes
- Allowing the dough to rise slowly in the refrigerator overnight enhances flavor complexity.
- Use fresh, active dry yeast to ensure proper rising.
- Make sure the milk mixture is completely cooled to avoid killing the yeast.
- For extra soft rolls, brush them immediately with butter after baking while still warm.
- Flaky salt adds a nice crunchy texture and contrast but can be omitted or substituted with regular salt if preferred.
Nutrition
- Serving Size: 1 roll
- Calories: 150
- Sugar: 3g
- Sodium: 180mg
- Fat: 6g
- Saturated Fat: 3.5g
- Unsaturated Fat: 2g
- Trans Fat: 0g
- Carbohydrates: 22g
- Fiber: 1g
- Protein: 4g
- Cholesterol: 35mg


