

If you’re looking for a fun, spooky treat that’s super easy to make, you’re going to fall in love with this Oreo Cookie Spiders Recipe. It’s a playful twist on the classic Oreo cookie, turning them into adorable little spider creatures that are perfect for Halloween, classroom parties, or just a quirky dessert surprise. I promise, making these will bring out the kid in you—and your family will go crazy for them!
Why You’ll Love This Recipe
- Super Simple & Quick: You can whip these up in just about 10 minutes—no baking or complicated steps involved.
- Kid-Friendly Fun: Perfect little creepy crawlies for little hands to help assemble and enjoy.
- Customizable Decorations: You can easily swap out candy eyes or sprinkles for your own creative touches.
- Great Party Treat: These spooky spiders make for standout table snacks that everyone will remember.

Ingredients You’ll Need
The magic of this Oreo Cookie Spiders Recipe lies in the simplicity of the ingredients, each playing a key role in building these cute critters. Most things you’ll probably already have on hand, which makes it a no-hassle project to pull together.
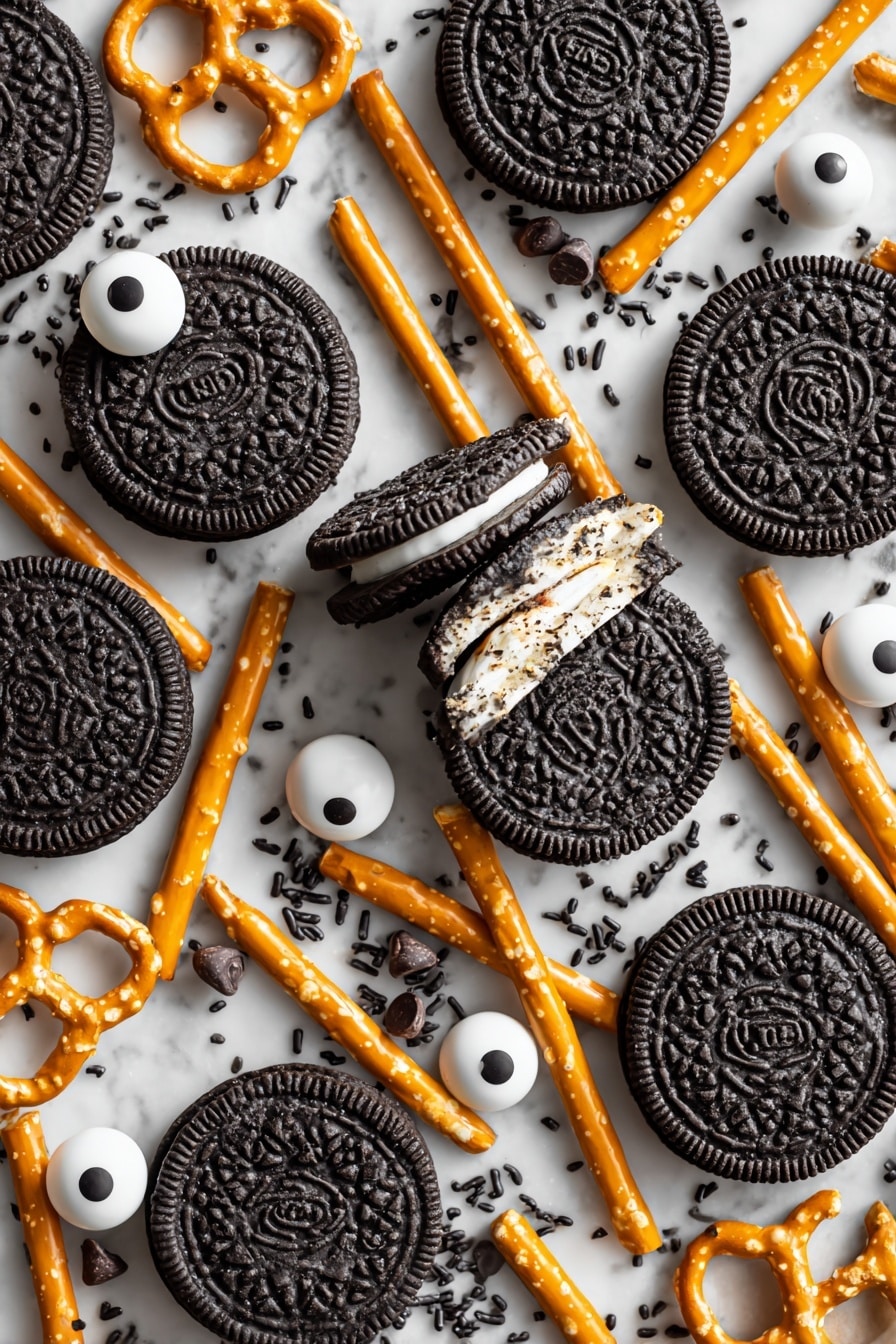
- Double Stuf Oreo cookies: The cream filling is our “glue” here, so the extra stuffing really helps hold everything together nicely.
- Pretzel rods: These become the spider legs—breaking them in half gives you just the right size for the perfect creepy crawl.
- Chocolate chips: Melted chocolate acts as an extra adhesive to secure the legs and candy eyes, plus adds rich flavor.
- Chocolate sprinkles: Sprinkle them on top for texture and to mimic the spider’s little hairs—adds a fun detail.
- Candy eyes: The star of the show! These bring your Oreo spiders to life in the cutest way imaginable.
Variations
I love that you can tweak this Oreo Cookie Spiders Recipe to fit various tastes or occasions. Whether you want it gluten-free, or just want to mess around with different eyes or leg styles, it’s pretty forgiving and fun to personalize.
- Gluten-Free Option: Substitute with gluten-free sandwich cookies and gluten-free pretzel sticks—I’ve done this for allergy-friendly options and it worked beautifully.
- Different Candy Eyes: Use googly edible eyes, mini M&Ms, or even hand-draw eyes with food markers for a unique look.
- Colored Sprinkles or Edible Glitter: Adding a splash of color makes these spiders party-ready for birthdays or other celebrations.
- Nutty Twist: Press small nuts (like pecans or almonds) as legs instead of pretzels for a crunchy variation I stumbled upon.
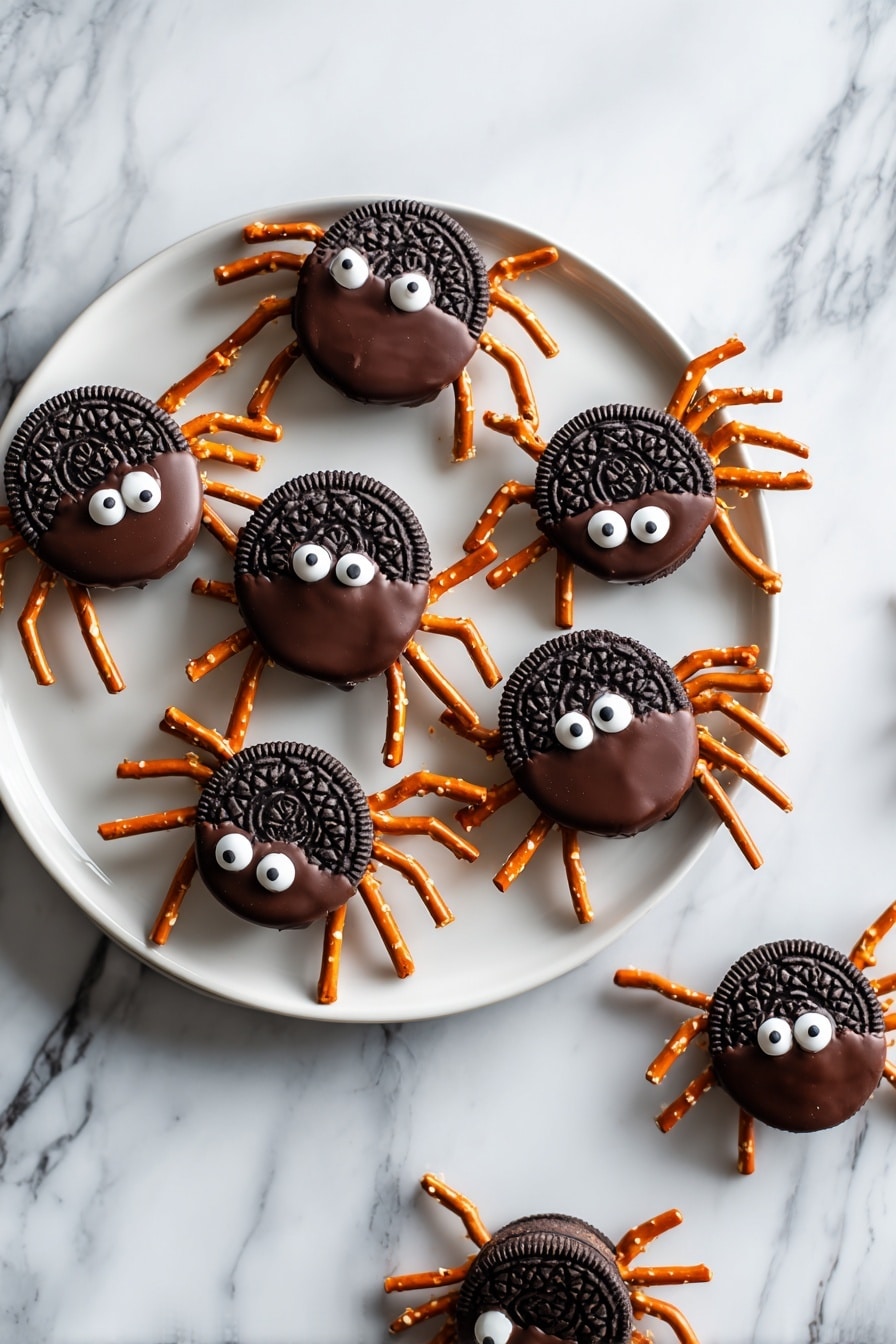
How to Make Oreo Cookie Spiders Recipe
Step 1: Prep and Position Your Oreo “Bodies”
Start by lining a large baking sheet with parchment paper—that way, cleanup is a breeze and your spiders don’t stick. Carefully twist apart the Oreos and place the halves with cream facing up on the sheet. This cream side is where all the magic will happen since it’s the base for stitching your spider’s legs and upper cookie body together.
Step 2: Attach the Pretzel Legs
Break pretzel rods in half to get the perfect leg length. For each Oreo half, press 8 pretzel pieces into the cream—4 on each side—to shape the spider’s legs. Don’t press too hard or the cookie might crack, but make sure the legs are secure enough to stay in place.
Step 3: Melt the Chocolate and Sandwich the Oreos
Melt the chocolate chips in a microwave-safe bowl in 20-second increments, stirring gently after each session until smooth. Dollop about a teaspoon of melted chocolate on top of each Oreo’s cream side with legs, then press the other cookie half gently on top—this acts like glue and keeps those legs firmly anchored. Don’t rush this step; letting that chocolate cool slightly before sandwiching helps avoid making the cookies soggy.
Step 4: Add the Mini Details
Spread about a teaspoon of melted chocolate on the top of each Oreo sandwich—this is your canvas for chocolate sprinkles and candy eyes. Sprinkle on some chocolate sprinkles to mimic tiny spider hairs, then carefully place two candy eyes on each Oreo. Press gently so they stick well.
Step 5: Chill and Set
Let your Oreo Cookie Spiders cool completely—I’d recommend chilling them in the fridge for at least 30 minutes to allow the chocolate to harden thoroughly. This ensures your spiders are sturdy enough to move around without losing legs or eyes. Then, they’re ready to creep and crawl into your snack lineup!
Pro Tips for Making Oreo Cookie Spiders Recipe
- Gentle Leg Placement: When pushing pretzel legs into the cream filling, go slow and steady to avoid breaking the cookie or making the legs snap.
- Use Melted Chocolate as Glue: I found that a little melted chocolate not only tastes great but really locks the legs and candy eyes into place securely.
- Chill Before Serving: Don’t skip the chilling step—you’ll get a firmer spider and less mess when moving or packing these treats.
- Avoid Overhandling: These treats are delicate, so handle them minimally once assembled to keep legs and eyes intact.
How to Serve Oreo Cookie Spiders Recipe
Garnishes
For serving, I love to add a sprinkle of extra chocolate sprinkles or mini powdered sugar dusting around their “legs” to add an eerie atmosphere. Sometimes, I throw in a few tiny plastic spider rings for decoration (obviously not edible!) to make it a Halloween display. A drizzle of colored candy melts can add flair if you’re feeling festive.
Side Dishes
Pair these Oreo Cookie Spiders with bright fruit platters or a simple bowl of vanilla pudding for contrast. They also go great alongside spooky-themed drinks like black lemonade or orange punch to keep up with the fun.
Creative Ways to Present
For parties, I like arranging my spiders on a “web” made from white cotton candy or stretched spun sugar to channel that Halloween vibe. Another idea is to place each spider on a mini cupcake liner for easy grab-and-go snacks. I even once set them around a carved pumpkin centerpiece — the kids were delighted!
Make Ahead and Storage
Storing Leftovers
I store leftover Oreo Cookie Spiders in an airtight container in the refrigerator. This keeps the chocolate and pretzels crisp for up to a week. Just make sure to layer them gently to avoid breaking the legs or smudging the eyes.
Freezing
Freezing these isn’t my go-to since the cream filling and chocolate sometimes change texture after thawing, but if you decide to freeze them, wrap each spider individually in plastic wrap and place in a freezer-safe container. Thaw in the fridge overnight for best results.
Reheating
Since these are no-bake treats, reheating isn’t necessary. Just bring them to room temperature if you prefer a softer texture, but I find they’re best enjoyed chilled and crisp.
FAQs
-
Can I use regular Oreos instead of Double Stuf for this recipe?
Absolutely! Regular Oreos work fine, but the Double Stuf variety gives you more cream to hold the pretzel legs and candy eyes securely in place. If you use regular Oreos, just be a bit gentler when inserting the legs, and consider using a little extra melted chocolate for added holding power.
-
What if I can’t find candy eyes?
No worries! You can substitute candy eyes with small dots of white and dark melted chocolate piped on, mini chocolate chips, or even decorate with edible markers. The key is to have some sort of eye to give the spiders their fun personality.
-
How long do Oreo Cookie Spiders last?
Stored in an airtight container in the fridge, they stay fresh and tasty for up to 5-7 days. The pretzels keep their crunch, and the chocolate remains firm, so you can enjoy these little critters throughout the week.
-
Is this recipe kid-friendly?
Absolutely! Kids love building these spiders. Just supervise when melting chocolate and handling pretzels, but otherwise, it’s a great way to get little hands involved in the kitchen.
Final Thoughts
This Oreo Cookie Spiders Recipe is one of those simple joys that turns everyday cookies into festive fun. I remember the first time I made these with my kids; their eyes lit up as each spider came together, and it quickly became a yearly tradition. If you’re after an easy, crowd-pleasing treat with minimal fuss and maximum charm, give these a try—you’ll enjoy every creepy-crawly bite.
Print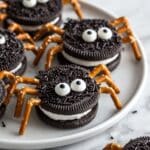
Oreo Cookie Spiders Recipe
- Prep Time: 10 minutes
- Cook Time: 0 minutes
- Total Time: 10 minutes
- Yield: 12 cookies 1x
- Category: No-Bake Treats
- Method: No-Cook
- Cuisine: American
Description
Delightfully spooky and fun Oreo Cookie Spiders are a perfect no-bake treat for Halloween or any party. These easy-to-make cookies combine classic Double Stuf Oreos, pretzel legs, melted chocolate, and candy eyes to create an adorable spider snack that kids and adults will love.
Ingredients
Cookies and Legs
- 12 Double Stuf Oreo cookies
- 48 pretzel rods (broken in half)
Chocolate Decoration
- ½ cup chocolate chips
- 2 tablespoons chocolate sprinkles
- 24 candy eyes
Instructions
- Prepare the base: Line a large baking sheet with parchment paper. Carefully twist apart the Oreos and place the cream side up on the baking sheet, creating the base for your spider bodies.
- Add spider legs: Press 8 of the halved pretzel rods into the cream of each Oreo, spreading them evenly around to resemble spider legs.
- Melt chocolate: In a small microwave-safe bowl, melt the chocolate chips by heating in 20-30 second intervals, stirring in between until smooth.
- Assemble spiders: Dollop about a teaspoon of melted chocolate onto the cream of each Oreo. Sandwich the other cookie half on top to close the cookie with chocolate acting as glue.
- Decorate spiders: Spread about a teaspoon of melted chocolate on top of each assembled Oreo. Sprinkle chocolate sprinkles on top and then press two candy eyes firmly into the chocolate to give your spiders their creepy look.
- Set and store: Allow the chocolate to harden completely at room temperature or place the baking sheet in the refrigerator for quicker setting. Once hardened, carefully move the Oreo Cookie Spiders and store them in an airtight container in the refrigerator to keep them fresh.
Notes
- Use Double Stuf Oreos for extra cream to secure the pretzel legs firmly.
- If chocolate sprinkles are unavailable, finely grated chocolate or mini chocolate chips can be substituted.
- To speed up chocolate melting, use a microwave-safe bowl and stir frequently to avoid burning.
- Chocolate chips can be replaced with candy melts or almond bark for easier melting and setting.
- These treats should be stored refrigerated and consumed within 3-4 days for best freshness.
Nutrition
- Serving Size: 1 cookie spider
- Calories: 180
- Sugar: 16g
- Sodium: 150mg
- Fat: 9g
- Saturated Fat: 5g
- Unsaturated Fat: 3g
- Trans Fat: 0g
- Carbohydrates: 24g
- Fiber: 1g
- Protein: 2g
- Cholesterol: 5mg


