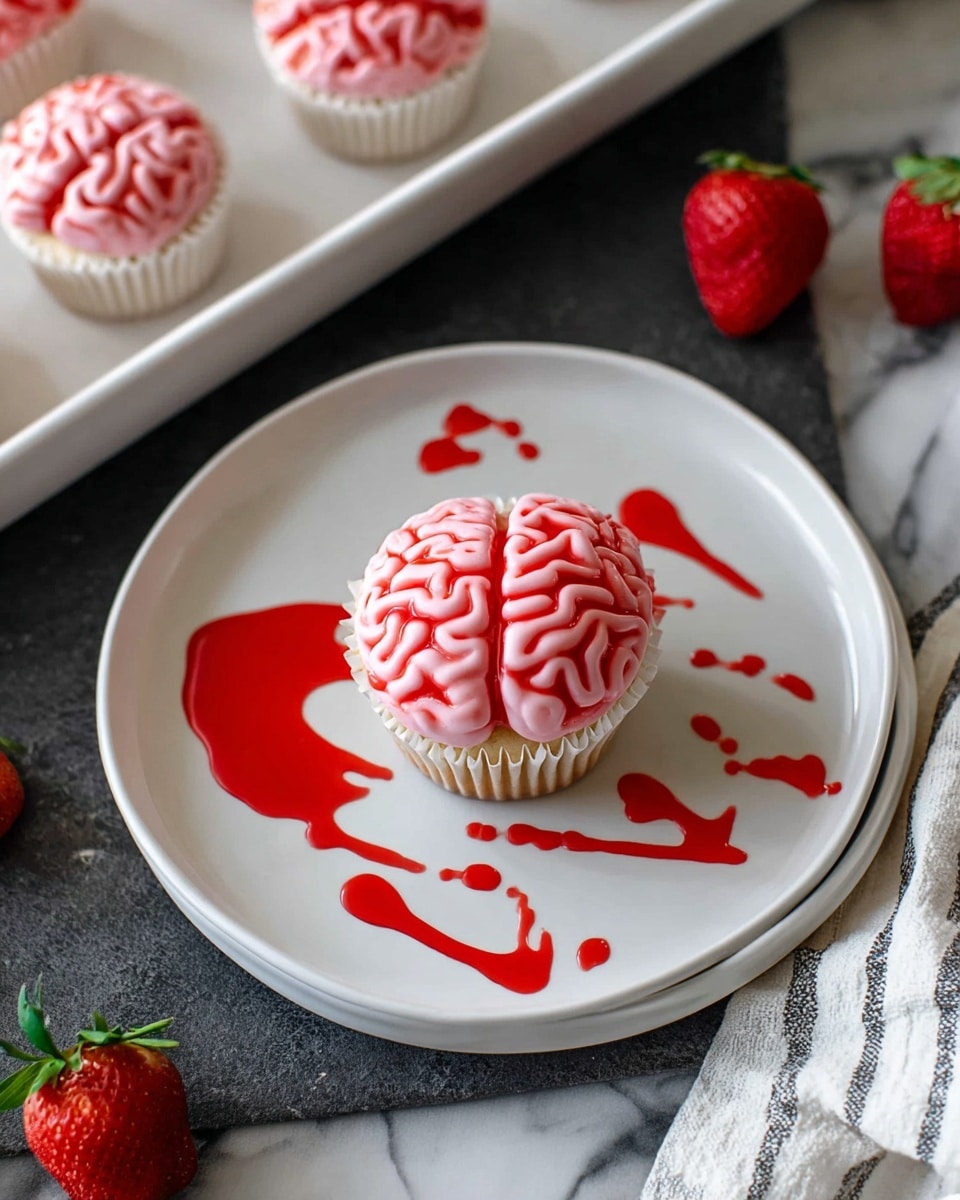
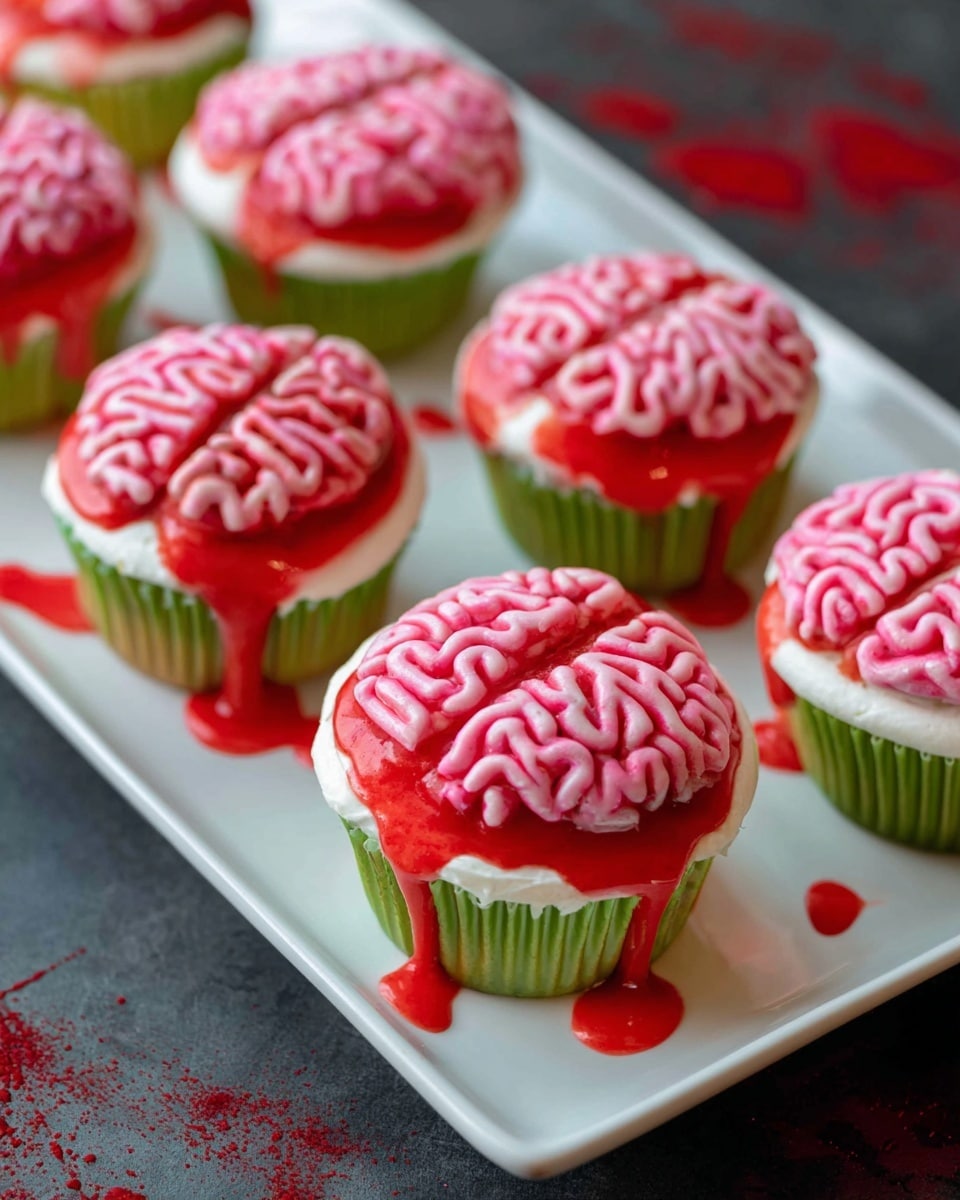
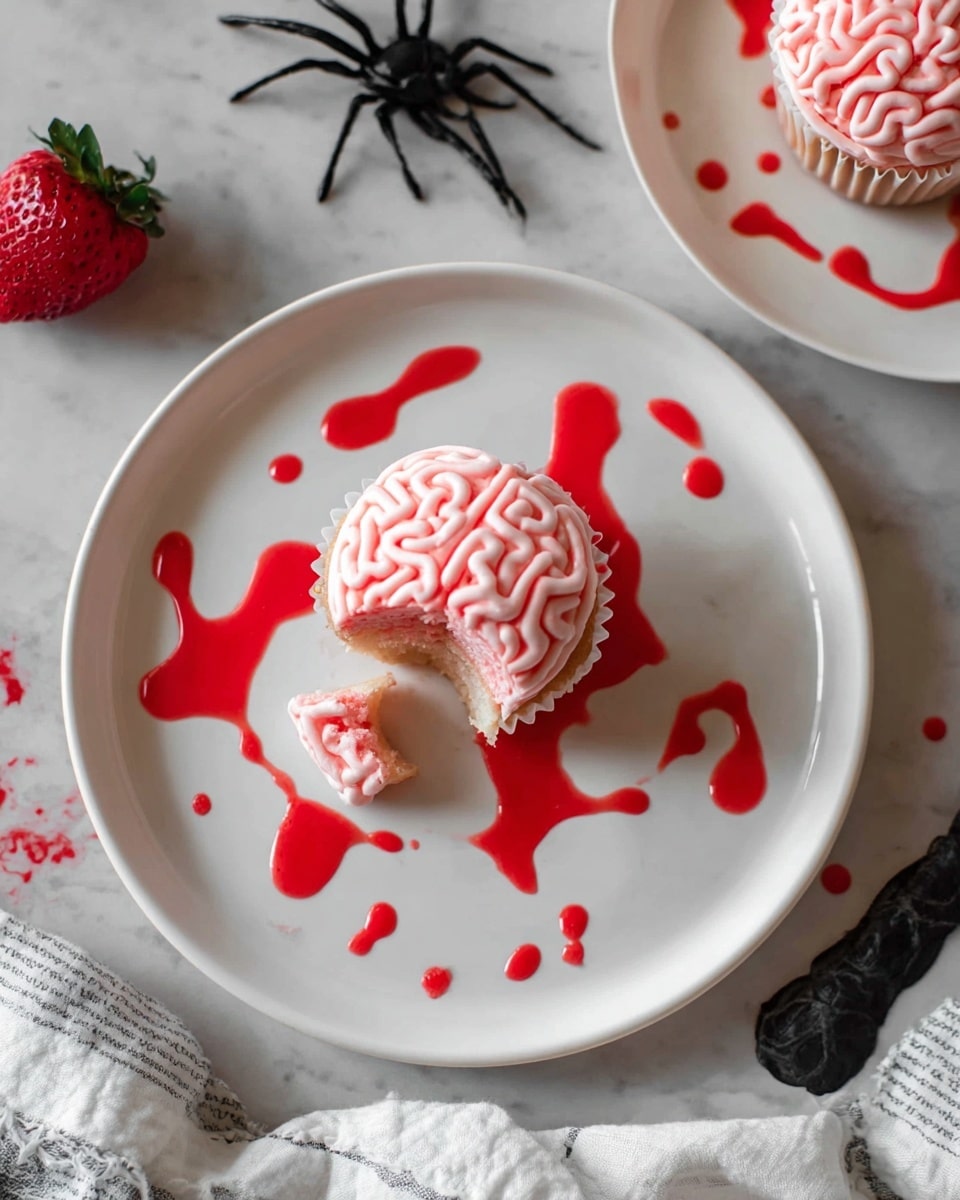
If you’re looking for a Halloween treat that’s as creepy as it is delicious, you’ve just hit the jackpot. This Halloween Zombie Brain Cupcakes Recipe will totally wow your friends and family with its gory, fun look and amazing strawberry flavor. I absolutely love how these cupcakes come together—they’re moist, fruity, and the frosting design really nails that spooky zombie brain vibe without being too complicated. Stick around, because I’m going to share my secrets to making them look fresh-from-the-zombie-apocalypse perfect, and you’ll find the whole process delightfully manageable!
Why You’ll Love This Recipe
- Show-Stopping Halloween Design: The zombie brain frosting technique is fun, spooky, and surprisingly easy to master, even if you’re no decorating pro.
- Delicious Strawberry Flavor: These cupcakes aren’t just about looks—the strawberry cake and jam buttercream create a juicy, sweet combo that everyone loves.
- Perfect For Parties: Makes 24 cupcakes, enough to serve a crowd or keep the Halloween vibes going for days.
- Simple and Straightforward: Pre-made cake mix speeds things up, but the homemade frosting trick elevates the taste and creativity.
Ingredients You’ll Need
The ingredients here are simple but clever—using a strawberry cake mix gives these cupcakes a lovely fruity base, while the strawberry jam frosting brings them to life with rich flavor and a smooth texture. Here’s a little rundown so you know what to expect when picking up your groceries.
- Strawberry Cake Mix: This is the foundation—using a box mix keeps it easy and reliable every time.
- Unsalted Butter: Key to that creamy, smooth frosting texture without overpowering flavors.
- Strawberry Jam: Incorporates natural fruit sweetness and a bit of texture to your buttercream.
- Powdered Sugar: Sweetens and thickens the frosting for that perfect spread.
- Vanilla Extract: Adds a subtle depth that balances the strawberry flavors beautifully.
- Kosher Salt: Just a pinch to enhance all the sweet notes.
- Strawberry Syrup: For that final dramatic “blood” drizzle that amps up the zombie effect.
Variations
I’ve played around a bit with variations of this Halloween Zombie Brain Cupcakes Recipe, and the best part is how customizable it is. Whether you want to play with flavors or tweak the spooky vibes, there’s a version for you.
- Chocolate Cake Base: I swapped in a chocolate cake mix once for a richer, darker base—it was a hit with guests and still balanced nicely with the strawberry frosting.
- Vegan Version: Using vegan butter and egg substitutes lets you still enjoy the brainy fun without animal products—just be sure to pick a vegan-friendly cake mix.
- Berry Mix-In: You can stir in fresh or frozen raspberries in the frosting for an extra tart pop that cuts through the sweetness.
- Intense “Blood” Drizzle: Mix a little beet juice with the strawberry syrup for a more vivid red drip that looks oh-so gory.
How to Make Halloween Zombie Brain Cupcakes Recipe
Step 1: Bake Your Strawberry Cupcakes
Start by preparing your strawberry cake mix exactly as the box instructs—usually it’s just eggs, oil, and water. Pop them into lined cupcake tins; this recipe makes 24, which is perfect for parties or sharing. The secret here is to bake until a toothpick inserted comes out clean but the cupcakes still feel moist. Once done, let them cool completely. If you frost warm cupcakes, the buttercream melts and you lose all that brainy detail later on.
Step 2: Whip Up the Strawberry Buttercream Base
While your cupcakes cool, get busy on that luscious frosting. In the bowl of a stand mixer fitted with the paddle attachment, beat your unsalted butter until it’s fluffy and smooth—this usually takes about 3-4 minutes on medium speed. Then, add in the strawberry jam and mix until it’s fully incorporated. This step is where all those sweet strawberry notes come alive! Next, add your powdered sugar gradually, about a cup at a time, mixing on low to keep the sugar from puffing everywhere. Finally, toss in the vanilla extract and a pinch of kosher salt, and beat until everything is silky-smooth and well combined.
Step 3: Create the Brainbase and Start Piping
Using an offset spatula, spread a thin, imperfect layer of the strawberry buttercream on top of each cupcake. This layer doesn’t need to be neat—it’s just the groundwork for your brainy design. Then, fill a piping bag fitted with a small round tip with the rest of the buttercream. Now for the fun part: pipe a line with a curve (kind of like an L shape) right down the center. After that, fill the cupcake surface with swirls, squiggles, and loops radiating from that curve, mimicking the convolutions of a zombie brain. I found that it helps to rotate the cupcake slowly with one hand while piping with the other—that way, you get cool, consistent squiggles without stressing your wrist.
Step 4: Add the “Blood” Drizzle Finishing Touch
Transfer your piped cupcakes to a rimmed serving tray, then drizzle each lightly with strawberry syrup. This adds a juicy red “blood” effect that really sells the zombie apocalypse vibe. Pro tip: wait to drizzle just before serving, especially if you plan to store your cupcakes, so the syrup doesn’t soak in and make the frosting runny.
Pro Tips for Making Halloween Zombie Brain Cupcakes Recipe
- Don’t Rush Cooling: I’ve learned the hard way that warm cupcakes ruin the frosting texture—so give them plenty of time to cool.
- Practice Your Piping: Try a few swirls on parchment paper first to get comfortable before decorating your cupcakes.
- Use Fresh Strawberry Jam: I noticed the frosting tastes best with a high-quality jam that isn’t too sugary or artificial.
- Drizzle Just Before Serving: This keeps your cupcakes neat and prevents them from getting soggy.
How to Serve Halloween Zombie Brain Cupcakes Recipe
Garnishes
I usually keep garnishes simple so the brain frosting is the star. That said, tiny edible eyes stuck with a dab of frosting or a few red sanding sugars sprinkled on top add a little extra creep factor. You can even pop in some small gummy worms crawling out of the “brains” for an extra gross-but-yummy surprise.
Side Dishes
Pair these cupcakes with something salty to balance the sweetness—think popcorn seasoned with a pinch of cayenne or a charcuterie board with sharp cheeses. For drinks, a tart berry punch or sparkling lemonade fits right in with the fruity, fresh taste of your cupcakes.
Creative Ways to Present
I love setting these out on a black slate tray with some fake cobwebs and candles to really set the spooky mood. For kids’ parties, I once served them in small terracotta pots lined with cupcake liners to look like creepy brain plants—everyone went wild! Switching up your serving platter or adding a few creepy props turns these from cupcakes into a full Halloween centerpiece.
Make Ahead and Storage
Storing Leftovers
These cupcakes keep beautifully in an airtight container for up to 3 days. I usually store mine in the fridge to keep the buttercream stable, especially in warmer weather. Just be sure to bring them back to room temperature before serving for the best flavor and texture.
Freezing
I’ve frozen these cupcakes a couple of times with great results. Just freeze the unfrosted cupcakes wrapped tightly in plastic wrap and foil, then thaw completely before frosting. The frosting itself doesn’t freeze well because it softens when thawed, so I recommend piping the brains fresh after thawing if you want that top-notch look.
Reheating
Since these are cold-stored desserts, I skip reheating. But if you want to soften the frosting a bit, just let the cupcakes sit at room temperature for 30 minutes before serving—they’ll come back to life with the perfect balance of flavor and texture.
FAQs
-
Can I use a different cake flavor for the Halloween Zombie Brain Cupcakes Recipe?
Absolutely! While strawberry pairs beautifully with the jam-based frosting, chocolate, vanilla, or even red velvet can work—just choose complementary frostings or adjust the jams and syrups to maintain that creepy look and cohesive flavor.
-
How do I prevent the frosting from melting or getting too soft?
Make sure your cupcakes are completely cooled before frosting—and if your kitchen is warm, keep the finished cupcakes refrigerated until just before serving. Adding the syrup drizzle last minute also helps maintain the frosting’s texture.
-
What piping tips work best for the zombie brain effect?
I found a small round tip works best to pipe curvy lines and swirls that resemble brain folds. You just want good control to create those squiggly shapes without the frosting blobs.
-
Can I make the frosting ahead of time?
Yes, the frosting keeps well in the fridge for up to 3 days. Just bring it back to room temperature and re-whip lightly before piping so it regains that perfect spreading texture.
-
Is this Halloween Zombie Brain Cupcakes Recipe kid-friendly?
Definitely! The design is spooky but not scary, and the sweet strawberry flavor is usually a hit with kids. Plus, decorating together can be a really fun Halloween activity.
Final Thoughts
When I first tried this Halloween Zombie Brain Cupcakes Recipe, I was amazed at how such a simple frosting trick could turn an ordinary cupcake into a Halloween showstopper. Whether you’re baking for a party or just some spooky fun at home, these cupcakes deliver on look, taste, and crowd-pleasing wow-factor. I really hope you give them a try—you’ll find yourself coming back to this recipe every October (and beyond!). Remember, the key’s in the patience with cooling and practicing those piping strokes, but trust me, the results are worth it. So, gather your ingredients, warm up your piping arm, and let’s make some creepy-cute zombie brains that taste as good as they look!
Print
Halloween Zombie Brain Cupcakes Recipe
- Prep Time: 40 minutes
- Cook Time: 15 minutes
- Total Time: 55 minutes
- Yield: 24 servings 1x
- Category: Dessert
- Method: Baking
- Cuisine: American
Description
These Halloween Cupcakes are delightfully spooky treats resembling fresh-from-the-zombie-apocalypse brains. Featuring moist strawberry cake cupcakes topped with creamy strawberry buttercream frosting and drizzled with vibrant strawberry syrup, they bring an eerie yet delicious touch to any Halloween party.
Ingredients
For the Cupcakes
- 1 box strawberry cake mix (15.25 ounces)
- Oil, water, and eggs as required by cake mix package instructions
For the Strawberry Buttercream
- 2 sticks unsalted butter (1 cup), softened
- ½ cup strawberry jam
- 4 cups powdered sugar
- ½ teaspoon vanilla extract
- Pinch kosher salt
- ¼ cup strawberry syrup (for drizzling)
Instructions
- Prepare the cupcakes: Follow the package instructions on the strawberry cake mix box to prepare 24 cupcakes. Bake as directed and let the cupcakes cool completely before proceeding to decorating.
- Make the strawberry buttercream: In the bowl of a stand mixer fitted with the paddle attachment, cream the softened unsalted butter on medium speed until fluffy and smooth. Add the strawberry jam and continue mixing on medium speed until fully incorporated.
- Add powdered sugar: While mixing on medium-low speed, add the powdered sugar one cup at a time until all is fully blended with the butter and jam mixture.
- Flavor and finalize buttercream: Add vanilla extract and a pinch of kosher salt, then mix on medium speed until the frosting is smooth and evenly combined.
- Frost the cupcakes: Using an offset spatula, spread a thin layer of strawberry buttercream on the top of each cooled cupcake. This base layer does not have to be perfect as it serves as the foundation for the detailed piping.
- Pipe zombie brain designs: Transfer the remaining buttercream into a piping bag fitted with a small round tip. Pipe a curved line down the center of each cupcake, resembling an L shape. Then, create swirls and squiggles extending from the curve to cover half of the cupcake surface. Repeat this on the other half to complete the brain-like texture.
- Finish with strawberry syrup: Arrange the decorated cupcakes on a rimmed serving tray and lightly drizzle strawberry syrup over them to mimic dripping blood, enhancing the zombie apocalypse effect.
- Storage and serving: Store the frosted cupcakes in an airtight container for up to 3 days. For best results, drizzle the strawberry syrup right before serving to maintain freshness and visual appeal.
Notes
- Use an offset spatula for even and controlled spreading of frosting.
- The strawberry syrup should be added just before serving to prevent sogginess.
- If you want to intensify the strawberry flavor, use high-quality strawberry jam and syrup.
- These cupcakes are best enjoyed within 3 days of preparation.
- Ensure cupcakes are fully cooled before frosting to avoid melting the buttercream.
Nutrition
- Serving Size: 1 cupcake
- Calories: 310 kcal
- Sugar: 28 g
- Sodium: 150 mg
- Fat: 14 g
- Saturated Fat: 8 g
- Unsaturated Fat: 5 g
- Trans Fat: 0 g
- Carbohydrates: 43 g
- Fiber: 1 g
- Protein: 2 g
- Cholesterol: 45 mg

