If you’re looking for a show-stopping, crowd-pleasing treat this season, look no further than this Halloween Oreo Balls Recipe. I absolutely love how these little chocolatey bites turn out—super rich, totally fun to make, and perfectly festive for Halloween parties or trick-or-treat gatherings. Trust me, once you try this recipe, you’ll want to make it every year!
Why You’ll Love This Recipe
- Easy and Fun to Make: These Oreo balls come together quickly, and shaping and decorating them is a blast, even for kitchen newbies.
- Deliciously Rich Flavor: The combo of Oreo crumbs and cream cheese creates the perfect creamy, sweet base.
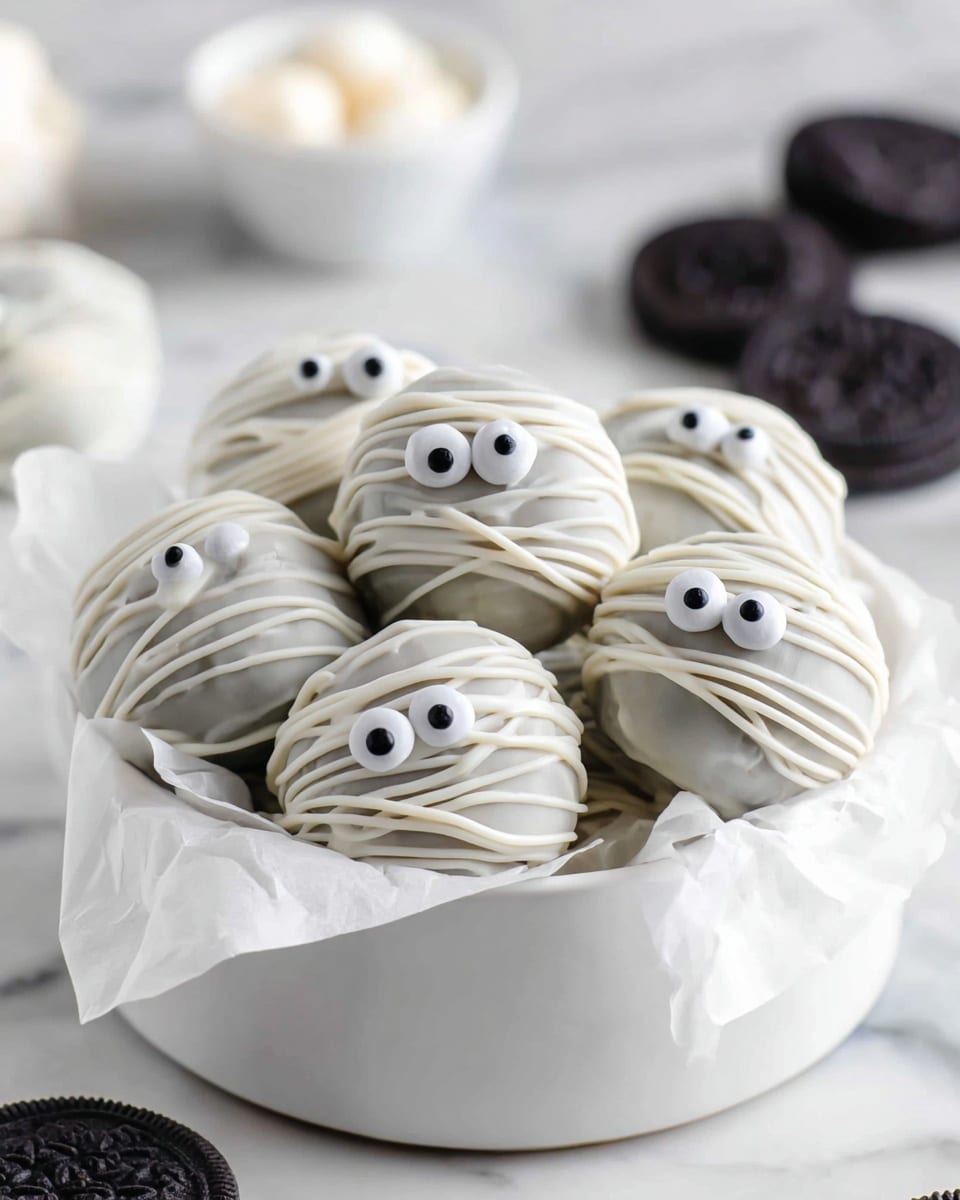
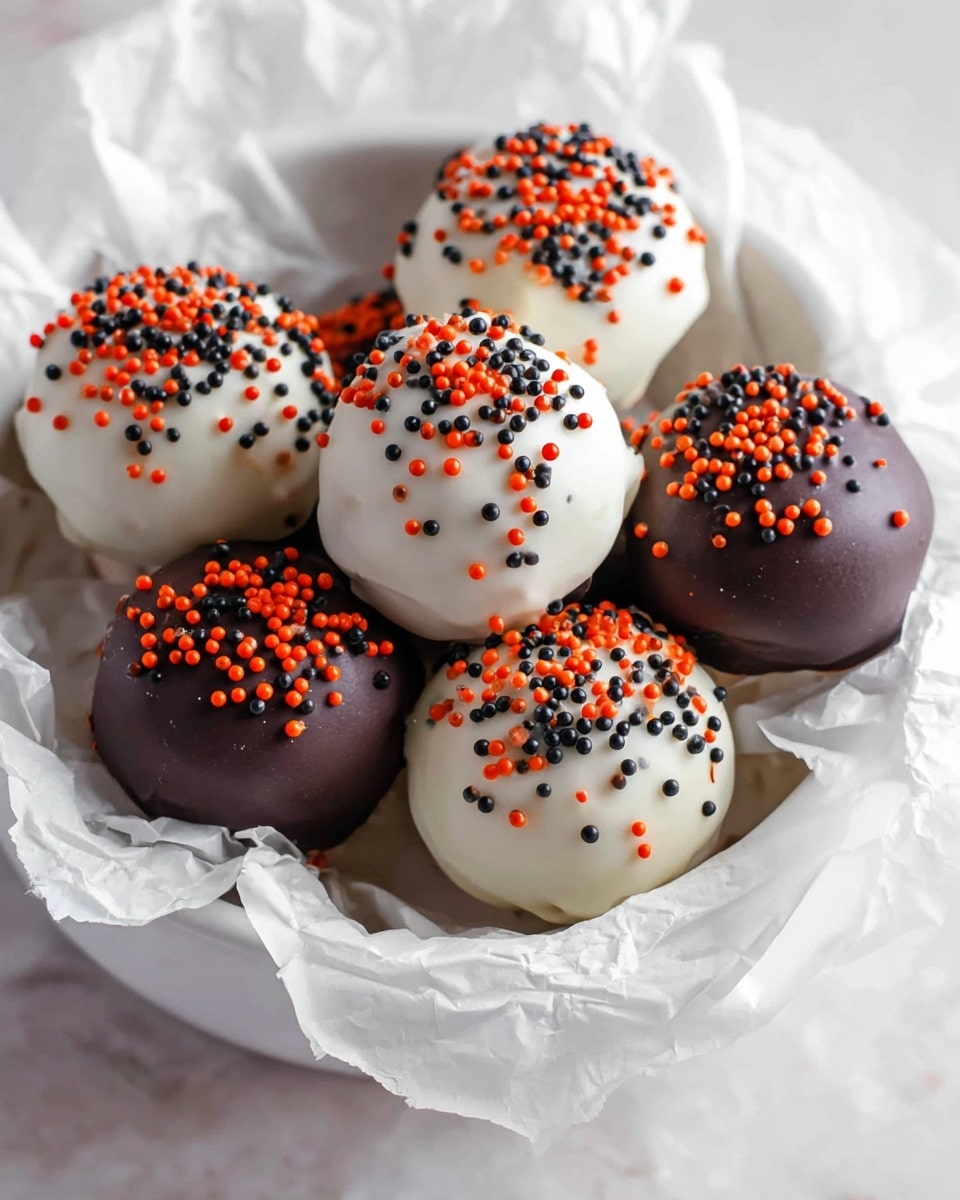
- Super Customizable: You can decorate them five different ways — ghosts, mummies, spiders, pumpkins, or sprinkled festive balls.
- Perfect for Halloween Parties: These treats always get oohs and ahhs, making them a guaranteed hit with kids and adults alike.
Ingredients You’ll Need
The magic of this Halloween Oreo Balls Recipe lies in its simple but delicious ingredients — Oreos and cream cheese form the base, while colorful melting chocolates and fun decorations bring them to life. Grab the right melting wafers to match your spooky theme!
- Oreo cookies: Classic Oreos with filling are best for that perfect sweet and chocolatey base.
- Cream cheese: Softened cream cheese brings creamy richness and helps bind the Oreo crumbs.
- Chocolate melting wafers: Choose dark, white, orange, or your favorite colors for dipping and decorating.
- Black licorice laces: These make perfect spider legs—cut to size for easy shaping.
- Mini candy eyes: They turn simple balls into spooky characters instantly.
- Mini chocolate chips: Great for ghost eyes, subtle but adorable.
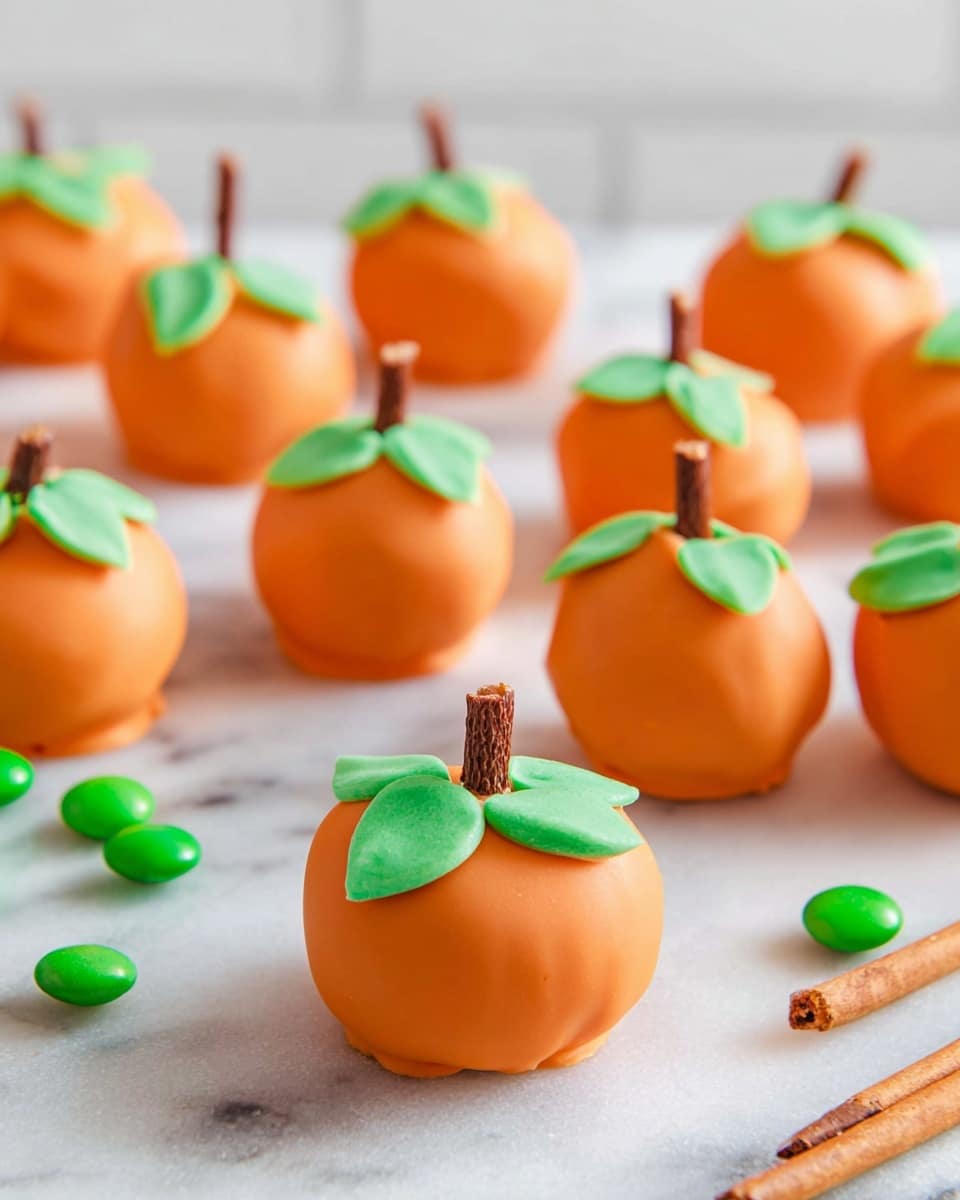
- Pretzel sticks: Broken into thirds, these are the cutest pumpkin stems.
- Green M&M’s: To serve as pumpkin leaves, adding a pop of color.
- Seasonal sprinkles: To add festive flair on sprinkle-covered Oreo balls.
Variations
I love that you can easily tailor the Halloween Oreo Balls Recipe to your taste or theme—try swapping decorating styles or even dairy-free options if you like. It’s all about making it your own and having fun in the process.
- Gluten-Free Version: I once swapped regular Oreos for gluten-free ones and still got fantastic results; just double-check your melting chocolates too.
- Vegan Options: Use vegan cream cheese and dairy-free chocolate melts for a cruelty-free treat the whole family will enjoy.
- Flavor Infusions: Add a touch of peppermint extract or pumpkin spice into the cream cheese mixture for seasonal flair—I tried pumpkin spice once, and it was a hit!
- Different Shapes: Instead of balls, try flattening the mixture into discs and decorating those for a fun twist.
How to Make Halloween Oreo Balls Recipe
Step 1: Crush the Oreos into Fine Crumbs
I usually find using a food processor makes this super quick and neat, but if you don’t have one, no worries! Just seal the Oreos in a zip-top bag and crush them with a rolling pin until fine crumbs form. Getting them as fine as possible helps with a smooth dough texture that holds together beautifully.
Step 2: Mix Oreos and Cream Cheese
Pour the crumbs into a large bowl and add the softened cream cheese. Start with your electric mixer to blend it, but honestly, I often end up using my hands—it’s easier to get everything combined evenly that way. The mixture should be soft but firm enough to shape into balls.
Step 3: Shape and Chill the Balls
Use a small cookie scoop or tablespoon to portion out the dough onto a parchment-lined baking sheet. Roll each portion into a neat ball with your hands. Freeze them for 10 to 15 minutes—just enough so they firm up but don’t freeze solid. This makes dipping way easier and prevents cracking.
Step 4: Melt Chocolate and Dip Oreo Balls
Microwave your melting wafers in 30-second bursts, stirring well in between, until silky smooth. I like to use a fork to dip the balls and gently tap off the excess chocolate for an even coat. For ghosts, I spoon chocolate over instead, to create that iconic drippy effect. Just be patient and gentle—the perfect coat looks glossy and smooth.
Step 5: Decorate Your Halloween Characters
Here’s where the fun really starts! Before the chocolate sets, press licorice laces gently for spider legs, stick on candy eyes with a dab of melted chocolate, use pretzel sticks as pumpkin stems, or sprinkle festive decorations on top. For mummies, drizzle white chocolate back and forth to mimic wrapped bandages. Don’t worry if you mess up a bit—I’ve learned these imperfect touches make them look homemade and charming!
Pro Tips for Making Halloween Oreo Balls Recipe
- Don’t Overfreeze: I always keep an eye on chilling time—freeze just enough to firm them up but not rock solid, or the balls crack when dipping.
- Smooth Chocolate Dip: Stir your melted chocolate often. I learned that even a little overheating can change the texture and make it dull instead of glossy.
- Use Toothpicks for Details: When attaching eyes or tiny decorations, a toothpick dipped in melted chocolate works like magic for precision.
- Work Quickly with Melted Chocolate: Chocolate sets fast! Prep decorations beforehand so you can decorate before it hardens.
How to Serve Halloween Oreo Balls Recipe
Garnishes
I love topping some of the balls with seasonal sprinkles for an extra pop of color and crunch. Candy eyes add so much personality—I always make sure to have a big stash on hand! For pumpkins, the green M&Ms as leaves take them from cute to totally festive.
Side Dishes
These Oreo balls shine on their own but also pair perfectly with a hot cup of cider or a spooky punch bowl at your Halloween party. I’ve served them alongside popcorn or caramel apples for a fun, casual mix of treats.
Creative Ways to Present
Everyone loves a good presentation, so I often arrange these Halloween Oreo balls on black or orange platters, or stick toothpicks in them and display them in a pumpkin-shaped foam ball for a delightful Halloween bouquet. It’s such a cute way to elevate simple treats into a centerpiece.
Make Ahead and Storage
Storing Leftovers
I’ve found storing leftover Halloween Oreo Balls Recipe in an airtight container in the refrigerator keeps them fresh and prevents melting or sweating. They taste great for up to a week, so you can enjoy them over several days without worry.
Freezing
If you want to prep way ahead, freeze them before dipping, or even after decorating. Wrap tightly in plastic wrap and store in a freezer-safe container. When I’ve done this, the texture stays silky and the chocolate coating holds up well.
Reheating
For best flavor, I let frozen Oreo balls thaw in the fridge overnight before serving. Avoid microwaving—they’re best enjoyed chilled to keep their firm bite and chocolate coating intact.
FAQs
-
Can I use any type of chocolate for dipping?
While you can melt any chocolate, I highly recommend using melting wafers or candy melts—they melt smoothly and harden with a nice shine, which is perfect for Halloween Oreo Balls Recipe. Regular chocolate can be trickier to work with and may require tempering to avoid dullness or streaks.
-
How long do Oreo balls last?
Stored in an airtight container in the refrigerator, Halloween Oreo Balls will last about a week. If you keep them on the counter, they might get soft or start melting, so refrigerate to keep their shape and flavor.
-
Can I make these nut-free?
Absolutely! This recipe is naturally nut-free as long as you ensure all your decorations and melting chocolates are processed in nut-free facilities. Always check labels, especially for the mini candy eyes and sprinkles.
-
What’s the best way to attach decorations?
Using a tiny dab of melted chocolate acts like glue for candy eyes, pretzel stems, or licorice legs. I use a toothpick to apply it precisely, which keeps things neat and well-adhered once the chocolate hardens.
Final Thoughts
This Halloween Oreo Balls Recipe has become my go-to for seasonal celebrations because it’s easy, fun, and absolutely delicious. Whenever I make these, it brings such joy to see friends and family’s faces light up over cute and tasty treats. Give it a try—you’ll enjoy the process and love how impressive these little balls turn out. Happy Halloween and happy baking!
Print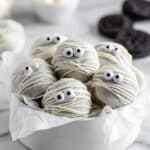
Halloween Oreo Balls Recipe
- Prep Time: 30 minutes
- Cook Time: 0 minutes
- Total Time: 45 minutes
- Yield: 40 Oreo balls 1x
- Category: Dessert
- Method: No-Cook
- Cuisine: American
- Diet: Vegetarian
Description
These Halloween Oreo Balls are a festive and fun treat perfect for Halloween parties and celebrations. Made from crushed Oreos combined with cream cheese, these no-bake balls are dipped in colorful melting chocolate and decorated with themed toppings like licorice legs for spiders, candy eyes for mummies and ghosts, pretzel stems and green M&Ms for pumpkins, or festive sprinkles. Easy to make and delightfully spooky, these Oreo balls are sure to be a hit with kids and adults alike.
Ingredients
Base
- 36 Oreo cookies (see notes)
- 1 (8-ounce) package cream cheese, softened
- 8 ounces chocolate melting wafers (use dark chocolate for spider, white chocolate for mummy and ghost, orange for pumpkin, or color of choice for sprinkle version)
Spider
- Black licorice laces, cut into 2 1/2”-3” pieces
- Mini candy eyes
Mummy
- Mini candy eyes
Ghost
- Mini chocolate chips
Pumpkin
- Pretzel sticks, broken into 3 pieces
- Green M&M’s
Sprinkle Variation
- Seasonal sprinkles
Instructions
- Crush Oreos: Line a baking sheet with parchment paper. Place 36 Oreo cookies (with filling) into a blender or food processor and pulse into fine crumbs. Alternatively, put the Oreos in a zip-top bag and crush with a rolling pin.
- Combine Oreos and Cream Cheese: In a large bowl, mix the Oreo crumbs and 8 ounces of softened cream cheese using an electric mixer until combined. If needed, use your hands to fully incorporate the mixture.
- Shape into Balls: Using a small cookie scoop, portion the mixture onto the prepared baking sheet and roll each portion into a ball with your hands. Freeze the balls for 10 to 15 minutes until slightly firm but not too cold.
- Dip in Chocolate: Melt the chocolate wafers in a microwave-safe bowl in 30-second intervals, stirring between each until smooth. Use a fork to dip the Oreo balls fully into the chocolate (except for ghost variation). Tap the fork on the edge of the bowl to smooth the coating. Use a toothpick to transfer the dipped balls back onto the parchment-lined baking sheet.
- Decorate Spider: Before the chocolate hardens, press 6 licorice lace pieces into the Oreo ball to form legs. If the chocolate hardens too quickly, dip licorice ends into melted chocolate and hold for 20 seconds to adhere. Use a toothpick to apply a small dot of melted chocolate to the back of mini candy eyes and place on the spider body for eyes.
- Decorate Mummy: After the chocolate hardens, drizzle white chocolate over each Oreo ball in a back-and-forth motion to mimic mummy bandages. Attach mini candy eyes by applying a small dot of melted chocolate to their backs and placing them on the ball.
- Decorate Ghost: Spoon melted white chocolate over the top and sides of the Oreo balls to partially cover them and create a ghostly drape effect, letting excess chocolate pool at the base. Allow to harden. Use a toothpick to attach mini chocolate chips as eyes by adding a bit of melted chocolate to the chip backs.
- Decorate Pumpkin: Before the chocolate sets, press one pretzel piece into the top of each ball to form the pumpkin stem. Dip green M&M’s slightly into melted orange chocolate and hold them for about 20 seconds on top of the pumpkin as leaves.
- Decorate with Sprinkles: Before the coating hardens, sprinkle seasonal sprinkles over the dipped Oreo balls. Allow chocolate to harden completely.
- Storage: Store the finished Halloween Oreo Balls in the refrigerator until ready to serve to maintain freshness and firmness.
Notes
- You can crush the Oreos with a blender, food processor, or by hand using a rolling pin.
- The chocolate dipping and decorating steps can be customized with your choice of chocolate candy melts and toppings.
- Adjust freezing time as needed; the balls should be firm but not frozen solid before dipping for best results.
- Store these treats refrigerated and consume within 3–5 days for optimal freshness.
Nutrition
- Serving Size: 1 Oreo ball (approx. 20g)
- Calories: 110
- Sugar: 9g
- Sodium: 55mg
- Fat: 7g
- Saturated Fat: 4g
- Unsaturated Fat: 2g
- Trans Fat: 0g
- Carbohydrates: 11g
- Fiber: 0.5g
- Protein: 1g
- Cholesterol: 10mg

