

If you’re looking for a sweet treat that’s outrageously simple yet absolutely delicious, let me introduce you to my favorite 2 Ingredient Pumpkin Fudge Recipe. This recipe is a total game-changer, especially when you’re craving something pumpkiny but don’t want to fuss with a ton of ingredients or complicated steps. I absolutely love how this turns out—creamy, a little bit indulgent, and perfect for the fall season or anytime you want a quick pumpkin fix. Stick with me, and I’ll show you exactly how to get this fan-freaking-tastic fudge on your table in minutes.
Why You’ll Love This Recipe
- Only Two Ingredients: Simplifies dessert-making without sacrificing flavor.
- Ready in Minutes: Perfect for when you want a sweet treat fast.
- Soft and Creamy Texture: Unlike many fudges, this one is beautifully smooth straight from the freezer.
- Versatile and Crowd-Pleaser: Great for fall gatherings or simple snacks everyone loves.

Ingredients You’ll Need
What I love most about this 2 Ingredient Pumpkin Fudge Recipe is how straightforward the ingredients list is. These two work together like magic to deliver that perfect pumpkin-spiced sweetness. When shopping, just make sure to grab good quality white baking chips and smooth pumpkin puree or pumpkin butter, which changes the flavor and texture just a bit.
- White baking chips: I recommend using white chocolate chips designed for baking, as they melt smoothly without seizing up.
- Pumpkin puree or pumpkin butter: Pumpkin puree gives a classic pumpkin flavor and creaminess; pumpkin butter adds a slightly richer, spiced note—choose based on what you love!
Variations
One of the best things about this 2 Ingredient Pumpkin Fudge Recipe is how easy it is to tweak it to your liking. I’ve tried a few variations depending on the season or what flavors I’m craving, and it’s always a hit no matter what! Feel free to make it your own.
- Use pumpkin butter instead of puree: I discovered this trick to deepen the fudge’s flavor with a little extra spice and sweetness, making it a perfect cozy treat.
- Add a pinch of cinnamon or pumpkin pie spice: Sometimes I sprinkle in extra warmth if I want that extra fall vibe without adding another ingredient.
- Mix in chopped nuts or chocolate chips: When I want texture, I fold in some chopped pecans or dark chocolate chips for a fun surprise in every bite.
- Swap white chocolate with vegan white chocolate: For dairy-free friends, it works just as well and keeps the recipe accessible.
How to Make 2 Ingredient Pumpkin Fudge Recipe
Step 1: Prepare Your Pan and Melt the Chocolate
Start by lining an 8×4 inch loaf pan with parchment paper, making sure to leave some overhang on the sides. This little trick makes it so much easier to lift out your fudge later without any sticky fingers! Next, place your white baking chips in a microwave-safe bowl. Heat them in short 15–30 second bursts, stirring gently between each interval. This slow melting prevents burning and ensures smooth chocolate. If you’d rather, you can melt the chocolate on the stovetop using a double boiler, which works beautifully too.
Step 2: Mix in the Pumpkin for That Perfect Blend
This step is crucial—make sure your pumpkin puree or pumpkin butter is at room temperature before mixing it into the melted chocolate. When I first tried adding cold pumpkin, the chocolate seized and it was a mess! Stir the pumpkin in gently with a spatula until the batter looks smooth and velvety, sporting a lovely uniform color. It’s such a satisfying mix to watch come together.
Step 3: Set and Slice Your Fudge
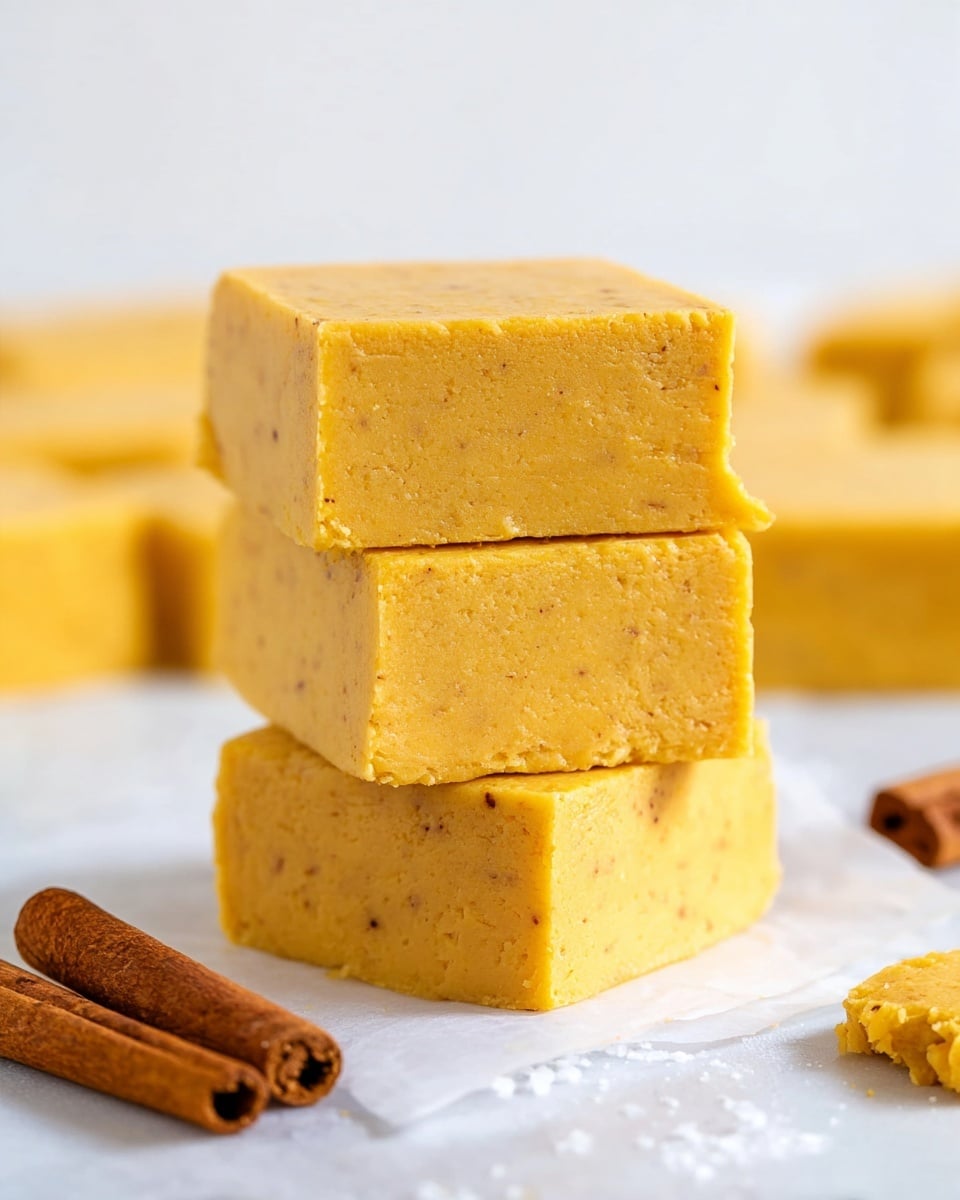
Pour the mixture into your prepared pan and spread it out evenly. Cover it tightly with plastic wrap and pop it into the freezer. This fudge sets super fast—usually firm enough in just a couple of hours. Once frozen solid, use the parchment paper overhang to easily lift it out. Place on a cutting board and slice into 1-inch squares with a sharp knife. Even though it looks firm, you’ll find the fudge soft and creamy straight from the freezer, ready to enjoy right away.
Pro Tips for Making 2 Ingredient Pumpkin Fudge Recipe
- Room Temperature Pumpkin: Bringing pumpkin to room temp before mixing keeps the chocolate silky and prevents clumping—trust me, I learned this the hard way.
- Slow Melt Your Chocolate: Always melt in short increments and stir frequently to avoid burnt chocolate bitterness.
- Use a Sharp Knife for Cutting: A clean, sharp knife minimizes cracking and helps cut neat, pretty squares.
- Freeze for Texture: Freezing makes all the difference—you get that creamy-but-firm fudge that’s easy to slice and lovely to eat.
How to Serve 2 Ingredient Pumpkin Fudge Recipe
Garnishes
I like to keep garnishes very simple for this fudge—sometimes I sprinkle a tiny pinch of flaky sea salt on top just before freezing to balance the sweetness. Other times, a dusting of finely chopped pecans or crushed graham crackers adds a nice crunch and a little extra visual appeal. Honestly, you don’t need much because the fudge is delightful all on its own.
Side Dishes
This fudge is a perfect after-dinner treat paired with a hot cup of chai tea or rich coffee. Sometimes I serve it alongside a simple vanilla bean ice cream when friends come over; the cold cream melts perfectly against the pumpkin’s flavors. It also pairs nicely with spiced nuts or even a small bowl of fresh fruit for a lighter touch.
Creative Ways to Present
For special occasions, I’ve wrapped individual fudge squares in festive parchment paper tied with twine, making them perfect little gifts or party favors. You can also layer them in a pretty glass jar with fall leaves or cinnamon sticks for a charming autumn centerpiece that’s edible! It always delights guests when you add that handmade touch.
Make Ahead and Storage
Storing Leftovers
Keep your leftover pumpkin fudge in an airtight container in the freezer. I learned the hard way that storing it at room temperature or even the fridge makes it too soft and sticky, which loses the signature fudge texture. Holding it frozen keeps things perfect until you’re ready to indulge again.
Freezing
Freezing is your best friend with this fudge. You can make a batch ahead of time, cut it into squares, and freeze them individually spaced on a tray to prevent sticking before stacking in containers. This way, it’s easy to grab a piece whenever a pumpkin craving hits.
Reheating
Honestly, this fudge is best enjoyed straight from the freezer. If you want it a little softer, just let it sit at room temperature for 5 to 10 minutes before eating. Avoid microwaving, which can make the texture grainy or too melty.
FAQs
-
Can I use regular canned pumpkin instead of pumpkin butter in the 2 Ingredient Pumpkin Fudge Recipe?
Absolutely! Pumpkin puree from the can works perfectly in this recipe. It provides that classic pumpkin flavor and creaminess. Pumpkin butter is just a richer, more spiced alternative if you want a slightly enhanced taste.
-
Why does my white chocolate seize when I add pumpkin?
This usually happens if the pumpkin is cold because adding cold pumpkin cools the melted chocolate too quickly, causing it to harden unevenly. To prevent this, make sure your pumpkin is at room temperature before stirring it in.
-
How long does the fudge keep in the freezer?
Stored properly in an airtight container, the fudge can last up to 2 weeks in the freezer while maintaining its best texture and flavor. After that, it might start to lose freshness or develop freezer burn.
-
Can I make this fudge dairy-free?
Yes! Swap the white baking chips for a dairy-free or vegan white chocolate alternative, and make sure your pumpkin puree doesn’t contain additives. You’ll get a similarly creamy and delicious treat.
-
Do I have to freeze the fudge, or can I refrigerate it instead?
Freezing is key for firm texture and easy slicing. Refrigeration might make the fudge softer and stickier, which can be harder to cut and handle. If you do refrigerate, expect to let it sit longer before cutting and serving.
Final Thoughts
This 2 Ingredient Pumpkin Fudge Recipe is one of those delightful surprises you find when you want something quick, simple, and comforting. I still remember the first time I whipped it up and how amazed I was that just white chocolate and pumpkin could taste this good together. Whether you’re making it for a last-minute party, a cozy night in, or as a thoughtful gift, I’m confident you’ll enjoy it as much as my family and I do. Give this incredible recipe a try—you’ll have pumpkin fudge magic in no time!
Print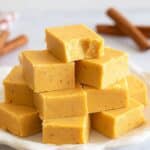
2 Ingredient Pumpkin Fudge Recipe
- Prep Time: 5 minutes
- Cook Time: 0 minutes
- Total Time: 5 minutes
- Yield: 21 pieces 1x
- Category: Dessert
- Method: No-Cook
- Cuisine: American
Description
This easy 2 Ingredient Pumpkin Fudge is a creamy, soft, and delicious treat perfect for fall and holiday seasons. Made with simple pantry staples—white baking chips and pumpkin puree or pumpkin butter—this no-bake fudge sets quickly in the freezer and delivers comforting pumpkin flavor in every bite. Ideal for beginner cooks or anyone needing a quick sweet fix, this fudge offers a delightful twist on classic white chocolate fudge with seasonal pumpkin goodness.
Ingredients
Ingredients
- 1 (12 oz / 340 g) bag white baking chips
- 1/3 cup (78 g) pumpkin puree, room temperature, or pumpkin butter (92 g)
Instructions
- Prepare the Pan: Line an 8 x 4 inch loaf pan with parchment paper, leaving some overhang on the sides to allow for easy removal of the fudge later.
- Melt the White Chocolate: Place white baking chips in a microwave-safe bowl and heat in 15-30 second increments, stirring thoroughly between each session with a spatula until the chocolate is fully melted and smooth. Alternatively, melt the chips gently over a double boiler on the stove.
- Combine Pumpkin with Chocolate: Stir the room temperature pumpkin puree or pumpkin butter into the melted white chocolate. Mix well until the batter is smooth and the color is uniform. Ensure pumpkin is at room temperature to prevent the chocolate from seizing.
- Pour and Spread Mixture: Pour the fudge mixture into the prepared loaf pan and spread it evenly with a spatula. Cover the pan with plastic wrap.
- Freeze until Firm: Place the pan in the freezer until the fudge surface feels firm to the touch, typically about 1-2 hours.
- Cut and Serve: Lift the fudge from the pan using the parchment overhang and place it on a cutting board. Cut into 1-inch squares using a large sharp knife. The fudge is soft and creamy right out of the freezer, but pumpkin butter versions might need a few minutes to soften before cutting.
- Storage: Serve immediately or store pieces in an airtight container in the freezer. Consume soon after removal from the freezer to avoid fudge becoming soft and sticky.
Notes
- Use room temperature pumpkin puree to avoid causing the melted chocolate to harden prematurely.
- For a more intense pumpkin flavor and creamier texture, pumpkin butter can be substituted for pumpkin puree.
- This fudge is best stored in the freezer and eaten shortly after being removed to maintain optimal texture.
- Use white baking chips rather than regular white chocolate for better melting and smoother fudge texture.
- Freezing time may vary depending on your freezer; check firmness periodically.
Nutrition
- Serving Size: 1 piece (approx)
- Calories: 90
- Sugar: 13 g
- Sodium: 10 mg
- Fat: 4 g
- Saturated Fat: 2.5 g
- Unsaturated Fat: 1.3 g
- Trans Fat: 0 g
- Carbohydrates: 14 g
- Fiber: 0.5 g
- Protein: 1 g
- Cholesterol: 5 mg


