

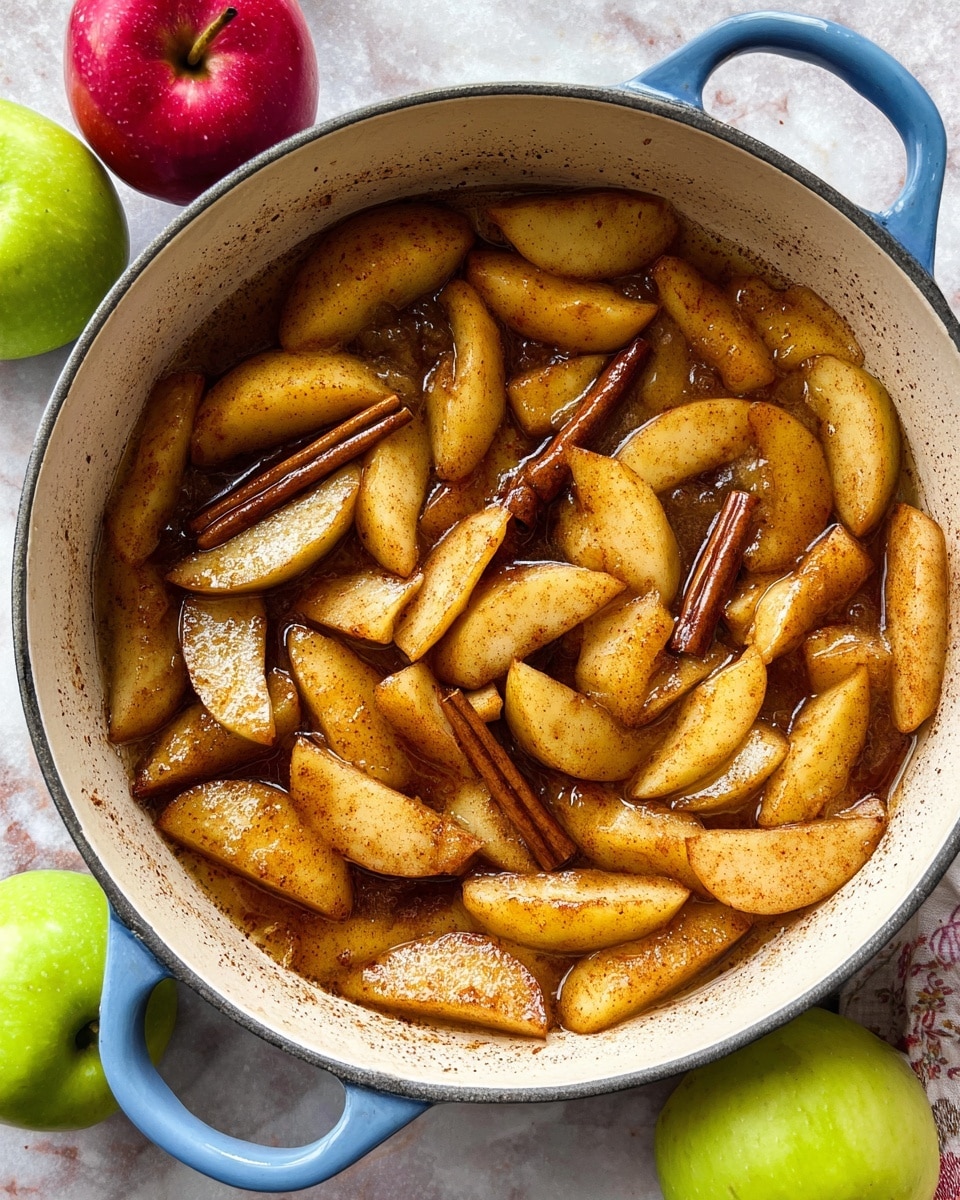
I absolutely love this Apple Pie Filling Recipe because it captures that perfect balance of tart and sweet apples with warm spices that instantly remind me of cozy fall afternoons. Whether you’re craving a classic apple pie or want a quick, delicious topping for ice cream or pancakes, this filling never disappoints. It’s one of those recipes you’ll keep coming back to because it’s flexible, homemade, and tastes infinitely better than any store-bought jar.
When I first tried making apple pie filling from scratch, I struggled with ending up with mushy apples or overpowering spices. But this recipe nailed it—apples stay tender yet hold their shape, and the spices are just right without stealing the spotlight. I appreciate how fast and straightforward it is, perfect for both impromptu desserts and well-planned meals. Once you make this Apple Pie Filling Recipe, you’ll understand why it’s a kitchen staple for so many of us.
Why You’ll Love This Recipe
- Perfect Texture: Apples stay tender but firm, avoiding that mushy filling trap.
- Balanced Flavors: Spices and sweetness hit just right, enhancing apple’s natural tang.
- Versatile Use: Great for pies, crisps, toppings, or even jars of homemade gifts.
- Simple Technique: Quick to make with basic ingredients you likely already have on hand.

Ingredients You’ll Need
I like to use a mix of tart and sweet apples to get that classic apple pie flavor with just the right bite and sweetness. Each spice adds a subtle hint of warmth without competing with the fruit.
- Granny Smith apples: Tart and firm, perfect for balancing sweetness and keeping texture.
- Honeycrisp, Fuji, or Braeburn apples: These apples add natural sweetness and juiciness to the mix.
- Unsalted butter: Helps bring richness and smoothness to the filling.
- Granulated sugar: Provides sweetness without overpowering the apples.
- Dark brown sugar, packed: Adds a deeper, molasses-like flavor that complements the spices.
- Ground cinnamon: A quintessential apple pie spice that warms the filling.
- Ground nutmeg: Offers a subtle, nutty spice that blends beautifully.
- Ground cloves: Use sparingly – just a pinch adds a lovely depth.
- Kosher salt: Enhances all the flavors without making it salty.
- Lemon zest: Brightens the filling with fresh citrus notes.
- Lemon juice: Prevents browning and adds a gentle tang.
- Cornstarch: Thickens the filling to that perfect glossy finish.
- Water: Mixed with cornstarch to make the slurry for thickening.
- Vanilla extract: Adds a subtle sweet aroma that rounds out the flavor.
Variations
One of the best parts of this Apple Pie Filling Recipe is how easy it is to tailor it to your taste buds or dietary needs. I’ve played around with different spices and apple types depending on what I have around, so feel free to make it your own.
- Spice it up: I sometimes add a touch of ground ginger or cardamom for a twist—my family loves the subtle complexity it brings.
- Less sugar: If you prefer a less sweet filling, just reduce the sugars a bit; the apples still shine through wonderfully.
- Gluten-Free: Using cornstarch makes this filling naturally gluten-free, perfect if you’re accommodating friends or family.
- Diced vs. sliced apples: For pies, I stick to slices, but diced works great for tarts or as a quick topping for oatmeal or yogurt.
How to Make Apple Pie Filling Recipe
Step 1: Prep Your Apples Right
Start by peeling, coring, and slicing your apples to about half-inch thickness, or dice them if you prefer smaller pieces for toppings or hand pies. I find that peeling the apples helps the filling have a smoother texture, but if you like a bit more rustic character and chew, leaving the peel on works too—just make sure to wash well.
Step 2: Cook the Filling Over Medium Heat
Heat a large skillet and melt your butter, then add all the apples, sugars, spices, salt, lemon zest, and lemon juice. Cook for 8 to 10 minutes until the apples are tender but still hold their shape. I usually stir gently but regularly, keeping the temperature below 185ºF (85ºC) to avoid mushy apples. If you’re using diced apples, check around 5 to 7 minutes—they cook a bit faster.
Step 3: Thicken and Finish the Filling
Make a slurry by mixing the cornstarch with water until smooth. Add the slurry to your skillet and stir continuously to coat the apples with that luscious syrupy glaze—this just takes about a minute. Then turn off the heat and stir in the vanilla extract to lift all the flavors. This last step always feels like magic to me, turning the filling from good to unforgettable.
Pro Tips for Making Apple Pie Filling Recipe
- Don’t Overcook Apples: Keep an eye on the heat and cook just until tender to avoid a mushy texture—this is key to a great filling.
- Use Fresh Lemon Juice: It brightens the filling and helps prevent the apples from browning while you cook.
- Cornstarch Slurry First: Always mix cornstarch with cold water before adding to the pan to avoid lumps and get that perfect glaze.
- Cool Before Storing: Let your filling reach room temperature before refrigerating to keep your filling fresh and tasty longer.
How to Serve Apple Pie Filling Recipe
Garnishes
I usually top my serving of apple pie filling with a generous dollop of whipped cream or a scoop of vanilla ice cream. Sometimes, I sprinkle a little extra cinnamon or crushed toasted pecans on top for a bit of crunch and warmth—trust me, it elevates the whole experience!
Side Dishes
This filling isn’t just for pie—you’ll love it over pancakes, waffles, or even stirred into oatmeal for breakfast. I’ve also enjoyed it warm alongside a slice of cheddar cheese for a sweet-savory treat that surprises guests every time.
Creative Ways to Present
For special occasions, I like to serve this filling in mini tart shells with a lattice pastry on top or spoon it onto puff pastry rounds for quick hand pies. It’s a simple way to impress, and kids always get excited seeing it presented in little fun shapes.
Make Ahead and Storage
Storing Leftovers
I store leftover apple pie filling in an airtight glass container in the fridge, where it keeps beautifully for up to 5 days. Just make sure it cools down fully before sealing it to avoid condensation, which can make the filling watery.
Freezing
I’ve frozen this apple pie filling successfully in portioned freezer-safe containers or zip-top bags for up to 3 months. Thaw it overnight in the fridge, then gently reheat—sometimes adding a splash of water or lemon juice revives the texture and flavor nicely.
Reheating
Reheat leftovers in a saucepan over low heat, stirring frequently to prevent sticking. You’ll find that warming it slowly keeps the apples tender and the glaze shiny. Avoid microwaving too long to keep the filling from breaking down.
FAQs
-
Can I use other types of apples for this apple pie filling recipe?
Absolutely! While this recipe uses granny smith and honeycrisp for the perfect balance of tartness and sweetness, you can swap in Fuji, Braeburn, or Pink Lady apples. Just be mindful of the texture; some apples are softer and might cook down more quickly.
-
How long does homemade apple pie filling last in the fridge?
When stored properly in an airtight container, this apple pie filling lasts up to 5 days in the refrigerator. Always let it cool completely before refrigerating to maintain the best texture and flavor.
-
Can I make this apple pie filling recipe ahead of time?
Yes! This filling is great made ahead. You can prepare it up to 3 days before serving, refrigerate it, and reheat gently when ready. It’s perfect for busy days or entertaining guests.
-
Is it possible to make this recipe vegan?
Definitely! Simply substitute the unsalted butter with a vegan butter or coconut oil, and keep the rest of the ingredients the same for a delicious plant-based version.
-
Can I use fresh or dried spices for this recipe?
Fresh ground spices always taste best here, as they release more flavor and aroma. However, if you only have dried spices, they’ll work too—just slightly reduce the quantity to avoid overpowering the apples.
Final Thoughts
This Apple Pie Filling Recipe is one of those kitchen treasures I’m so happy to share. It’s straightforward, reliable, and endlessly adaptable to whatever you have on hand or whatever mood you’re in. When you make it yourself, you’ll notice the difference that fresh ingredients and just the right technique bring—trust me, your desserts and breakfasts will thank you! So grab those apples, and let’s get cooking; I promise you’ll love having this filling ready for all your cozy cravings.
Print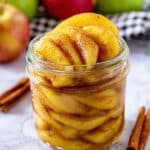
Apple Pie Filling Recipe
- Prep Time: 20 minutes
- Cook Time: 10 minutes
- Total Time: 30 minutes
- Yield: 10 servings 1x
- Category: Dessert Filling
- Method: Stovetop
- Cuisine: American
Description
This easy and flavorful Apple Pie Filling recipe combines tender Granny Smith and Honeycrisp apples cooked with warm spices and a buttery, lightly sweetened glaze. Perfect for use as a pie filling, topping for desserts, or a delicious addition to pastries, this versatile filling comes together quickly on the stovetop and can be enjoyed warm or chilled.
Ingredients
Apples
- 1 ½ pounds (681 g) Granny Smith apples
- 1 ½ pounds (681 g) Honeycrisp apples, Fuji, or Braeburn
Filling Base
- ¼ cup (60 g) unsalted butter
- ¼ cup (50 g) granulated sugar
- ¼ cup (50 g) dark brown sugar, packed
- 1 teaspoon (2 g) ground cinnamon
- ¼ teaspoon ground nutmeg
- ¼ teaspoon ground cloves
- ⅛ teaspoon kosher salt
- ¼ teaspoon lemon zest
- 2 teaspoons (10 ml) lemon juice
Thickening and Flavoring
- 2 tablespoons (15 g) cornstarch
- ¼ cup (60 ml) water
- ½ teaspoon (2.5 ml) vanilla extract
Instructions
- Prepare the Apples: Peel, core, and cut the apples into ½ inch thick slices. For a smaller cut suitable for pastries or toppings, dice the apples into ½ inch pieces.
- Cook the Apple Filling: Heat a large skillet over medium heat. Melt the unsalted butter in the skillet, then add the apple slices or dices along with the granulated sugar, dark brown sugar, ground cinnamon, nutmeg, cloves, kosher salt, lemon zest, and lemon juice. Sauté the mixture, stirring occasionally, until the apples become tender but remain intact and most of their moisture has cooked off, about 8 to 10 minutes for sliced apples or 5 to 7 minutes for diced apples. Ensure the apples do not exceed 185ºF (85ºC) to prevent them from becoming mushy.
- Thicken the Filling: In a small bowl, whisk together cornstarch and water to make a slurry. Pour the slurry into the skillet with the apples and continue stirring until the mixture thickens and coats the apples in a syrupy glaze, around 1 minute. Remove the skillet from heat and stir in the vanilla extract for added flavor.
- To Serve: Use the apple pie filling immediately as a warm topping, or allow it to cool completely. Once cooled, transfer to storage containers and refrigerate or freeze until ready to use in pies, pastries, or desserts.
Notes
- Choose a mix of tart Granny Smith and sweeter Honeycrisp, Fuji, or Braeburn apples for balanced flavor and texture.
- Do not overcook the apples or heat them above 185ºF to avoid a mushy consistency.
- The filling can be made ahead and stored refrigerated for up to 5 days or frozen for up to 3 months.
- Adjust the sugar amount to taste depending on the tartness of your apples.
- Use this filling not only for pies but also as a topping for pancakes, waffles, ice cream, or yogurt.
Nutrition
- Serving Size: 1/10th of recipe (~150g)
- Calories: 120 kcal
- Sugar: 20 g
- Sodium: 40 mg
- Fat: 4 g
- Saturated Fat: 2.5 g
- Unsaturated Fat: 1 g
- Trans Fat: 0 g
- Carbohydrates: 28 g
- Fiber: 3 g
- Protein: 0.5 g
- Cholesterol: 10 mg


