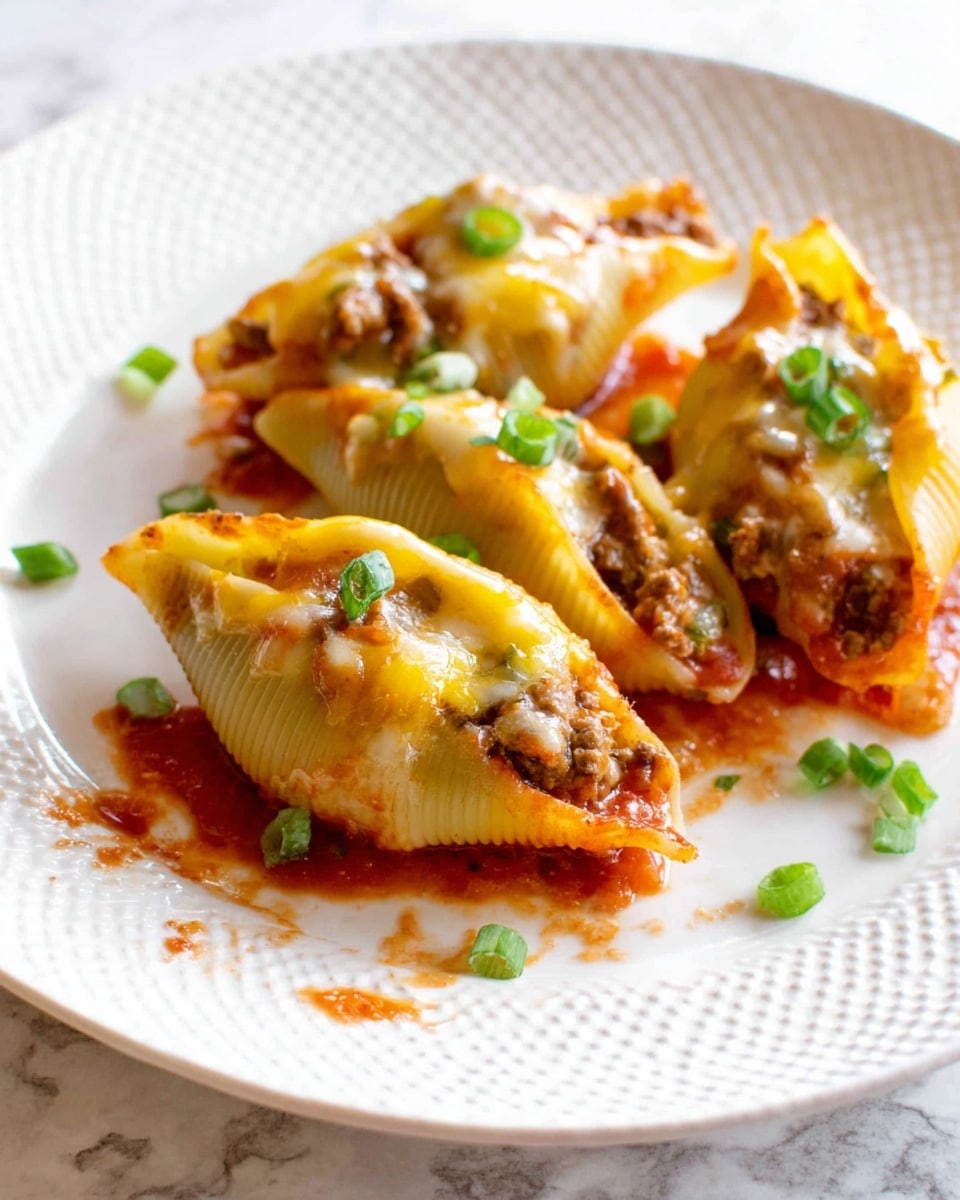
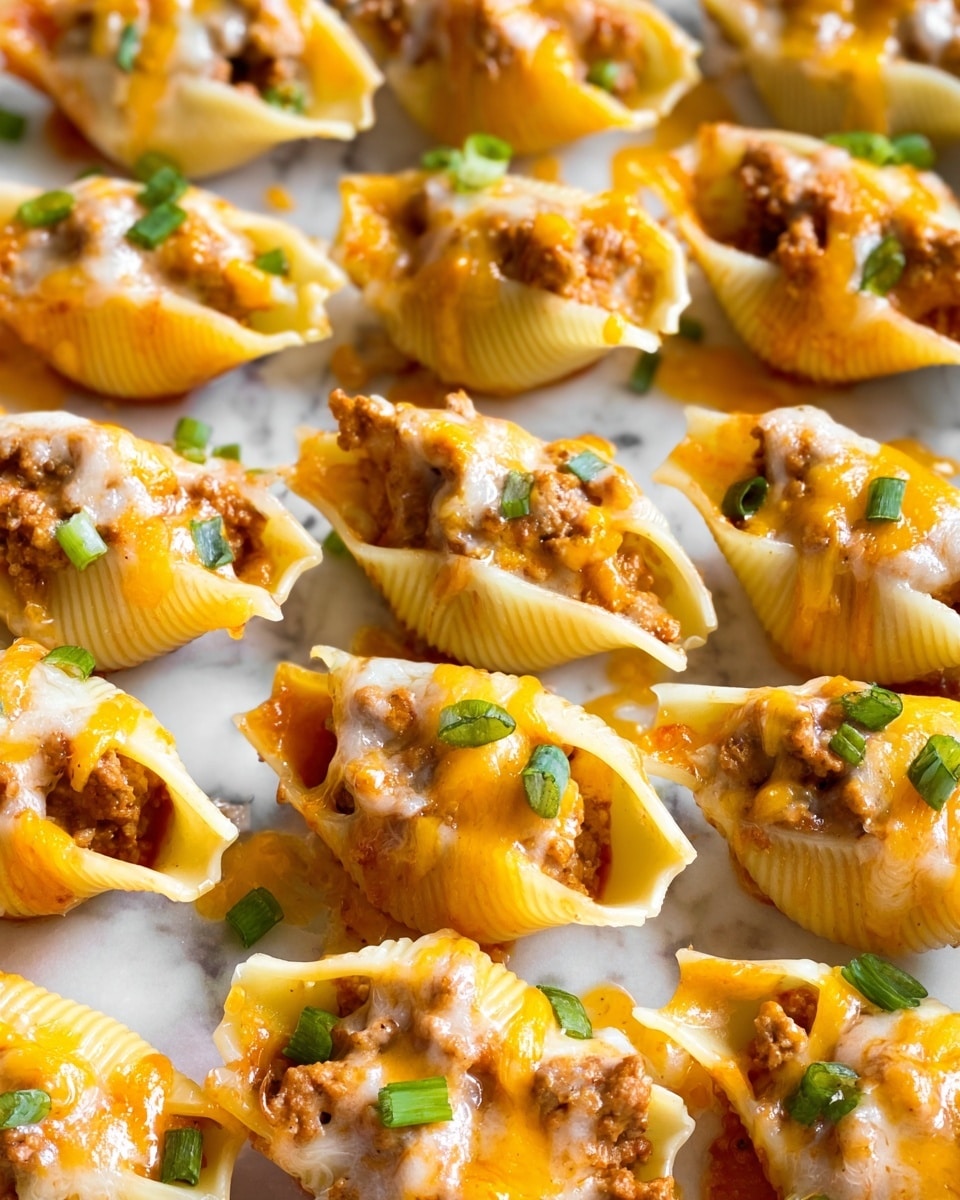
I absolutely love this Mexican Stuffed Shells Recipe because it brings together all my favorite Mexican flavors wrapped in a comforting pasta dish. It’s one of those meals that feels indulgent but is surprisingly easy to make, perfect for busy weeknights or casual weekend dinners. Plus, it’s a huge hit with my family and guests, who go crazy for the cheesy, saucy goodness packed inside each shell.
What makes this recipe truly special is how versatile it is—you can tweak the meat, cheese, or spice level to suit your tastes, and it still turns out fantastic every time. When I first tried making Mexican Stuffed Shells, I was amazed by how the cream cheese adds this velvety texture that ties everything together beautifully. If you’re looking for a fresh twist on classic stuffed shells, this Mexican-inspired version is definitely worth trying.
Why You’ll Love This Recipe
- Rich, Flavorful Filling: The blend of seasoned ground beef with cream cheese creates a creamy, zesty filling you’ll crave.
- Simple to Prepare: You just need a handful of ingredients and straightforward steps that even weeknight cooks will appreciate.
- Perfect for Crowd-Pleasers: This recipe easily scales up and is always a hit at dinner parties or family gatherings.
- Customizable: You can swap proteins, cheeses, or sauces to match your preferences or what’s in your pantry.
Ingredients You’ll Need
The ingredients here come together in a balanced way—the seasoned beef packs a punch, while the cheeses bring creamy, melty comfort. A good-quality salsa and taco sauce add a lively, tangy base that complements the pasta shells beautifully.
- Ground beef (or ground turkey): I sometimes swap in ground turkey for a leaner option, but beef’s richness really shines here.
- Low-sodium taco seasoning: Using low-sodium lets you control the salt better and prevents overpowering the filling.
- Cream cheese: This is the secret weapon—it makes the filling wonderfully smooth and creamy.
- Jumbo pasta shells: Jumbo shells are perfect for stuffing and holding all that delicious filling.
- Salsa: Choose a salsa with good flavor but not too watery to avoid soggy shells.
- Taco sauce: This adds an extra layer of Mexican flair and ties the dish together.
- Cheddar cheese: Sharp cheddar melts nicely and adds a bold cheesy bite.
- Monterrey jack cheese: It’s milder but melts beautifully, balancing the cheddar.
- Green onions: Fresh and crunchy garnish that brightens the dish.
- Sour cream: A classic topping to cool down the spices and add creaminess.
Variations
I love to make this Mexican Stuffed Shells Recipe my own by switching up the protein or adding extra veggies. It’s such a flexible base that experimenting is fun and really tasty.
- Ground turkey or chicken: For a lighter twist, I swap beef with ground turkey, which keeps it just as flavorful but a bit leaner.
- Vegetarian: You can skip the meat and fill shells with a mixture of sautéed mushrooms, black beans, and corn spiced with taco seasoning.
- Spicy kick: Adding diced jalapeños or a splash of hot sauce to the filling amps up the heat if you like things fiery.
- Cheese blend: Experiment with pepper jack or a Mexican cheese blend for more authentic flavor.
- Seasonal veggies: Toss in chopped bell peppers or zucchini for extra color and nutrition.
How to Make Mexican Stuffed Shells Recipe
Step 1: Cook and Season the Meat Filling
Heat a skillet over medium heat and brown your ground beef (or turkey) until fully cooked, breaking it apart as it cooks. Drain any excess fat, then stir in the taco seasoning with a bit of water following the package instructions. Once seasoned, add the cream cheese, cover the pan, and let it simmer until the cream cheese melts into the mixture. This step is key because the cream cheese adds that smooth creaminess that you don’t want to skip. Set the filling aside to cool completely before stuffing—the cooler temp makes it easier to handle.
Step 2: Prepare the Jumbo Shells
Cook your jumbo pasta shells according to the package directions—usually a quick boil until just tender but still firm. Be sure to drain them carefully and lay them out separately on a baking sheet or cutting board so they don’t stick together. I’ve learned this little trick saves so much frustration when you’re stuffing them later. If they stick, it’s tough to keep the filling inside without tearing the pasta.
Step 3: Stuff and Assemble the Dish
Preheat your oven to 350°F. Spread the salsa evenly on the bottom of a 9×13 baking dish—this not only adds flavor but keeps the shells from sticking to the dish. Then, spoon about 1 to 2 tablespoons of the meat mixture into each shell. Place the shells open side up in the baking dish, fitting them snuggly so they bake evenly. Next, pour the taco sauce over the shells to coat them beautifully before covering the dish with foil.
Step 4: Bake and Add Cheese
Bake covered for 15 to 20 minutes, allowing the flavors to meld and the shells to soften just right. Then, pull off the foil and sprinkle cheddar and Monterrey jack cheese over the top. Pop it back in the oven without the foil for another 5 to 10 minutes so the cheese melts and develops a golden, bubbly finish. This last step makes all the difference—I always peek in to make sure the cheese doesn’t overcook and dry out.
Step 5: Garnish and Serve
Once the cheese is perfectly melted, remove from the oven and sprinkle chopped green onions on top for freshness and crunch. Serve with a dollop of sour cream and extra salsa on the side. I’ve found that these simple garnishes elevate the dish to a restaurant-worthy meal you’ll want to make again and again.
Pro Tips for Making Mexican Stuffed Shells Recipe
- Cool the Filling Before Stuffing: Stuffing becomes much easier and less messy when the meat mixture isn’t hot and runny.
- Use Separate Baking Sheet for Shells: Laying out cooked shells individually prevents them from sticking and tearing during stuffing.
- Don’t Skip the Bake with Foil On: It ensures shells cook through without drying out before the cheesy finish.
- Watch Cheese for Browning: Keep an eye during the uncovered bake to avoid over-melting or burning the cheese topping.
How to Serve Mexican Stuffed Shells Recipe
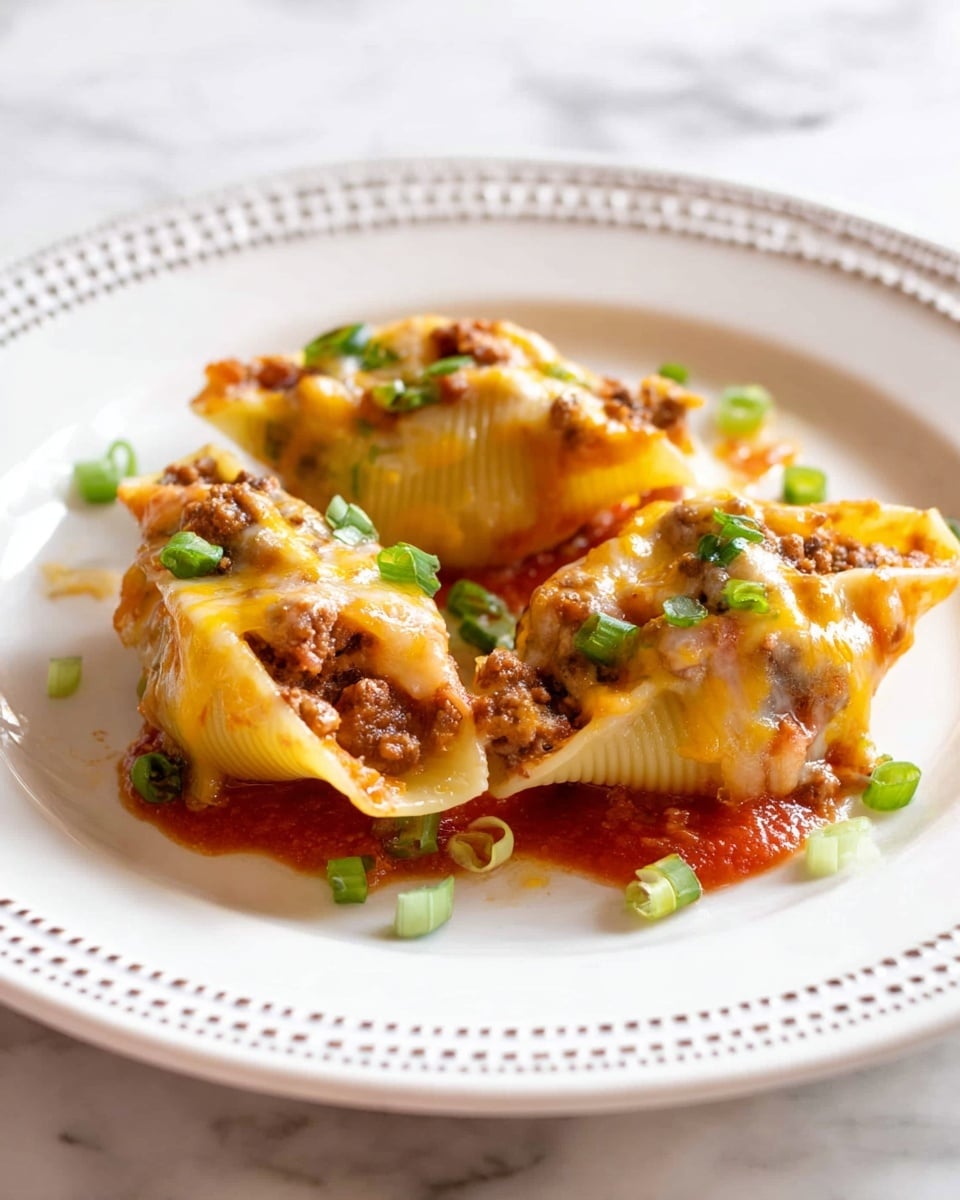
Garnishes
I’m a big fan of topping these stuffed shells with freshly chopped green onions—they add a pop of color and a mild crunch that pairs beautifully with the creamy filling. Sour cream is my go-to finishing touch because it cools down the spices and adds extra creaminess. Sometimes, I also toss on some sliced black olives or cilantro for an extra flavor boost.
Side Dishes
Serve alongside a fresh, zesty Mexican-style corn salad or a simple green salad with lime vinaigrette to keep things light and refreshing. For a heartier meal, some cilantro lime rice or black beans work perfectly and round out the meal nicely.
Creative Ways to Present
For special occasions, I like to bake the stuffed shells in individual ramekins so each person gets their own personal serving. It’s such a fun way to dress up the meal and makes for a great presentation. I also sometimes layer them in a casserole dish with alternating layers of cheese and sauce for extra cheesiness and flavor depth.
Make Ahead and Storage
Storing Leftovers
Leftover Mexican Stuffed Shells store beautifully in the fridge for up to 3 days. I like to cover the baking dish tightly with plastic wrap or transfer portions into airtight containers to keep everything fresh. When I reheat, I add a splash of water or extra salsa on top to keep the pasta moist.
Freezing
This recipe freezes really well! After assembling the shells and before baking, I cover the dish tightly with foil and pop it right into the freezer. When I’m ready to eat, I thaw overnight in the fridge and bake as usual. It’s a total lifesaver when you want a delicious homemade meal on a busy night.
Reheating
To reheat, I cover the leftovers with foil and warm them in a 350°F oven until heated through—usually about 15-20 minutes. Removing the foil in the last 5 minutes lets the cheese melt and regain its fresh-out-of-the-oven texture. Microwaving works in a pinch, but I prefer the oven to keep the shells from getting soggy.
FAQs
-
Can I make Mexican Stuffed Shells Recipe vegetarian?
Absolutely! Simply swap the ground beef for a mixture of seasoned black beans, corn, and sautéed vegetables like bell peppers or mushrooms. Use your favorite vegetarian taco seasoning and keep the rest of the recipe the same for a delicious meatless version.
-
What’s the best way to prevent jumbo shells from sticking?
After cooking, carefully drain the shells and spread them out in a single layer on a baking sheet or a cutting board without overlapping. You can also lightly brush them with olive oil if you worry about sticking, but spacing them out usually does the trick.
-
Can I prepare Mexican Stuffed Shells ahead of time?
Yes! You can assemble the stuffed shells a day in advance, cover tightly, and refrigerate until ready to bake. Just extend the baking time by about 10-15 minutes if baking straight from the fridge.
-
What cheeses work best for Mexican Stuffed Shells?
I recommend a blend of sharp cheddar and Monterrey jack because they melt well and provide a nice balance of sharpness and creaminess. You can also experiment with pepper jack for some spice or use a Mexican cheese blend if available.
-
Can I freeze leftovers after baking?
While freezing before baking gives the best texture when reheated, you can freeze baked leftovers too. Just wrap tightly and reheat gently in the oven to prevent the pasta from becoming mushy.
Final Thoughts
This Mexican Stuffed Shells Recipe holds a special place in my kitchen because it’s the perfect combo of comforting pasta and vibrant Mexican flavors—a real crowd-pleaser that’s not fussy to make. I’m confident you’ll enjoy how easy it is to bring bold, cheesy, and savory tastes to your table with minimal effort. Give it a try the next time you want a flavorful, cozy meal that feels a little different from your regular weeknight dinner—you won’t regret it!
Print
Mexican Stuffed Shells Recipe
- Prep Time: 15 minutes
- Cook Time: 30 minutes
- Total Time: 45 minutes
- Yield: 20 stuffed shells 1x
- Category: Main Course
- Method: Baking
- Cuisine: Mexican
Description
Mexican Stuffed Shells are a delicious twist on the classic Italian pasta dish, featuring jumbo pasta shells filled with seasoned ground beef and cream cheese, topped with salsa, taco sauce, and melted cheese. This crowd-pleasing recipe is perfect for family dinners and easy to customize with your favorite taco toppings like green onions and sour cream.
Ingredients
Filling
- 1 pound ground beef (or ground turkey)
- 1 package low-sodium taco seasoning
- 4 ounces cream cheese
Pasta
- 20 jumbo pasta shells (about 6 ounces)
Sauces and Cheese
- 1 1/2 cups salsa
- 1 cup taco sauce
- 1 cup cheddar cheese
- 1 cup Monterey Jack cheese
Toppings
- 3 green onions, sliced
- Sour cream, for serving
Instructions
- Preheat Oven: Preheat your oven to 350°F (175°C) to get it ready for baking the stuffed shells.
- Cook Meat Mixture: In a pan, brown the ground beef over medium heat. Add the taco seasoning and prepare according to package directions. Stir in the cream cheese, cover the pan, and simmer until the cheese melts completely. Mix well and set aside to cool.
- Cook Pasta Shells: While the meat cooks, boil the jumbo pasta shells according to package instructions until al dente. Drain and lay them flat on a cutting board or baking sheet to prevent sticking.
- Assemble Dish: Pour salsa evenly on the bottom of a 9×13-inch baking dish. Stuff each pasta shell with 1-2 tablespoons of the cooled meat mixture and place them open side up in the baking dish.
- Add Sauce and Bake: Pour taco sauce evenly over the stuffed shells. Cover the dish with foil and bake for 15-20 minutes to heat through.
- Add Cheese and Finish Baking: Remove the foil and sprinkle shredded cheddar and Monterey Jack cheese evenly over the shells. Bake uncovered for another 5-10 minutes, or until the cheese is melted and bubbly.
- Garnish and Serve: Top with sliced green onions or olives if desired. Serve warm with sour cream and extra salsa on the side.
Notes
- You can substitute ground turkey or even plant-based meat alternatives to customize the protein.
- For a spicier dish, use a spicy salsa or add chopped jalapeños.
- Prepare the meat mixture ahead of time to save on assembly day.
- Leftovers keep well in the refrigerator for up to 3 days and reheat nicely in the oven or microwave.
Nutrition
- Serving Size: 1 stuffed shell
- Calories: 190
- Sugar: 3g
- Sodium: 380mg
- Fat: 9g
- Saturated Fat: 5g
- Unsaturated Fat: 3g
- Trans Fat: 0g
- Carbohydrates: 15g
- Fiber: 1.5g
- Protein: 11g
- Cholesterol: 40mg

