

This incredibly satisfying homemade white bread is everything you want in a loaf – soft, fluffy interior with a golden crust that’s remarkably simple to make. Perfect for sandwich-making, toast, or simply enjoying with a pat of butter, this recipe proves that baking bread at home doesn’t need to be complicated. With just a handful of basic ingredients and some patience for rising time, you’ll have two gorgeous loaves that will fill your home with that irresistible freshly-baked bread aroma.
Why You’ll Love This Recipe
- Truly No-Fuss: Don’t let bread-making intimidate you! This recipe is designed for success, even if you’re a first-time bread baker.
- Everyday Ingredients: Everything you need is probably already in your pantry – no specialty flours or additives required.
- Versatile: These loaves work beautifully for sandwiches, French toast, bread pudding, or simply toasted with your favorite spread.
- Cost-Effective: Making your own bread costs a fraction of what you’d pay for artisan bread at bakeries or even grocery stores.
- Impressive Results: There’s something deeply satisfying about pulling gorgeous golden loaves from your oven that you made with your own hands.

Ingredients You’ll Need
- All-purpose flour: The foundation of our bread that provides structure. No need for fancy bread flour here!
- Nonfat dry milk: This gives the bread a tender crumb and helps create that beautiful golden crust.
- Granulated sugar: Provides food for the yeast and adds a subtle sweetness that balances the flavors.
- Unsalted butter: Adds richness and tenderness to the crumb. Make sure it’s softened for easy incorporation.
- Active dry yeast: The magical ingredient that makes our bread rise. Always check the expiration date!
- Kosher salt: Enhances all the flavors and strengthens the gluten structure.
- Warm water: Activates the yeast and brings the dough together. Temperature matters – aim for about 115°F (warm but not hot).
- Melted butter (optional): For brushing on top after baking, creating an irresistibly soft, shiny crust.
Note: You’ll find the complete list of ingredients, along with their exact measurements, in the printable recipe card at the bottom of this post.
Variations
Want to customize your bread? Here are some delicious options to try:
- Herb Bread: Add 2 tablespoons of fresh herbs like rosemary, thyme, or basil to the dough for a fragrant loaf.
- Honey Wheat: Replace the sugar with honey and substitute 2 cups of whole wheat flour for part of the all-purpose flour.
- Cinnamon Swirl: Roll the dough out flat, sprinkle with cinnamon sugar, then roll up before placing in the loaf pan.
- Garlic Cheese: Add 1/4 cup grated parmesan and 1 tablespoon garlic powder to the dough for a savory variation.
- Multigrain: Add 1/4 cup of mixed seeds (like sunflower, flax, and sesame) to the dough for extra texture and nutrition.
How to Make No Fuss Easy Homemade White Bread
Step 1: Mix the Dough
Add 2 cups of flour, dry milk, sugar, softened butter, yeast, and salt to your stand mixer bowl. Give it a few turns with the dough hook just to combine the ingredients. Pour in the warm water and mix until everything comes together.
Step 2: Add Remaining Flour
With the mixer on low speed, gradually add more flour until you’ve added 5 cups total. Increase to medium-high speed, watching for the dough to clean the sides of the bowl (usually takes a couple of minutes). If needed, add up to 1/2 cup more flour, a little at a time, until the dough pulls away from the sides.
Step 3: Knead and First Rise
Continue kneading with the mixer on medium-high for 10 minutes until the dough becomes smooth and elastic. Lightly coat the dough with cooking spray, cover the bowl with plastic wrap, and let it rise in a warm spot for about an hour, or until doubled in size.
Step 4: Shape the Loaves
After the first rise, punch down the dough to release air bubbles. Turn it out onto a lightly floured surface and knead briefly by hand (about 1 minute). Divide the dough into two equal pieces and shape each into a log. Place each log in a greased 9×5 loaf pan.
Step 5: Second Rise and Bake
Allow the shaped loaves to rise uncovered until doubled in size, about 30-45 minutes. Meanwhile, preheat your oven to 400°F. Once the loaves have doubled, make an optional slice down the center with a sharp knife. Place them in the oven and immediately reduce the temperature to 350°F. Bake for 30-35 minutes until beautifully golden brown.
Step 6: Finish and Cool
For an extra touch of richness, brush the hot loaves with melted butter right after taking them out of the oven. Let them cool in the pans for 5 minutes, then transfer to a wire rack to cool completely.
Pro Tips for Making the Recipe
- Temperature Matters: The water should feel comfortably warm to the touch (115°F) – too hot will kill the yeast, too cool won’t activate it properly.
- Kneading Indicator: Properly kneaded dough will pass the “windowpane test” – stretch a small piece thin enough to see light through without tearing.
- Rise Environment: Create an ideal rising spot by preheating your oven for just a minute, then turning it off and placing the dough inside the slightly warm oven.
- Measure Flour Correctly: Spoon flour into measuring cups and level off with a knife rather than scooping directly with the measuring cup, which compacts the flour.
- Visual Cues: Trust how your dough looks and feels more than strict timing – humidity and kitchen temperature affect rising times.
How to Serve

This versatile bread shines in so many ways:
For Breakfast:
Toast slices and serve with butter and jam, or transform into spectacular French toast soaked in egg batter with a hint of cinnamon.
For Lunch:
Create the ultimate sandwich with your favorite fillings – the sturdy yet tender crumb holds up beautifully to anything from deli meats to peanut butter and jelly.
For Dinner:
Serve warm slices alongside soups or stews for dipping, or spread with garlic butter and toast for quick homemade garlic bread.
As a Snack:
A simple slice with butter and honey makes a satisfying treat any time of day.
Make Ahead and Storage
Storing Leftovers
Keep your bread fresh by storing it in a bread box or paper bag at room temperature for 2-3 days. Avoid refrigerating, as this actually speeds up the staling process.
Freezing
These loaves freeze beautifully! Once completely cooled, wrap tightly in plastic wrap, then aluminum foil or place in a freezer bag. Freeze for up to 3 months.
Reheating
For that fresh-baked taste, wrap frozen or day-old bread in foil and warm in a 300°F oven for about 15 minutes. For individual slices, simply toast from frozen or room temperature.
FAQs
-
Can I make this bread without a stand mixer?
Absolutely! Mix the ingredients with a wooden spoon until combined, then turn out onto a floured surface and knead by hand for about 10-12 minutes until smooth and elastic. The process takes a bit more muscle but gives equally delicious results.
-
Why didn’t my bread rise properly?
Several factors could affect rising: Check that your yeast is fresh and not expired. Ensure your water temperature is warm (around 115°F) but not hot. Also consider the environment – bread rises best in a warm, draft-free area. If your kitchen is cold, try creating a warm spot by briefly heating your oven, then turning it off.
-
Can I use bread flour instead of all-purpose flour?
Yes! Bread flour has a higher protein content which can give you an even chewier texture and higher rise. The recipe works beautifully with either flour, so use what you have on hand.
-
My bread crust got too dark before the inside was done. What happened?
This usually happens when the oven temperature is too high. Make sure you lower the temperature to 350°F right after putting the loaves in. You can also tent the bread with aluminum foil halfway through baking if you notice it browning too quickly.
Final Thoughts
There’s something truly magical about pulling freshly baked bread out of your own oven – a simple pleasure that connects us to generations of bakers before us. This no-fuss white bread recipe proves that homemade bread doesn’t need to be complicated or time-consuming. Give it a try this weekend and experience the joy of creating something so basic yet so satisfying from scratch. Your house will smell amazing, and you’ll have the deep satisfaction of knowing exactly what went into your family’s bread. Happy baking!
Print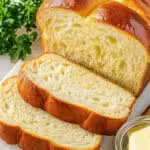
No Fuss Easy Homemade White Bread Recipe
- Prep Time: 20 minutes
- Cook Time: 35 minutes
- Total Time: 1 hour 45 minutes
- Yield: 24 servings 1x
- Category: Bread
- Method: Baking
- Cuisine: American
Description
This easy homemade white bread recipe is perfect for beginners and seasoned bakers alike. With a soft, fluffy texture and golden crust, it’s a no-fail way to enjoy fresh, delicious bread at home. Whether you’re making sandwiches or enjoying it with a smear of butter, this versatile bread will quickly become your go-to recipe.
Ingredients
Dry Ingredients
- 5 1/2 cups all-purpose flour
- 1/4 cup nonfat dry milk
- 3 tablespoons granulated sugar
- 2 teaspoons kosher salt
Wet Ingredients
- 3 tablespoons unsalted butter, softened
- 2 1/4 teaspoons active dry yeast
- 2 cups warm water (115°F)
- 2 tablespoons melted butter (optional, for brushing)
Instructions
- Prepare the Dry Mixture
To the bowl of a stand mixer fitted with a dough hook, add 2 cups of the flour, dry milk, sugar, butter, yeast, and salt. Mix a few turns to combine the ingredients. - Add Water
Pour in 2 cups of warm water, making sure the water is at 115°F to properly activate the yeast. Mix thoroughly to incorporate. - Incorporate Remaining Flour
Slowly add the remaining flour, a little at a time, on low speed, until you’ve added around 5 cups. Increase the speed to medium-high, allowing the dough to knead. Ensure the dough begins to clean the sides of the bowl. If not, add a little more flour (up to ½ cup) until it forms a cohesive dough. - Knead the Dough
Continue mixing on medium-high speed for about 10 minutes. The dough should be smooth and elastic. Lightly spray the dough with cooking spray, roll it in the bowl to coat, cover with plastic wrap, and let it rise in a warm spot for about 1 hour, or until doubled in size. - Punch and Knead
Remove the plastic wrap and punch the dough in the bowl to release the air bubbles. Lightly flour a clean surface, knead the dough by hand for about 1 minute to remove any remaining bubbles. - Prepare the Loaf Pans
Spray two 9×5 loaf pans with cooking spray. Divide the dough into 2 equal portions. Shape each portion into a log and place in the prepared pans. - Second Rise
Allow the dough to rise again in the loaf pans until doubled in size. This will take about 30-45 minutes. No need to cover the dough during this second rise. - Bake the Bread
Preheat your oven to 400°F while the dough rises. Once the bread has doubled in size, you can make a decorative slit down the center if desired. Place the pans in the oven, immediately lowering the temperature to 350°F. Bake for 30-35 minutes, or until golden brown. - Brush with Butter
If using melted butter, brush it over the tops of the loaves right after they come out of the oven for a soft, glossy crust. Let the bread cool in the pan for 5 minutes. - Cool and Slice
Remove the loaves from the pans and let them cool completely on a wire rack before slicing. Enjoy your homemade white bread!
Notes
- Water Temperature: Use warm water, not hot, to properly activate the yeast. Hot water can kill the yeast.
- Rise Times: Be patient with both the first and second rises for a lighter, fluffier bread.
- Kneading: Ensure the dough is smooth and elastic. This is crucial for achieving the right texture.
- Covering During First Rise: Use plastic wrap or a kitchen towel to prevent the dough from drying out.
- Soft Crust Tip: Brushing melted butter on top of the bread while it’s warm will result in a soft crust.
- Slicing: Always allow the bread to cool completely for cleaner slices, although it’s tempting to dig in immediately!
Nutrition
- Serving Size: 1 slice
- Calories: 125
- Sugar: 2g
- Sodium: 150mg
- Fat: 2g
- Saturated Fat: 1g
- Unsaturated Fat: 1g
- Trans Fat: 0g
- Carbohydrates: 24g
- Fiber: 1g
- Protein: 4g
- Cholesterol: 5mg


