

If you’re craving something that feels like a cozy fall evening but you want dinner on the table fast, this Apple Crisp Recipe is exactly what you need. It’s got that perfect blend of sweet and tart apples baked under a buttery, crunchy topping that just melts in your mouth. Honestly, I absolutely love how this recipe turns out every single time — it’s a family favorite that makes the kitchen smell divine and the whole house feel warm and inviting. Stick around, because I’m going to share everything you need to know to nail it perfectly!
Why You’ll Love This Recipe
- Simple Ingredients: You probably already have most of what you need in your pantry and fridge.
- Perfect Texture Balance: Crispy crunchy topping paired with juicy soft apples every time.
- Great for Any Occasion: Whether it’s a casual weeknight or a holiday dessert, it shines.
- Kid-Approved and Crowd-Pleasing: My family literally goes crazy for this one — and I’m betting yours will, too.

Ingredients You’ll Need
Choosing the right apples and topping components is key here. I always reach for firm, crisp apples so the texture contrasts nicely with that buttery topping. The rest of the ingredients work together to create the perfect balance of sweetness, spice, and crunch.

- Apples: Honeycrisp or Granny Smith give a great tart crunch without turning mushy.
- Brown sugar: Adds rich molasses sweetness to the topping and complements the apples beautifully.
- Rolled oats: For that classic chewy, crunchy crisp topping texture.
- Flour: Helps bind the topping together without weighing it down.
- Cinnamon: A must-have warm spice that brings all the flavors together.
- Butter: Use cold, unsalted butter for a flaky, buttery crisp texture.
- Salt: Just a pinch to balance sweetness and enhance flavor.
Variations
One of the best things about an Apple Crisp Recipe is how easily you can tweak it to suit your taste or dietary needs. I love playing around with different nuts or spices to give it a little twist, and you absolutely should too!
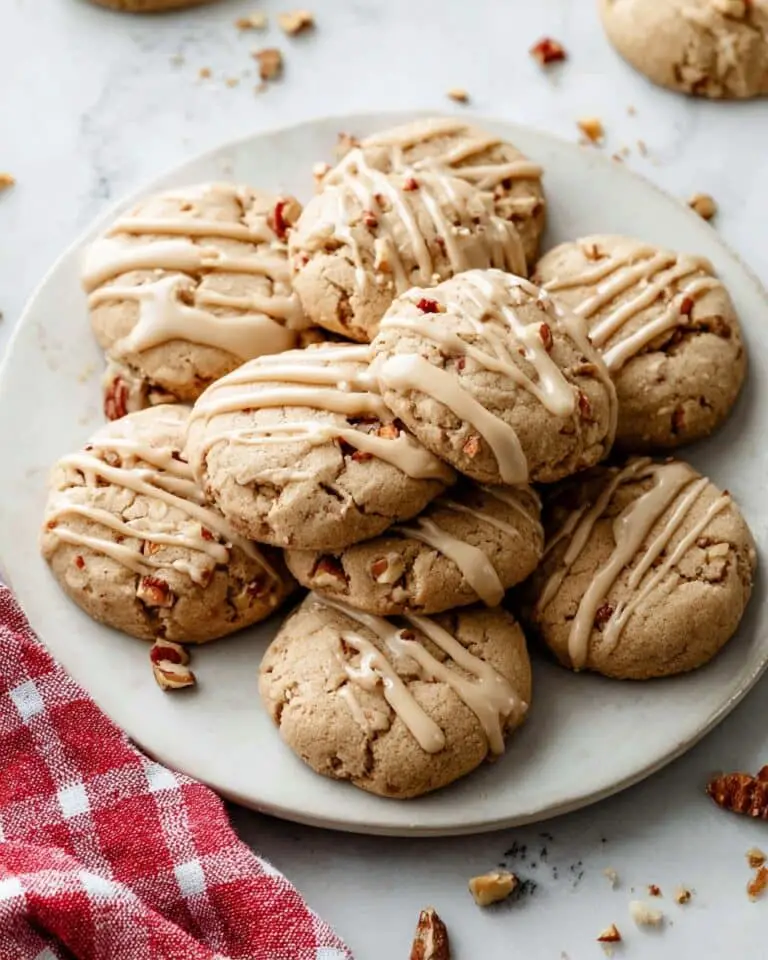
- Nutty Upgrade: I like adding chopped pecans or walnuts to the crisp topping for an extra crunch — it instantly feels more indulgent.
- Gluten-Free Version: Swap all-purpose flour for almond or oat flour, and use gluten-free oats to keep it safe for gluten-sensitive friends.
- Spice it Up: Try adding a pinch of nutmeg or ginger for warm, fragrant layers of flavor that complement the apples beautifully.
- Healthier Twist: Use coconut sugar instead of brown sugar, and reduce the butter slightly. It still tastes amazing without feeling heavy.
How to Make Apple Crisp Recipe
Step 1: Prep Your Apples for Success
Start by peeling (if you prefer), coring, and slicing your apples into half-inch thick slices. I like to keep the peel on because it adds beautiful color and texture, plus extra nutrients. Toss them in a bowl with a bit of lemon juice to keep them from browning and sprinkle with cinnamon and a touch of sugar — this really helps the flavor pop.
Step 2: Craft Your Crispy Topping
In a mixing bowl, combine flour, oats, brown sugar, cinnamon, and salt. Cut in chilled butter with your fingers or a pastry cutter until the mixture resembles coarse crumbs. The bits of butter are what make the topping perfectly flaky and crumbly — don’t skip chilling it beforehand!
Step 3: Assemble and Bake
Spread the apples evenly in your baking dish, then sprinkle that gorgeous crisp topping all over. Pop it in a preheated 350°F (175°C) oven for about 40-45 minutes. You’ll want to bake until the topping is golden brown and the apples are bubbly and soft. I like to peek around the 35-minute mark just to make sure it’s progressing nicely — ovens vary!
Step 4: Let it Rest Before Diving In
Once out of the oven, I let my apple crisp rest for at least 10 minutes. This helps the juices settle so everything isn’t lava-hot but stays warm and delicious. Plus, it’s a good excuse to grab a scoop of vanilla ice cream or a dollop of whipped cream.
Pro Tips for Making Apple Crisp Recipe
- Choose Firm Apples: I’ve learned that Honeycrisp or Granny Smith hold their shape well and give the best texture contrast to the crisp topping.
- Cold Butter is Key: Cutting in cold butter rather than melted creates that perfect crumbly, flaky topping we all crave.
- Don’t Overmix the Topping: Mix just until crumbs form — overworking breaks down the butter and ruins the texture.
- Watch Your Oven Time: Every oven is different, so check for golden topping and bubbly filling around 40 minutes to avoid drying it out.
How to Serve Apple Crisp Recipe
Garnishes
My go-to garnish is a generous scoop of vanilla bean ice cream that slowly melts into the warm apple crisp. Sometimes I sprinkle chopped toasted pecans on top for a little extra crunch and a drizzle of caramel sauce if I’m feeling fancy. If I’m serving it right away, a bit of fresh whipped cream laced with cinnamon never fails to impress.
Side Dishes
This dessert pairs beautifully with a hot cup of coffee or a spiced chai latte. For a heartier meal, I like serving it alongside roasted pork or cinnamon-glazed ham — the sweet and tart apple crisp cuts through the richness perfectly.
Creative Ways to Present
For Thanksgiving or special family dinners, I love baking the apple crisp in individual ramekins — it feels so personal and fancy serving it this way. You could also layer it in a trifle dish with whipped cream and caramel for a showstopping presentation that still keeps the flavors front and center.
Make Ahead and Storage
Storing Leftovers
I usually let the leftover apple crisp cool completely, then cover it tightly with plastic wrap or transfer to an airtight container. It keeps beautifully in the fridge for up to 4 days, and the flavors even deepen overnight. Just warm it slightly before serving!
Freezing
Yes, you can freeze apple crisp! I like to freeze it unbaked in a foil pan covered tightly with foil and plastic wrap, then bake from frozen adding extra baking time. You can also freeze leftover slices — just wrap well in plastic and place in a freezer bag.
Reheating
To reheat, I pop it into a 325°F oven for about 15 minutes, uncovered, so the topping stays crisp instead of soggy. If I’m in a hurry, microwaving works but it softens the topping — still delicious but different texture.
FAQs
-
Can I use other types of apples in this Apple Crisp Recipe?
Absolutely! While I recommend firm apples like Honeycrisp, Granny Smith, or Braeburn for the best texture, you can mix different varieties for a more complex flavor. Just avoid overly soft apples that turn mushy when baked.
-
How do I make the topping extra crunchy?
Use cold butter cut into small pieces and don’t overmix the topping. Also, baking at 350°F and ensuring the topping is exposed (not covered) during baking helps it crisp up nicely.
-
Can I prepare Apple Crisp Recipe ahead of time?
Yes! You can assemble it a day ahead and store it covered in the fridge before baking. Just add a few extra minutes to the bake time if chilled before baking.
-
Is this recipe suitable for gluten-free diets?
You can make it gluten-free by swapping regular flour for a gluten-free flour blend and ensuring your oats are certified gluten-free. The texture and taste are still fantastic!
Final Thoughts
Honestly, this Apple Crisp Recipe feels like a warm hug on a plate. It’s the kind of dessert that brings people around the table, sparks happy memories, and leaves you wanting just one more bite. I can’t recommend making this soon enough — whether you’re new to baking crisps or it’s already a family tradition, you’re going to love how simple it is to get such amazing, comforting results. Give it a go and enjoy every delicious bite!
Print
Apple Crisp Recipe
- Prep Time: 10 minutes
- Cook Time: 20 minutes
- Total Time: 30 minutes
- Yield: 4 servings 1x
- Category: Main Course
- Method: Frying
- Cuisine: American
Description
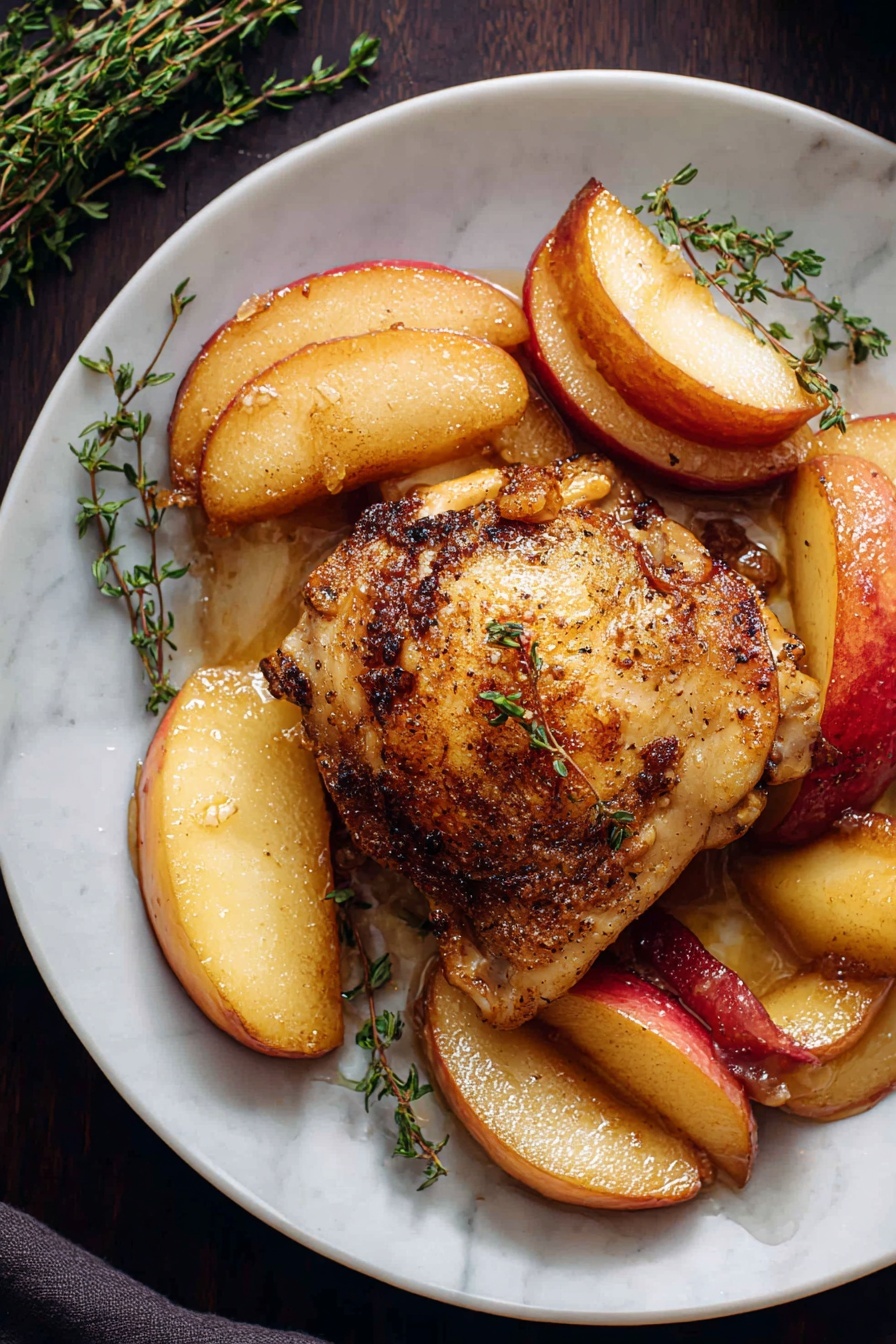
This Apple Orchard Chicken recipe features tender, juicy boneless chicken thighs seasoned with aromatic spices and cooked to golden perfection in a skillet. The dish is elevated by a luscious caramelized apple and lemon sauce, creating a perfect balance of savory and sweet flavors. Garnished with fresh thyme and lemon slices, this simple yet elegant meal is perfect for a cozy dinner or special occasion.
Ingredients
Chicken
- 2 pounds boneless skinless chicken thighs
- 1 teaspoon Italian seasoning
- ½ teaspoon paprika
- ½ teaspoon chili powder
- ½ teaspoon kosher salt
- ¼ teaspoon black pepper
- 2 tablespoons extra virgin olive oil
Apples
- 1 tablespoon unsalted butter
- ¼ cup (50 g) light brown sugar, packed
- 2 medium lemons, juiced (about 3 tablespoons)
- 2 large Honeycrisp apples, cored, sliced into ½-inch slices
- 1 medium lemon, sliced for garnish
- Fresh thyme, for garnish
Instructions
- Season the Chicken: Pat the chicken thighs dry with paper towels to remove excess moisture. Evenly season both sides with Italian seasoning, paprika, chili powder, kosher salt, and black pepper. Set aside to let the spices meld.
- Cook the Chicken: Heat the extra virgin olive oil in a large nonstick skillet over medium heat. Once hot, add the chicken thighs and cook for 6-8 minutes per side, until they develop a golden brown crust and reach an internal temperature of 165°F (74°C). Remove the chicken, place on a plate, and tent loosely with aluminum foil to keep warm.
- Prepare the Apple Sauce: In the same skillet, add the unsalted butter and let it melt over medium heat. Stir in the light brown sugar and fresh lemon juice, mixing until the sugar is completely dissolved and you scrape up any flavorful browned bits stuck to the pan.
- Cook the Apples: Add the sliced Honeycrisp apples to the skillet. Cook them for about 5 minutes, flipping halfway through, until they are slightly caramelized and softened, but still retain their shape to provide a pleasing texture contrast.
- Combine Chicken and Apples: Return the cooked chicken thighs to the skillet with the apples and sauce. Turn the chicken pieces gently to coat them thoroughly with the caramelized apple sauce, allowing flavors to meld together for a minute or two.
- Garnish and Serve: Transfer the chicken and apples to serving plates. Garnish with fresh thyme sprigs and lemon slices to add a fresh, aromatic note. Serve immediately and enjoy your flavorful Apple Orchard Chicken.
Notes
- Use Honeycrisp or another firm apple variety to ensure the slices hold their shape without turning mushy.
- Adjust seasoning and chili powder based on your preferred spice level.
- To ensure even cooking, use a meat thermometer to verify the chicken reaches 165°F internally.
- For a thicker sauce, let the apple mixture cook a little longer before adding the chicken back.
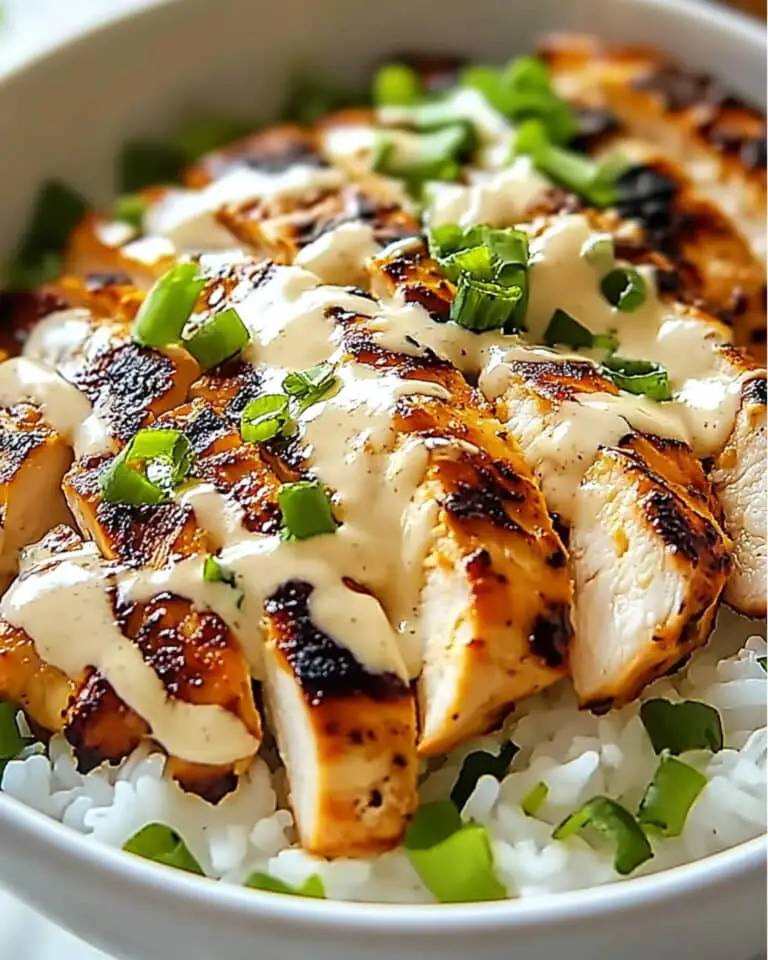
- Serve with rice, mashed potatoes, or a fresh green salad for a complete meal.
Nutrition
- Serving Size: 1 serving
- Calories: 420 kcal
- Sugar: 15 g
- Sodium: 450 mg
- Fat: 22 g
- Saturated Fat: 6 g
- Unsaturated Fat: 14 g
- Trans Fat: 0 g
- Carbohydrates: 18 g
- Fiber: 3 g
- Protein: 35 g
- Cholesterol: 110 mg


