
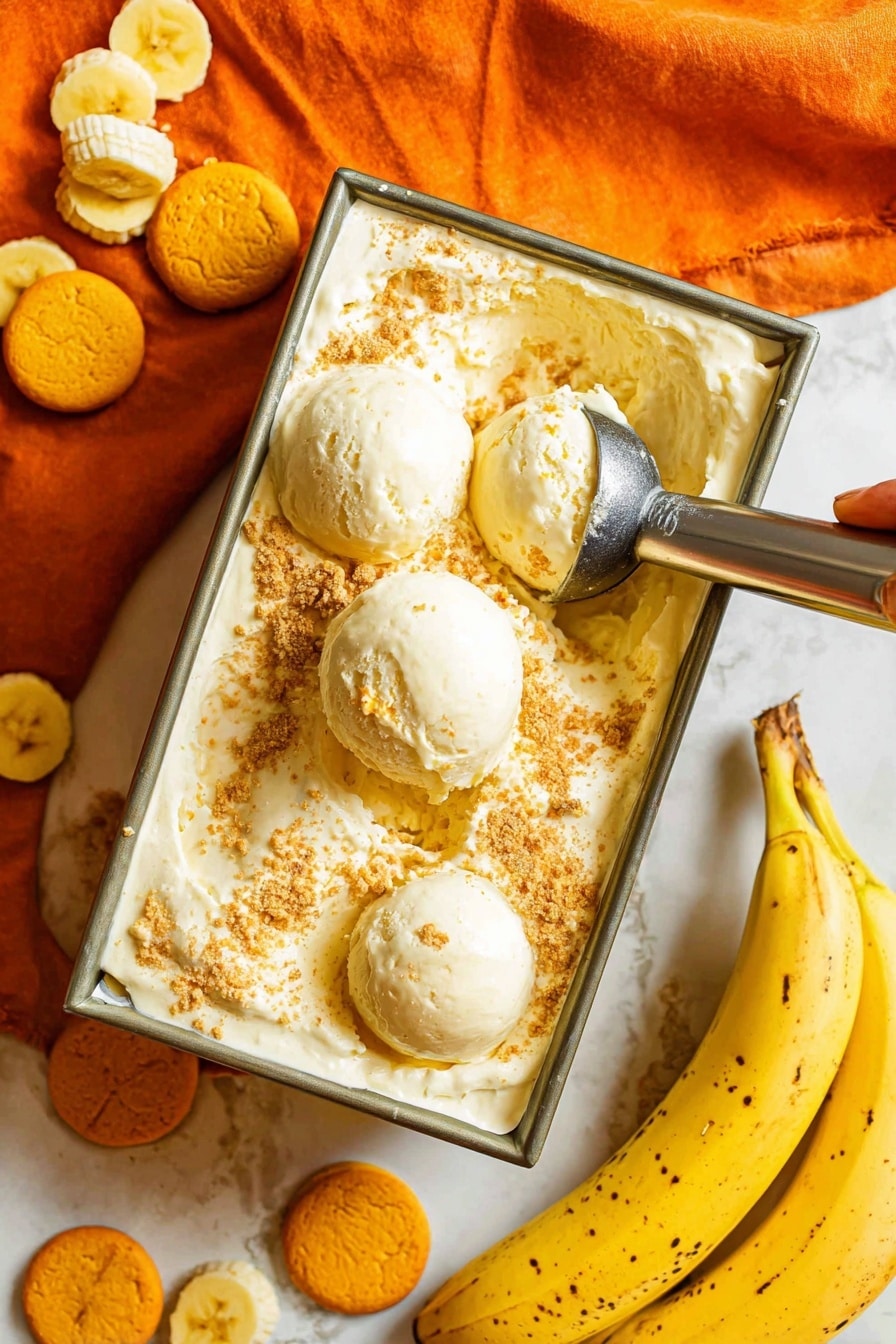
If you’ve ever wished you could combine the creamy comfort of banana pudding with the cool indulgence of ice cream—without turning on your ice cream maker—then I’ve got exactly what you need. This No-Churn Banana Pudding Ice Cream Recipe is a game changer. It’s super easy, uses everyday ingredients, and the texture? Ridiculously dreamy. I absolutely love how this turns out every single time, and I promise you’re going to get hooked too.
Why You’ll Love This Recipe
- No Ice Cream Maker Needed: You can whip this up with just a mixer, making it super accessible and easy in your kitchen.
- Authentic Banana Pudding Flavor: The combination of Nilla Wafers and ripe bananas gives it that nostalgic taste we all crave.
- Creamy, Rich Texture: Thanks to the cream cheese and heavy cream, the ice cream turns out silky smooth without any iciness.
- Flexible and Fun to Customize: You can easily tweak it with different extracts, mix-ins, or toppings for your perfect scoop.

Ingredients You’ll Need
This No-Churn Banana Pudding Ice Cream Recipe relies on simple, honest ingredients that work beautifully together. Be sure to pick ripe bananas for maximum sweetness and full flavor, and I always recommend using freshly whipped heavy cream for silky texture.
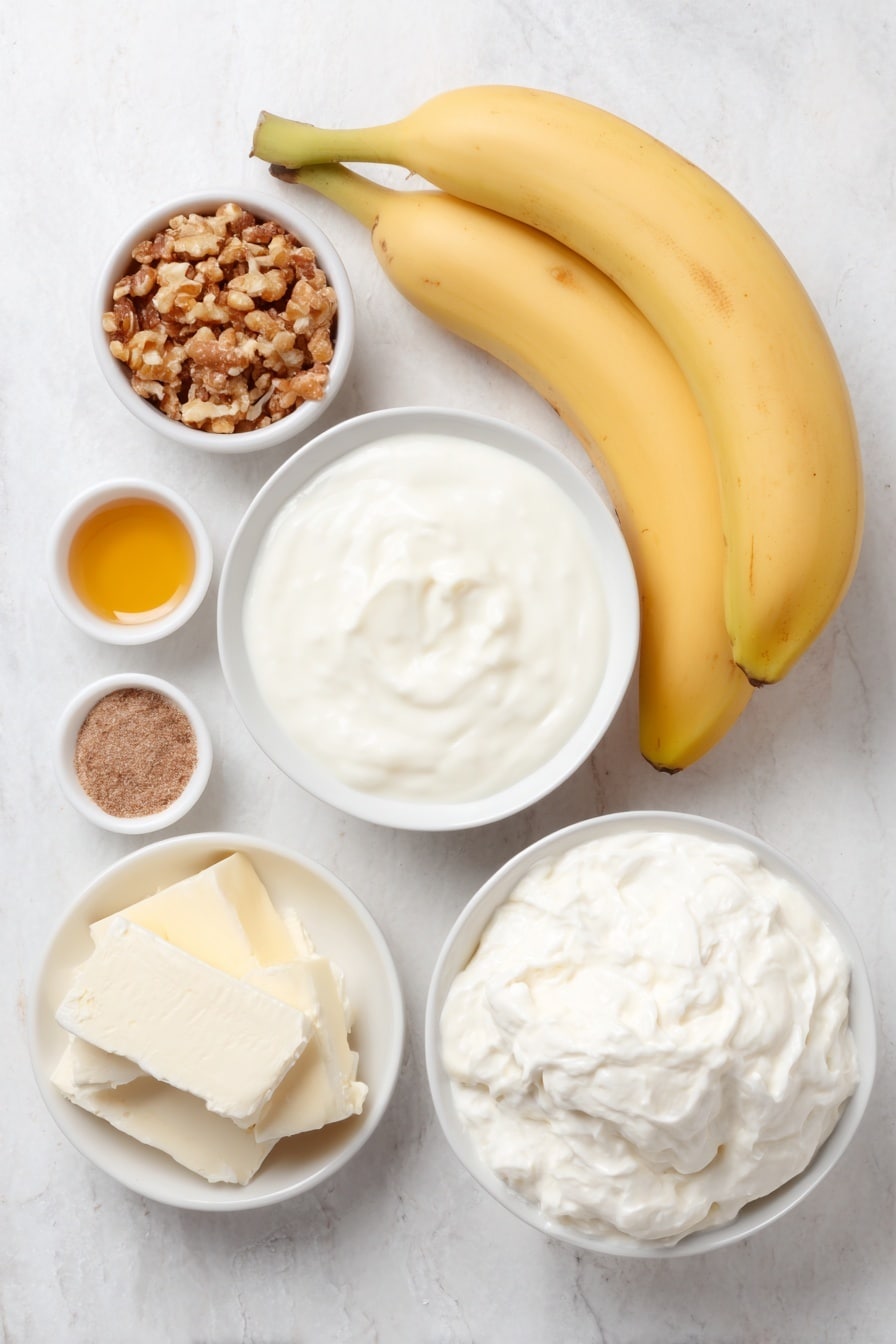
- Bananas: Use really ripe bananas—they mash easily and lend that natural sweetness we all love.
- Nilla Wafers: These classic cookies are the heart of banana pudding flavor and add a delightful crunch.
- Sweetened Condensed Milk: This adds creamy sweetness and helps keep the ice cream soft without an ice cream maker.
- Cream Cheese: Softened to room temperature, it boosts richness and adds a subtle tang for balance.
- Vanilla Extract (or Vanilla Bean Paste/Bourbon): I love vanilla bean paste if you can get it, but the others work just as well for that warm aromatic note.
- Sea Salt: Just a pinch to enhance all the sweet and creamy flavors.
- Ground Nutmeg: Adds a lovely hint of spice that really elevates the banana pudding vibe.
- Heavy Cream: Whipped to fluffy perfection, it’s the foundation for that creamy ice cream texture.
Variations
I like to think of this No-Churn Banana Pudding Ice Cream Recipe as a base that you can tweak for different moods or dietary needs. Whether you’re aiming for more indulgence or a lighter twist, there’s a way to make it your own!
- Add Chocolate Chips or Chunks: My family goes crazy for a few mini chocolate chips stirred in—like a grown-up banana split vibe.
- Dairy-Free Version: Swap heavy cream with coconut cream and cream cheese with a vegan alternative; it won’t be quite the same but still fantastic.
- Spiced Up: Try sprinkled cinnamon or a dash of allspice instead of nutmeg for a cozy fall twist.
- Boozy Boost: A splash of bourbon or rum alongside vanilla extract adds classy warmth and complexity.
How to Make No-Churn Banana Pudding Ice Cream Recipe
Step 1: Prep Your Bananas and Cookies
Start by mashing one banana with a fork until you get a chunky puree—think baby food texture, not totally smooth. Slice the second banana and then cut half of those slices into half-moons for layering later. For the Nilla Wafers, I like to crush about half into fine crumbs and leave the rest in slightly bigger chunks for better texture. Using a rolling pin or the back of a spoon works wonders here.
Step 2: Make the Creamy Ice Cream Base
Next, in your mixer fitted with the paddle attachment (or using a hand mixer), blend the sweetened condensed milk, cream cheese, your mashed banana, vanilla, salt, and nutmeg together. Beat it for around four minutes until smooth and free of cream cheese lumps. This step is where the magic happens, so don’t rush it—you want that velvety, unified base.
Step 3: Whip the Heavy Cream to Fluffy Peaks
Switch the paddle for the whisk attachment (or grab your hand mixer again) and whip the heavy cream until it thickens and holds stiff peaks—usually about six minutes. When done, gently fold the condensed milk mixture into the whipped cream with a spatula, mixing carefully so you keep all that airy fluff intact.
Step 4: Layer and Assemble Your Ice Cream
Grab a freezer-safe container and start by spreading half the crushed Nilla Wafers on the bottom. Layer the circular banana slices over the crumbs. Then, spoon in your creamy ice cream mixture. Finally, add the banana half-moons and the rest of the cookie crumbs on top, gently swirling them in for an inviting marbled look. I love this part because it makes serving a surprise every scoop.
Step 5: Freeze Until Perfectly Set
Cover and pop your container in the freezer. Four hours will get you a soft-serve style ice cream, but for firmer scoops, wait at least six hours. If you have the patience (and I know that’s tough!), overnight chilling creates that perfect scoopable texture we all dream of.
Pro Tips for Making No-Churn Banana Pudding Ice Cream Recipe
- Ripe Bananas are Key: The riper, the sweeter and more flavor-packed your ice cream will be—don’t shy away from spots!
- Don’t Overfold: When mixing the whipped cream and condensed milk base, fold gently to keep it light and airy—this is how you avoid dense ice cream.
- Mix Cookie Sizes: Combining finely crushed and chunkier cookie pieces makes scooping easier and mimics the classic pudding texture I love so much.
- Freeze Long Enough: Patience is a virtue here—letting it freeze at least 6 hours gets you that perfect scoopability.
How to Serve No-Churn Banana Pudding Ice Cream Recipe
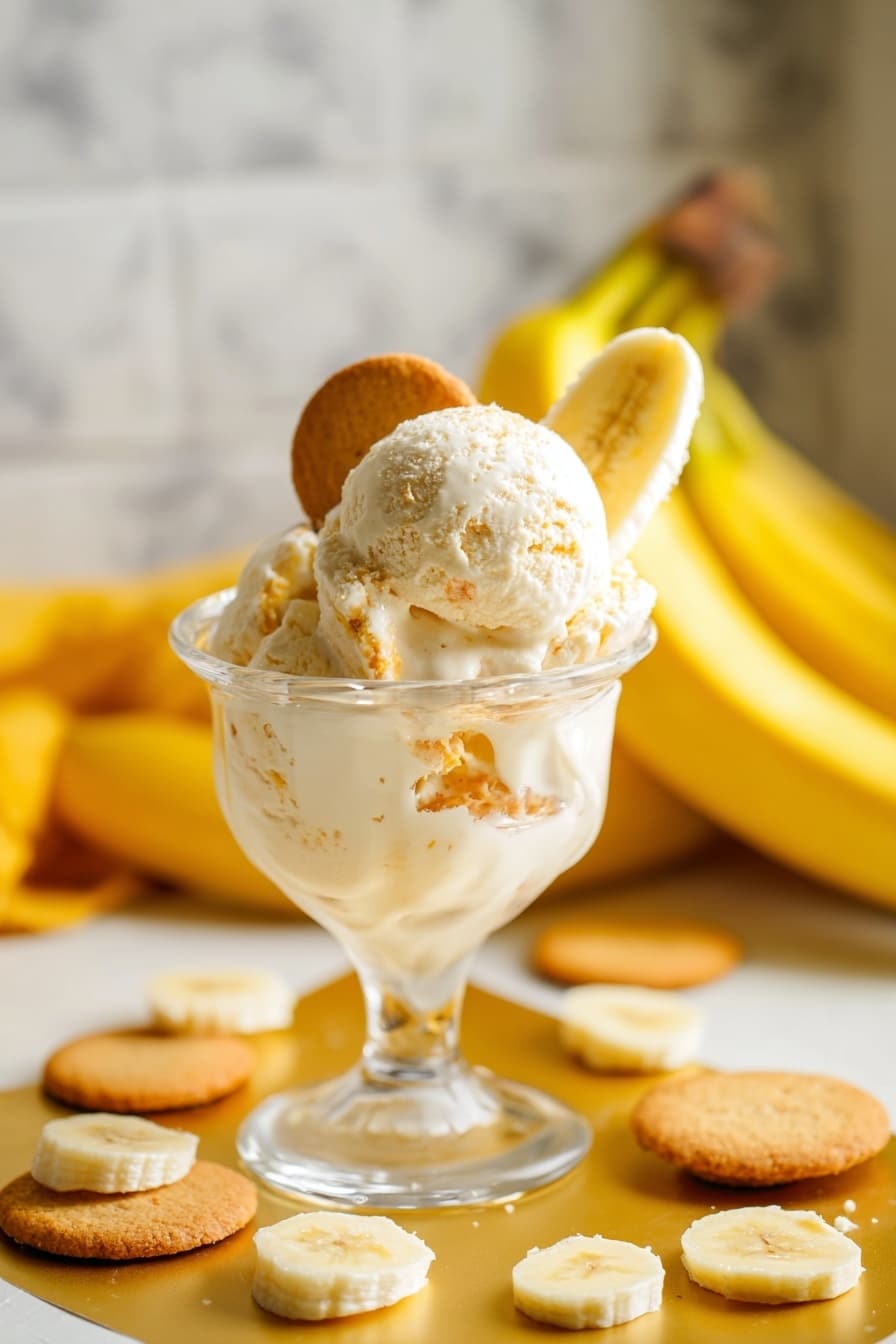
Garnishes
I love topping scoops with a few whole Nilla Wafers for crunch and some fresh banana slices for that pop of color and freshness. Sometimes, I add a drizzle of caramel sauce or a sprinkle of toasted pecans to kick it up a notch. These garnishes make it feel a little more special without much extra effort.
Side Dishes
This ice cream shines as a standalone dessert, but pairing it with warm, homemade pound cake or simple vanilla cupcakes turns it into a dreamy banana pudding sundae. For a low-effort dessert, I sometimes serve it alongside a warm fruit crisp—especially peach or berry—to mix temperatures and textures.
Creative Ways to Present
When I’ve had friends over, I like to present this ice cream in cute glass parfait cups layered with extra cookie crumbs and sliced bananas. Adding a sprig of mint or edible flowers on top makes it feel festive. It’s such a hit whether it’s a casual family night or a backyard get-together!
Make Ahead and Storage
Storing Leftovers
I store leftovers in an airtight container with plastic wrap pressed directly onto the ice cream surface to prevent ice crystals. It keeps wonderfully in the freezer for up to six months, but I recommend enjoying it within a month for the best creamy texture.
Freezing
When freezing your ice cream, I’ve found that using a shallow, wide container helps it freeze evenly and thaw quickly when you’re ready to eat. If you try to freeze it too deep, it takes forever to scoop out later, which can be frustrating.
Reheating
This ice cream is best enjoyed cold, so reheating isn’t really in the cards. But if it gets too firm, I simply let it sit out at room temperature for 5-10 minutes before scooping—it softens enough to scoop easily without melting or losing texture.
FAQs
-
Can I use overripe bananas for this recipe?
Absolutely! Overripe bananas are actually perfect because they’re super soft and sweet, which intensifies the banana flavor in this ice cream. Just make sure there’s no mold or off smell.
-
Do I have to use cream cheese in the ice cream base?
Cream cheese adds richness and a slight tang that balances the sweetness beautifully, but you can omit it if needed. Just know the texture might be slightly less creamy and more icy without it.
-
How long does the ice cream need to freeze?
For soft-serve texture, four hours is enough, but I recommend a minimum of six hours for firm scoops. Overnight freezing works best if you want perfect scoopability and texture.
-
Can I make this recipe vegan?
Yes! Use coconut cream or another dairy-free whipping cream and a vegan cream cheese substitute. Sweetened condensed milk can be replaced with a homemade or store-bought vegan condensed milk alternative as well.
Final Thoughts
This No-Churn Banana Pudding Ice Cream Recipe has become one of those treats I turn to when I want something nostalgic and refreshing at the same time. I used to struggle with making banana desserts that felt too heavy or not quite right in texture. This hits all the right notes—creamy, flavorful, and easy enough to pull off any day. I can’t wait for you to try it out and share it with your loved ones. Trust me, it’s like summer and your favorite southern classic all in one scoop!
Print
No-Churn Banana Pudding Ice Cream Recipe
- Prep Time: 15 minutes
- Cook Time: 0 minutes
- Total Time: 6 hours 15 minutes
- Yield: 8 servings 1x
- Category: Dessert
- Method: No-Cook
- Cuisine: American
Description
This No-Churn Banana Pudding Ice Cream combines the creamy texture of classic banana pudding with the convenience of a no-churn frozen treat. Featuring mashed bananas, sweetened condensed milk, cream cheese, and crushed Nilla Wafers, it layers sweet flavors and crunch for a delightful dessert that requires no ice cream maker.
Ingredients
Banana Pudding Base
- 2 bananas (one mashed, one sliced with half slices cut into half moons)
- 14 ounces sweetened condensed milk
- 4 ounces cream cheese, softened to room temperature
- 2 teaspoons vanilla extract or vanilla bean paste or bourbon
- ½ teaspoon fine sea salt
- ¼ teaspoon ground nutmeg
Mix-ins and Toppings
- 10 Nilla Wafers, crushed into rough crumbs
- 2 cups heavy cream
Instructions
- Prep the Ingredients: Mash one banana with a fork until it reaches a baby food or chunky puree consistency. Slice the other banana and cut half of the slices into half moons. Crush the Nilla Wafers using a kitchen spoon or rolling pin into rough crumbs.
- Make the Ice Cream Base: In a stand mixer fitted with a paddle attachment or using a hand mixer, beat sweetened condensed milk, softened cream cheese, mashed banana, vanilla extract, sea salt, and nutmeg together until completely smooth with no cream cheese chunks, about four minutes.
- Whip the Cream: Switch to the whisk attachment on the stand mixer or use a hand mixer to beat the heavy cream until thickened and fluffy, approximately six minutes.
- Combine Mixtures: Gently fold the condensed milk mixture into the whipped cream, ensuring a smooth and airy consistency.
- Assemble the Ice Cream: Line the bottom of a freezer-safe container with half of the crushed cookie crumbs, then add a layer of circular banana slices on top.
- Layer and Swirl: Spoon and spread half of the ice cream mixture into the container, then add the banana half moons and remaining cookie crumbs. Gently swirl them into the mixture for texture.
- Finish and Freeze: Cover the container and freeze for a minimum of six hours for firm scoops. Four hours will yield a soft-serve texture, and freezing overnight or for eight hours ensures full firmness.
Notes
- Crushing the cookies to a mix of small crumbs and larger pieces creates a texture balance resembling traditional banana pudding.
- This ice cream can be stored in the freezer for up to six months, but texture may become icy after one month.
Nutrition
- Serving Size: 1/8 of recipe
- Calories: 320
- Sugar: 28g
- Sodium: 130mg
- Fat: 20g
- Saturated Fat: 12g
- Unsaturated Fat: 6g
- Trans Fat: 0g
- Carbohydrates: 33g
- Fiber: 2g
- Protein: 4g
- Cholesterol: 65mg

