
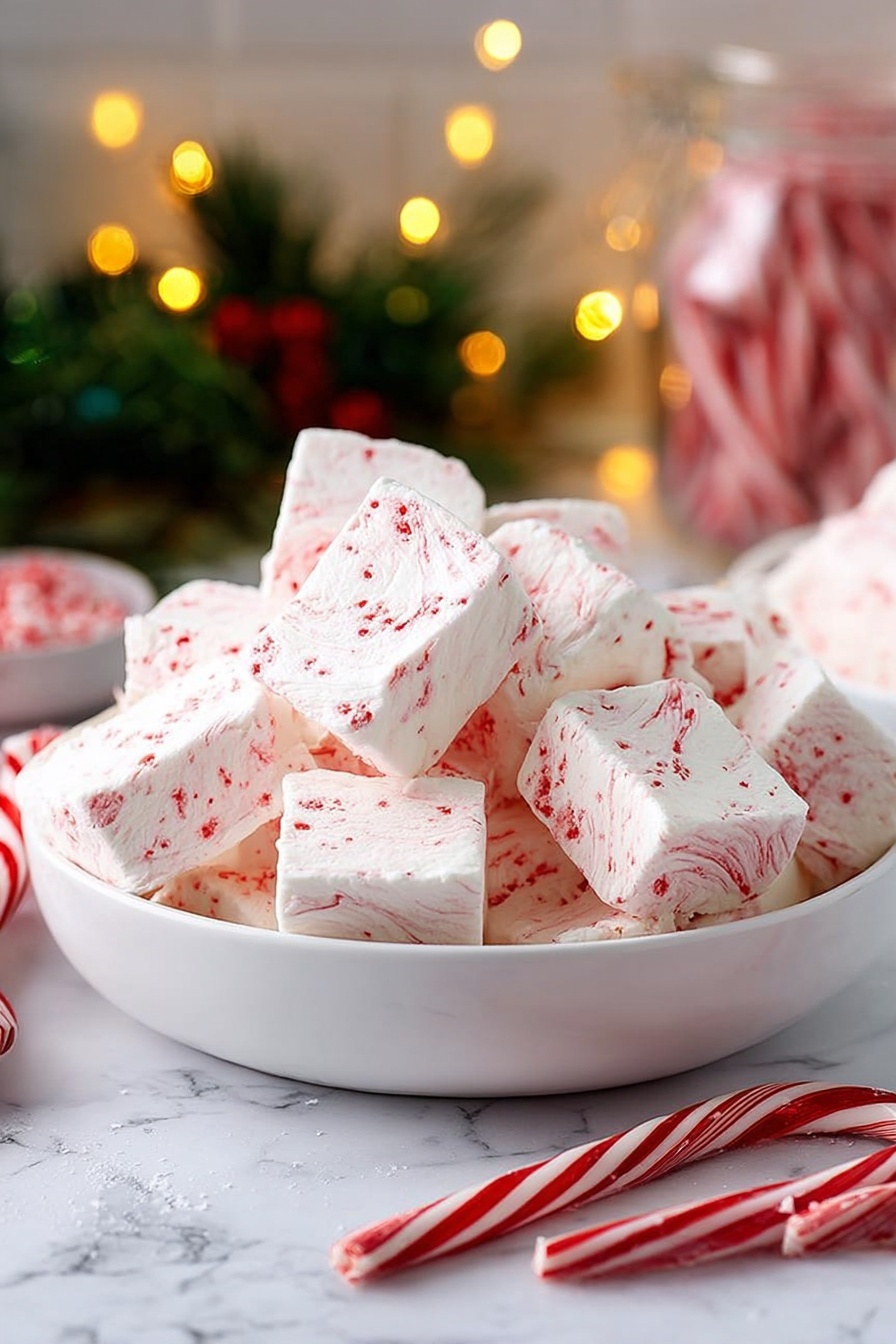
If you’ve ever dreamed of making your own candy that’s soft, fluffy, and packed with a refreshing twist, this Homemade Peppermint Marshmallows Recipe is going to become your new go-to. I absolutely love how these marshmallows turn out—airy clouds of peppermint goodness that melt in your mouth. Whether you’re spoiling yourself with a cozy cup of hot chocolate or surprising friends with a sweet gift, you’ll find that homemade marshmallows are surprisingly simple and endlessly rewarding to make.
Why You’ll Love This Recipe
- Refreshing Peppermint Flavor: The peppermint extract and crushed candy canes give a festive, cool taste that’s perfect for the holidays or anytime you want a minty treat.
- Fun and Fluffy Texture: I love this recipe because it results in marshmallows that are soft, pillowy, and hold their shape beautifully.
- Surprisingly Easy to Make: Even if you’re new to candy-making, you’ll find this recipe approachable with clear steps and common ingredients.
- Perfect for Gifts or Treats: Homemade marshmallows make incredible edible gifts, and they’ll have everyone asking for your secret!

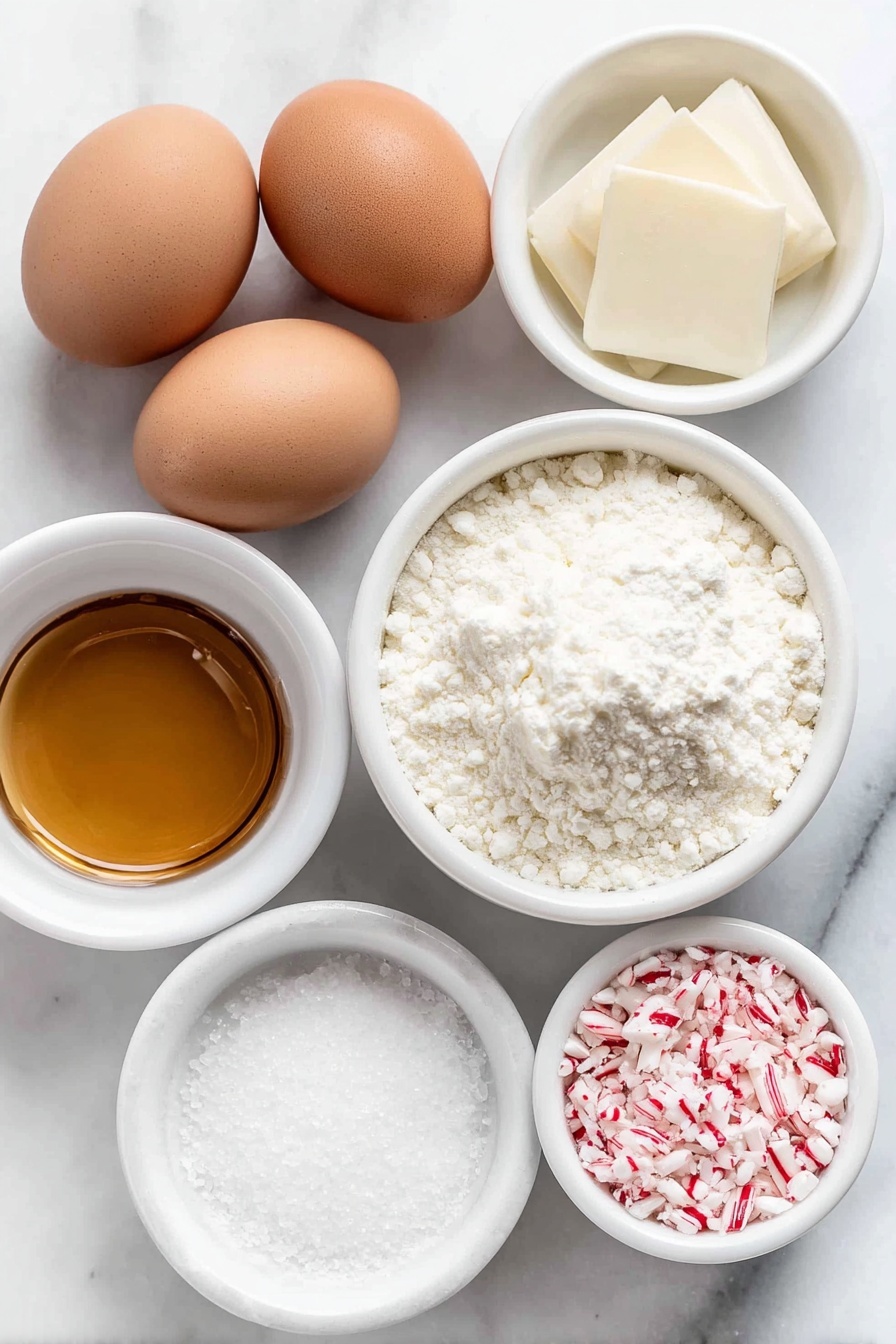
Ingredients You’ll Need
Getting the ingredients right is key to perfect marshmallows, especially when it comes to sweetness and texture. I always recommend fresh peppermint extract for that authentic, clean flavor. Keep an eye out for unflavored gelatin packets and light corn syrup — these do the heavy lifting in texture and sweetness. Here are the essentials explained:
- Unflavored Gelatin: This is what gives marshmallows their signature bounce. Make sure you buy the unflavored kind, usually found near boxed gelatins like Jell-O.
- Light Corn Syrup: It prevents the sugar from crystallizing, keeping your marshmallows silky and smooth.
- White Sugar: The sweet base for your marshmallows, balancing the gelatin’s texture.
- Pure Vanilla Extract: Adds warmth and depth to the mint flavor.
- Peppermint Extract: Not to be confused with mint extract — this is vital for that classic peppermint punch.
- Crushed Candy Canes (Optional): For a little crunch and extra peppermint flair inside your marshmallows.
- Red Gel Food Coloring (Optional): For adding those pretty peppermint swirls.
- Cornstarch and Confectioners’ Sugar: To dust your marshmallows and keep them from sticking.
- Water: Divided to bloom the gelatin and dissolve the sugar syrup.
Variations
I like to switch things up depending on the season or occasion, and this Homemade Peppermint Marshmallows Recipe is a great canvas. Feel free to personalize it with flavors or textures you love — it’s your kitchen adventure, after all!
- Chocolate Peppermint: Add a swirl of melted dark chocolate or sprinkle cocoa powder right before setting. My family goes crazy for this twist at holiday parties.
- Vegan Version: While this recipe uses gelatin, you could experiment with agar agar to make a plant-based marshmallow — just be mindful the texture will differ.
- No Corn Syrup: I’ve tried substituting honey for corn syrup; it works but gives a slightly different flavor and texture, so taste-test as you go.
- Extra Crunch: Try folding in chopped peppermint bark or white chocolate chips for a little surprise contrast inside the marshmallow.
How to Make Homemade Peppermint Marshmallows Recipe
Step 1: Prep Your Pan and Gelatin
First things first — line a 9×9 inch baking dish with plastic wrap and spray it with non-stick cooking spray. Then, grab your stand mixer bowl and sprinkle the unflavored gelatin over ½ cup of cold water. Let it soak while you move to the next step. I’ve learned soaking the gelatin properly makes all the difference in the world for that perfect marshmallow texture.
Step 2: Make the Sugar Syrup
Combine ¼ cup of water, light corn syrup, and white sugar in a saucepan. Heat it over medium and bring it to a hard boil, then let it boil for exactly one minute. This step might seem intimidating, but timing is key to avoid grainy marshmallows.
Step 3: Whip It Good
Carefully pour the hot sugar syrup into the gelatin mixture. Immediately switch on your stand mixer to high speed and beat for about 12 minutes until the mixture is thick, fluffy, and forms stiff peaks. This part makes me smile every time — that flurry of clouds forming is so satisfying. At the end, fold in the vanilla and peppermint extracts, and if you’re adventurous, the crushed candy canes.
Step 4: Add Some Peppermint Swirls
Pour the marshmallow fluff into your prepared pan and smooth the top with a greased spatula. To get those pretty red peppermint swirls, drop 9-12 drops of red gel food coloring on the top and swirl gently with an oiled knife or chopstick. Cover with the sprayed plastic wrap pressed lightly to seal.
Step 5: Let It Set
Patience is crucial here — let your marshmallows rest for at least 4 hours or overnight. This slow setting guarantees that perfect chewy, fluffy texture we’re aiming for.
Step 6: Cut and Coat
Combine cornstarch and confectioners’ sugar in a shallow dish. Using oiled scissors or knife, cut the marshmallow slab into strips, then into 1-inch squares. Toss them gently in the cornstarch mixture to keep them from sticking — this step is a lifesaver for easy storing and serving!
Pro Tips for Making Homemade Peppermint Marshmallows Recipe
- Bloom the Gelatin Properly: Always soak the gelatin in cold water first, so it dissolves completely when mixed with hot syrup — no lumps allowed!
- Use a Candy Thermometer: For consistent results, keep an eye on your syrup temperature so it hits the perfect soft-ball stage.
- Oil Your Tools Generously: Applying oil to your spatula, knife, or scissors prevents the sticky marshmallows from giving you a hard time when cutting or swirling colors.
- Don’t Skip The Cornstarch Dusting: Trust me, this keeps your marshmallows from clumping and makes them so much easier to enjoy or gift.
How to Serve Homemade Peppermint Marshmallows Recipe
Garnishes
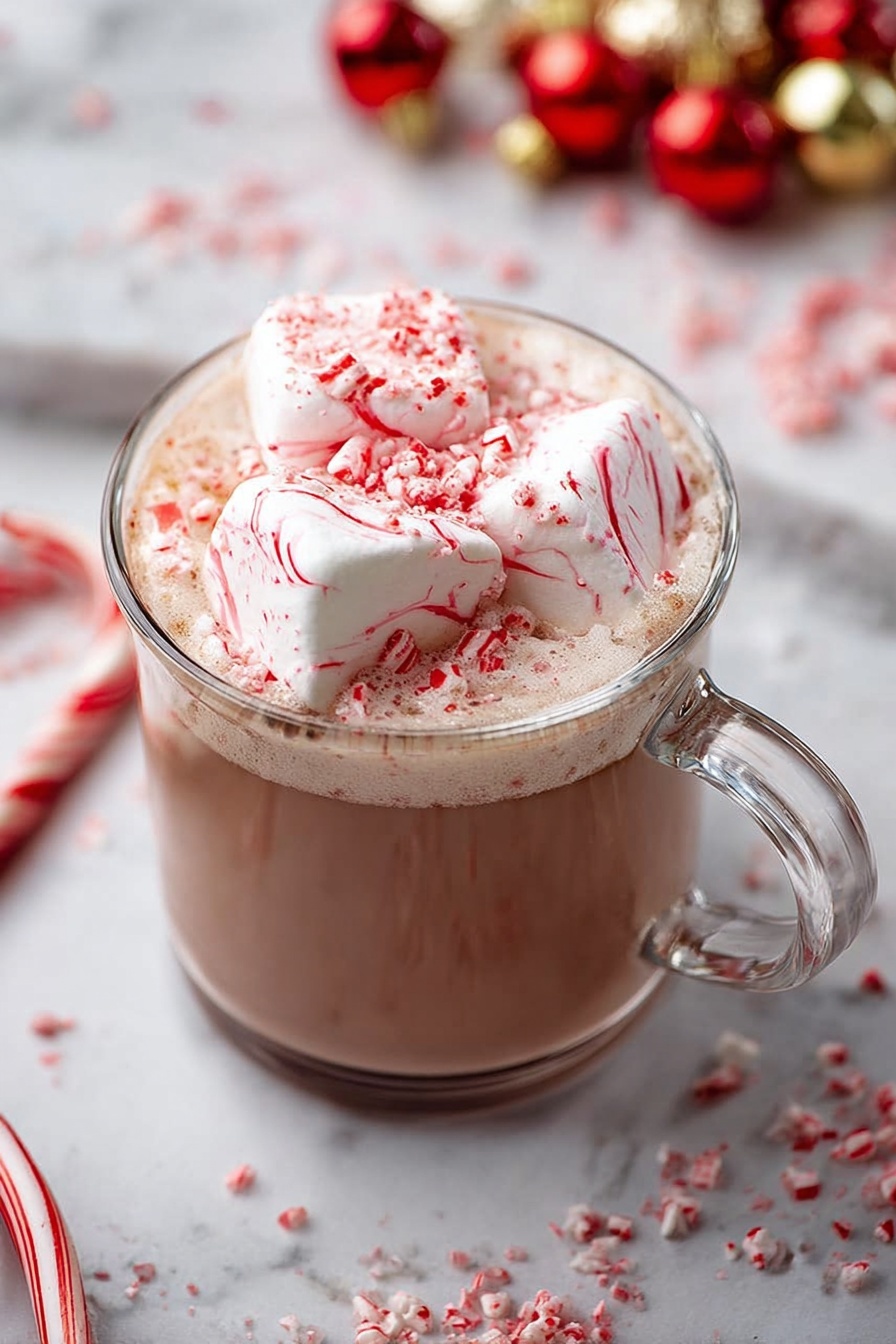
I love garnishing with a sprinkle of crushed candy canes on top of whipped cream or right inside hot cocoa—it adds a lovely crunch and extra peppermint zing. Sometimes I even dip the corners of marshmallows in melted dark chocolate for a decadent twist.
Side Dishes
These marshmallows are wonderful with warm drinks like peppermint hot chocolate or creamy coffee lattes. I also enjoy them alongside gingerbread cookies or a simple slice of chocolate cake for a festive dessert spread.
Creative Ways to Present
For holiday gifts, I like to package my marshmallows in cute mason jars layered with crushed candy canes and tied with a festive ribbon. Another fun idea is threading them on skewers with mini gingerbread cookies for a sweet centerpiece or party favor.
Make Ahead and Storage
Storing Leftovers
I store leftover marshmallows in an airtight container at room temperature for up to two weeks. Be sure they’re well-coated in the cornstarch-confectioners sugar mix to keep them from sticking together inside the container.
Freezing
Freezing these marshmallows works beautifully! Just separate layers with parchment to prevent sticking and place them in a freezer-safe bag. When thawed, they’ll still be soft and delicious, making them a great make-ahead treat.
Reheating
Typically, you don’t need to reheat marshmallows. However, if you want them softer and pillowy again after storage, pop them in the microwave for 5-7 seconds. Just be careful not to melt them entirely.
FAQs
-
Can I use a hand mixer instead of a stand mixer for this Homemade Peppermint Marshmallows Recipe?
Absolutely! A hand mixer works just fine, though it might take a bit longer to reach those stiff peaks. Just make sure your bowl is deep enough and be patient — the fluffiness will come with thorough whipping.
-
What’s the best way to prevent marshmallows from sticking together?
Coating your marshmallows lightly in a mixture of cornstarch and confectioners’ sugar is the best defense against sticking. Also, oil your cutting tools to keep shapes clean and manageable.
-
Can I make this recipe without peppermint extract?
You can, but then it wouldn’t be peppermint marshmallows! If you’re out of peppermint extract, vanilla or even almond extracts are nice substitutes for a different flavor profile.
-
Why is my marshmallow mixture not fluffing up?
This usually happens if your syrup temperature was off or the gelatin wasn’t properly bloomed. Always measure carefully, and make sure to beat the mixture long enough for air to fully incorporate.
-
How long do homemade peppermint marshmallows last?
If stored properly in an airtight container at room temperature, they last up to two weeks. They’re best enjoyed fresh, but freezing extends their shelf life up to 3 months.
Final Thoughts
This Homemade Peppermint Marshmallows Recipe is one of those joyful kitchen projects that feels fancy but is totally doable, even on a busy day. Every time I serve them, friends and family are blown away—not just by the flavor but by the love you can taste in every bite. Give this recipe a try, and I promise you’ll be hooked on making your own marshmallow magic at home!
Print
Homemade Peppermint Marshmallows Recipe
- Prep Time: 20 minutes
- Cook Time: 10 minutes
- Total Time: 4 hours 20 minutes
- Yield: 36 marshmallows 1x
- Category: Dessert
- Method: Stovetop
- Cuisine: American
- Diet: Vegetarian
Description
These peppermint marshmallows are a delightful homemade treat featuring fluffy, melt-in-your-mouth texture infused with refreshing peppermint flavor. Perfect for festive occasions or a sweet snack, they combine the classic softness of marshmallows with a hint of crushed candy canes and optional colorful swirls for a festive appearance.
Ingredients
Marshmallow Mixture
- ¾ cup water, divided
- 3 envelopes unflavored gelatin (0.25 ounces each)
- ⅔ cup light corn syrup
- 2 cups white sugar
- 1 tablespoon pure vanilla extract
- ½ teaspoon peppermint extract
- ½ cup finely crushed candy canes (optional)
- Red gel food coloring (optional)
Coating
- ¼ cup cornstarch
- ¼ cup confectioners’ sugar
Instructions
- Prepare Baking Dish: Line a 9×9 inch baking dish with plastic wrap and spray it with non-stick cooking spray. Also spray another piece of plastic wrap that will be used to cover the top later, then set both aside.
- Bloom Gelatin: Place ½ cup of water into the bowl of a stand mixer fitted with a whisk attachment. Sprinkle the gelatin evenly over the water and let it soak until fully bloomed.
- Cook Sugar Syrup: In a saucepan, combine the remaining ¼ cup water, light corn syrup, and white sugar. Heat over medium heat and bring to a boil. Boil this mixture vigorously for 1 minute to ensure proper sugar concentration.
- Whip Marshmallow Base: Carefully pour the hot sugar syrup into the blooming gelatin. Using the stand mixer on high speed, beat the mixture for approximately 12 minutes until it becomes fluffy and forms stiff peaks. Next, add the vanilla extract and peppermint extract, mixing only until just incorporated. Fold in crushed candy canes if using.
- Set and Color: Pour the marshmallow mixture into the prepared baking dish. Use a greased spatula to smooth the surface evenly. If desired, add 9-12 drops of red gel food coloring scattered across the top, then swirl it gently into the marshmallow using an oiled butter knife or chopstick to create a festive pattern. Cover the marshmallow with the second prepared plastic wrap, pressing down lightly to seal.
- Rest and Cut: Allow the marshmallow to rest at room temperature for 4 hours or overnight to fully set. Mix cornstarch and confectioners’ sugar in a shallow dish. Using oiled scissors or a knife, cut the marshmallow slab into 1-inch squares. Lightly dredge each piece in the cornstarch-sugar mixture to prevent sticking. Store the finished marshmallows in an airtight container.
Notes
- Unflavored gelatin is found in the baking aisle near flavored gelatins like Jello; common brands include Knox.
- Light corn syrup prevents sugar crystallization, ensuring smooth marshmallows. Honey can be used as an alternative but may alter flavor.
- Always use peppermint extract, not mint extract, as peppermint has a distinct flavor that complements marshmallows.
- For easier cutting, oil your scissors or knife to prevent sticking.
- The marshmallows keep best stored in an airtight container at room temperature for up to 2 weeks.
Nutrition
- Serving Size: 1 marshmallow (approximate 1-inch square)
- Calories: 45
- Sugar: 9g
- Sodium: 5mg
- Fat: 0g
- Saturated Fat: 0g
- Unsaturated Fat: 0g
- Trans Fat: 0g
- Carbohydrates: 11g
- Fiber: 0g
- Protein: 0.3g
- Cholesterol: 0mg