
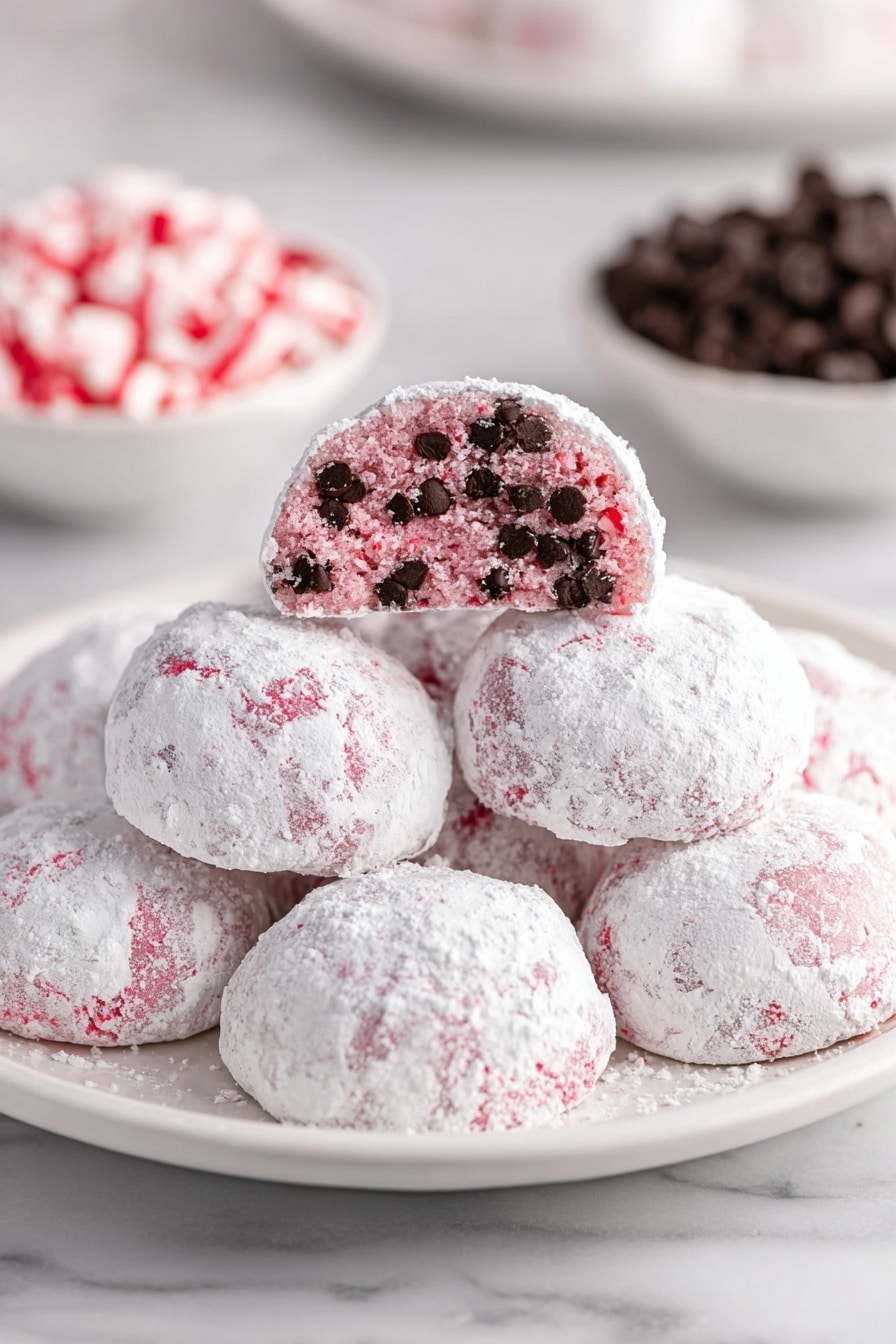
If you’re looking for a cozy, festive treat that’ll knock your socks off, you’ve got to try this Peppermint Snowball Cookies Recipe. I absolutely love how these cookies come out tender, buttery, and bursting with peppermint flavor—plus that little pop of chocolate chips makes them irresistible. Whether you’re baking for the holidays or just because, this recipe will quickly become your go-to. So grab your mixer and let’s get cozy in the kitchen!
Why You’ll Love This Recipe
- Perfect Peppermint Flavor: I discovered just the right balance of peppermint extract and crushed candies that makes these cookies refreshing without overpowering.
- Buttery, Tender Texture: Thanks to the cornstarch and softened butter, these cookies melt in your mouth with every bite.
- Visual Appeal: The light dusting of powdered sugar mixed with crushed peppermint gives them a snowy, festive look that your guests will adore.
- Easy to Make: With a straightforward mixing process and quick bake time, you’ll have these on your table in under half an hour.

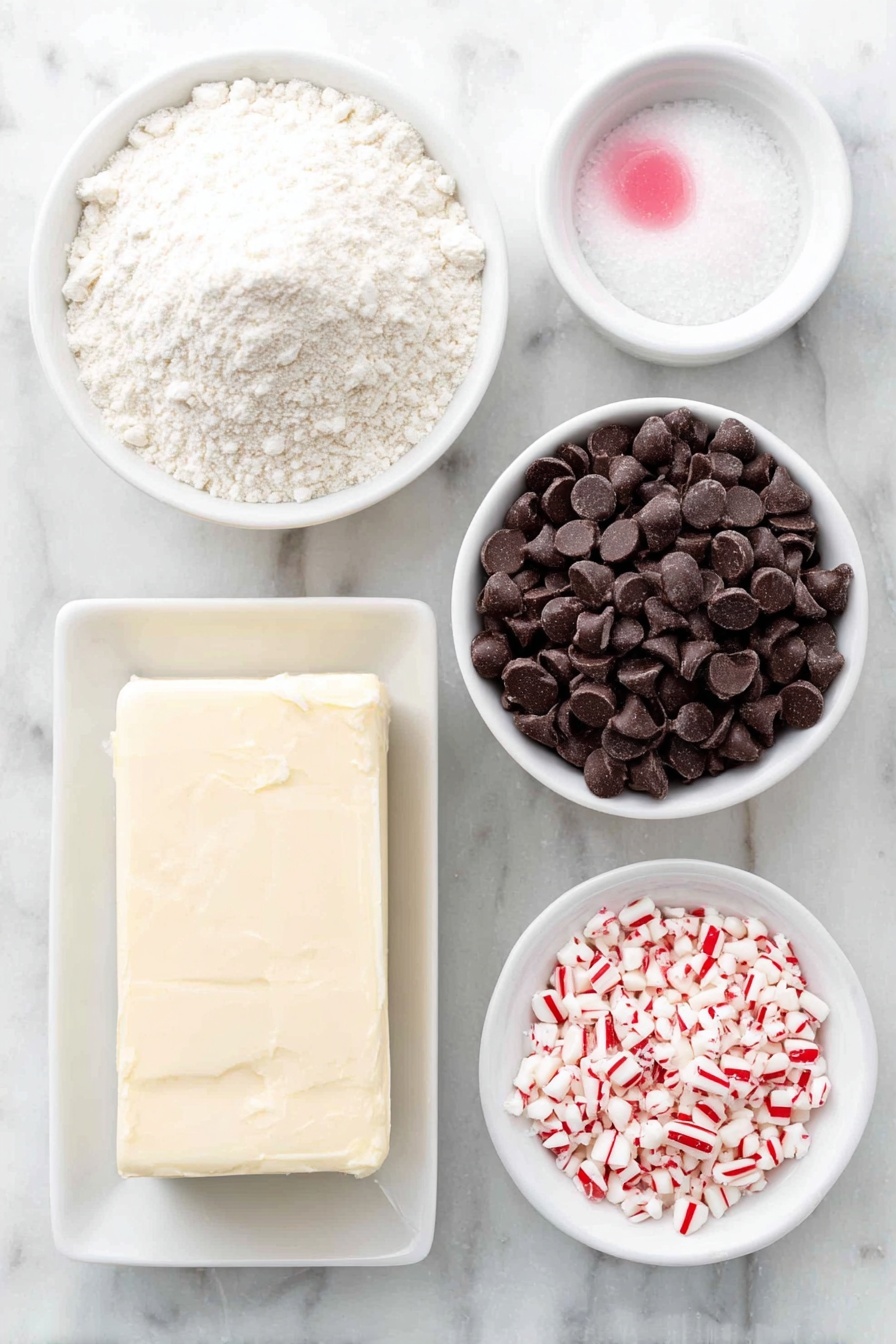
Ingredients You’ll Need
The ingredients in this Peppermint Snowball Cookies Recipe are simple pantry staples with a few festive twists. Using a mix of all-purpose flour and cornstarch creates that melt-in-your-mouth softness, while peppermint extract and crushed candies bring the delightful holiday spirit. Let me share some tips on what to look for while shopping.
- All-purpose flour: Choose a good quality, unbleached flour for the best texture.
- Cornstarch: This is the secret weapon that makes the cookies so tender and crumbly.
- Salted sweet cream butter: Make sure it’s softened, not melted — it helps the dough hold together nicely.
- Powdered sugar: Divided into two parts – one for the dough and one for that snowy coating at the end.
- Pure peppermint extract: Look for natural peppermint extract to avoid any artificial aftertaste.
- Pure vanilla extract: Adds warmth and depth to the flavor.
- Mini semi-sweet chocolate chips: I love the way these add bursts of chocolate without overwhelming the peppermint.
- Hot pink/rose food coloring gel: Optional, but I like adding a festive tint to make these cookies pop visually.
- Finely crushed peppermint candies: For the final coating—adds crunch and an extra peppermint kick.
Variations
I’m all about making recipes my own, and I encourage you to do the same with this Peppermint Snowball Cookies Recipe. Swapping out ingredients or tweaking flavors can be so fun and yield delicious results. Here are some of my favorite twists.
- Chocolate lovers’ version: Double the mini chocolate chips or even add white chocolate chips for a sweeter contrast—I’ve done this during the holidays, and my family goes crazy for it.
- Mint julep twist: Add a splash of crème de menthe extract alongside the peppermint for a grown-up flair. It’s a neat party trick I discovered recently.
- Gluten-free option: Substitute the all-purpose flour with a gluten-free blend but keep the cornstarch for texture. Just keep an eye on baking time as GF flours bake a bit differently.
- No food coloring: If you prefer a natural look, just skip the hot pink food color. The crushed peppermint candies add plenty of festive charm on their own.
How to Make Peppermint Snowball Cookies Recipe
Step 1: Whisk together dry ingredients
Start by whisking together 2 cups plus 2 tablespoons of all-purpose flour with 2 teaspoons of cornstarch. Setting this mixture aside keeps things organized and ensures your cookies will have that beautiful tender crumb I love so much.
Step 2: Cream the butter and sugar
Using a stand mixer or handheld mixer, beat 1 cup of softened salted sweet cream butter on medium-high speed for about 30 seconds until creamy. Add 1 cup of powdered sugar and beat an additional 1 to 1½ minutes. I like to do this step thoroughly because it creates the perfect base for soft cookies that aren’t greasy.
Step 3: Add the extracts
Reduce your mixer speed to medium-low and mix in 1 teaspoon of pure peppermint extract and ½ teaspoon pure vanilla extract. This combo is magic—I once tried peppermint alone and found vanilla really smooths and rounds out the flavor.
Step 4: Incorporate dry ingredients and color
On medium-low speed, add your flour and cornstarch mixture. Mix just until everything is incorporated—you don’t want to overmix or the cookies can get tough. Then, bump your speed to medium and stir in 5–6 drops of hot pink or rose food coloring gel until the color is even and festive looking.
Step 5: Fold in chocolate chips and chill
Add 1¼ cup of mini semi-sweet chocolate chips and gently mix until they’re evenly distributed throughout the dough. Cover your bowl and chill the dough in the fridge for 10 minutes to make rolling easier and help the cookies keep their shape while baking.
Step 6: Form and bake the cookies
Preheat your oven to 350°F. Line two baking sheets with parchment paper (one for baking and one for cooling). Using a 1-tablespoon cookie scoop, portion out dough, roll each into a smooth ball, and place them about 1 inch apart on your baking sheet. Bake for 10–12 minutes until the edges are set but the centers are still soft. I usually watch closely at the 10-minute mark—cookie ovens can vary!
Step 7: Prepare peppermint sugar coating
While the cookies bake, mix together 2 cups powdered sugar and ¼ cup finely crushed peppermint candies in a medium bowl. This is the snow-like coating that takes these cookies to the next level in both flavor and look.
Step 8: Coat the cookies and cool
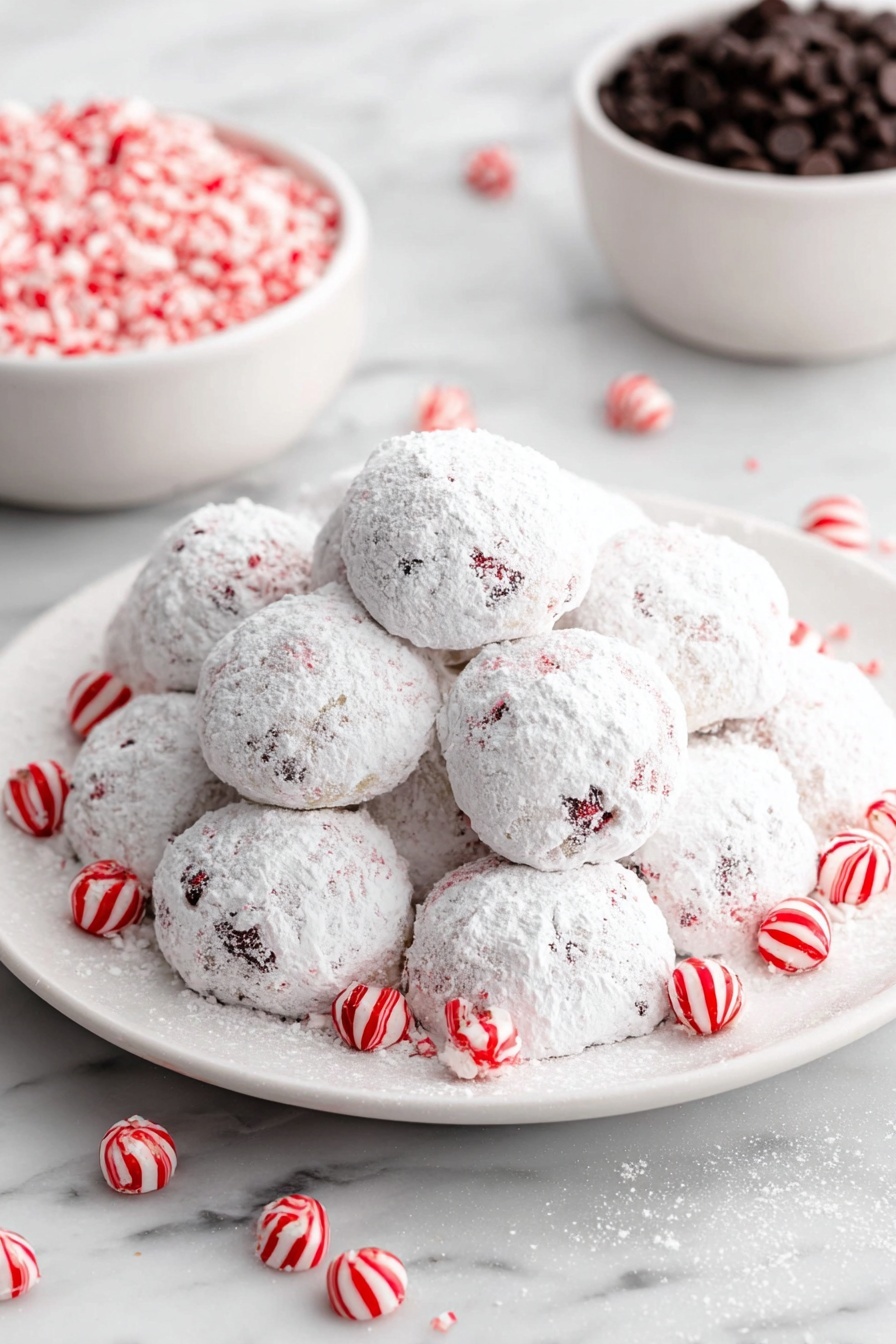
Once baked, let cookies rest on the baking sheet for 5 minutes so they firm up just enough. Then, roll each warm cookie in the peppermint sugar mixture and transfer to the second baking sheet to cool completely. After they’re cooled, roll them one more time in the mixture—this double coating adds the signature snowball effect you’re aiming for.
Pro Tips for Making Peppermint Snowball Cookies Recipe
- Use Room Temperature Butter: I learned the hard way that melted butter makes these cookies spread too much—softened is key for that perfect shape.
- Don’t Overmix: Mixing the dough just enough keeps the texture tender and flaky, which is exactly what you want here.
- Double Coating is a Game Changer: Rolling the cookies twice in the peppermint sugar mixture gives them that classic snowball look and extra crunch that guests rave about.
- Watch Your Oven Timings: Every oven bakes differently, so keep an eye on your first batch to get perfect baking time down for your set-up.
How to Serve Peppermint Snowball Cookies Recipe
Garnishes
I like to top my serving platter with a handful of extra crushed peppermint candies and scatter fresh mint leaves nearby. The pop of red and green is festive and complements the cookies’ flavor beautifully. Sometimes, I even drizzle a little melted white chocolate over the top for extra flair.
Side Dishes
These cookies pair wonderfully with a hot cup of cocoa or peppermint tea. For holiday parties, I love setting out a sharp cheddar cheese board alongside—surprising, but the contrast works! And if you’re feeling indulgent, a scoop of vanilla bean ice cream makes for an easy dessert upgrade.
Creative Ways to Present
For holiday gift-giving, I arrange these peppermint snowballs in festive tins layered over wax paper. Another fun way I tried was making cookie stacks tied with a red satin ribbon—guests loved the look and it makes a lovely edible centerpiece.
Make Ahead and Storage
Storing Leftovers
I store leftover peppermint snowball cookies in an airtight container at room temperature and they stay fresh for up to five days. To keep that powdered sugar coating intact, I layer them between sheets of parchment paper so they don’t stick together.
Freezing
Freezing baked cookies works great with this recipe. I let them cool completely, then freeze in single layers on a baking sheet before transferring to freezer-safe bags. They keep their flavor and texture for up to 3 months, making them perfect for holiday prep or surprise cravings.
Reheating
When you’re ready to enjoy frozen cookies, I recommend letting them thaw at room temperature for about 30 minutes. If you want a freshly baked feel, pop them in a 300°F oven for 5 minutes. This warms the chocolate chips and revives the soft texture without melting the powdered sugar coating.
FAQs
-
Can I use unsalted butter instead of salted?
Yes, you can substitute unsalted butter, but I suggest adding a pinch of salt (about ¼ teaspoon) to the dough. This balances flavors and enhances the sweetness of the peppermint snowball cookies.
-
What if I don’t have peppermint extract?
If you don’t have peppermint extract, you can use mint flavorings like spearmint or even crushed peppermint candies alone for some flavor. However, peppermint extract provides the most authentic and intense flavor in this recipe.
-
How do I prevent my cookies from spreading too much?
Make sure your butter is softened, not melted, and chill your dough for at least 10 minutes before baking. Also, avoid overmixing, and space your cookie dough balls at least 1 inch apart on the baking sheet.
-
Can I make these cookies dairy-free?
For a dairy-free version, substitute the butter with a plant-based margarine or coconut oil that behaves similarly when creamed. Note that the texture might be a bit different but still delicious. Be sure to check that your chocolate chips are also dairy-free.
-
What’s the best way to crush peppermint candies?
I usually place the candies in a zip-top bag and use a rolling pin to gently crush them to the desired consistency. You want them fine enough to stick to the cookies but still have a little crunch.
Final Thoughts
This Peppermint Snowball Cookies Recipe is truly one of my favorite go-to festive treats—it’s part nostalgia, part magic in the kitchen. From the way they smell while baking to the soft bite and peppermint kisses with every munch, they never fail to bring a smile. I hope you’ll give this recipe a try and maybe even add your own twist like I have. Happy baking, friend!
Print
Peppermint Snowball Cookies Recipe
- Prep Time: 15 minutes
- Cook Time: 12 minutes
- Total Time: 27 minutes
- Yield: 42 cookies 1x
- Category: Dessert
- Method: Baking
- Cuisine: American
Description
These Peppermint Snowball Cookies are delightful, melt-in-your-mouth treats perfect for the holiday season. They combine the classic buttery snowball cookie texture with refreshing peppermint flavor, mini chocolate chips, and a festive touch of crushed peppermint candies. Finished with a sweet powdered sugar and crushed peppermint coating, they are both visually appealing and deliciously festive.
Ingredients
Dry Ingredients
- 2 cups + 2 tablespoons all-purpose flour
- 2 tsp cornstarch
- 3 cups powdered sugar, divided (2 cups and 1 cup)
- ¼ cup finely crushed peppermint candies
Wet Ingredients
- 1 cup salted sweet cream butter, softened
- 1 tsp pure peppermint extract
- ½ tsp pure vanilla extract
- 5–6 drops hot pink/rose food color gel
Add-ins
- 1¼ cup mini semi sweet chocolate chips
Instructions
- Mix Dry Ingredients: Whisk together the all-purpose flour and cornstarch in a bowl. Set aside for later use.
- Cream Butter and Sugar: Using a stand mixer or handheld mixer on medium-high speed, beat the softened butter for 30 seconds. Add 1 cup of the powdered sugar and continue beating for 1 to 1½ minutes until creamy and well combined.
- Add Flavor Extracts: Lower the mixer speed to medium-low and add the peppermint and vanilla extracts, mixing gently to incorporate the flavors evenly.
- Combine Dry and Wet Ingredients: While keeping the mixer on medium-low, gradually add the flour mixture. Mix just until all ingredients are well incorporated, being careful not to overmix.
- Add Food Coloring: Increase the mixer speed to medium and add the hot pink/rose food color gel. Mix briefly just until the color becomes uniform throughout the dough.
- Blend in Chocolate Chips: Add the mini semi-sweet chocolate chips and mix just until evenly distributed in the dough.
- Chill Dough: Cover the dough tightly and refrigerate for 10 minutes to firm up, which helps prevent the cookies from spreading too much during baking.
- Preheat Oven and Prepare Sheets: Preheat your oven to 350°F (175°C). Line two baking sheets with parchment paper—one for baking the cookies and the other for cooling the coated cookies.
- Form and Bake Cookies: Using a 1 tablespoon cookie scoop, portion out the dough and roll it into balls. Place the dough balls on the prepared baking sheet, spacing them about 1 inch apart. Bake for 10 to 12 minutes until set but not browned.
- Prepare Coating Mixture: In a medium bowl, whisk together the remaining 2 cups of powdered sugar and crushed peppermint candies. Set this coating mixture aside.
- Coat Warm Cookies: After removing the cookies from the oven, let them rest on the baking sheet for 5 minutes. Then, roll each cookie in the powdered sugar and crushed peppermint mixture to coat thoroughly.
- Cool and Recoat: Transfer the coated cookies to the second prepared baking sheet to cool completely. Once fully cooled, roll the cookies again in the powdered sugar mixture to achieve a thick, snowy coating.
Notes
- Storage: Store any leftover cookies in an airtight container for up to 5 days to maintain freshness.
- Freezing: Baked cookies can be frozen for up to 3 months. Thaw at room temperature before serving.
- Tip: Ensure your butter is softened to room temperature but not melted; melted butter will cause the cookies to spread too much and lose their shape during baking.
Nutrition
- Serving Size: 1 cookie
- Calories: 130 kcal
- Sugar: 15 g
- Sodium: 45 mg
- Fat: 6 g
- Saturated Fat: 3.5 g
- Unsaturated Fat: 2 g
- Trans Fat: 0 g
- Carbohydrates: 18 g
- Fiber: 1 g
- Protein: 1.5 g
- Cholesterol: 20 mg

