

If you’re a fan of rich, creamy, and chocolatey treats, you’re going to absolutely adore this Boston Cream Fudge Recipe. It’s one of those desserts I discovered that strikes the perfect balance between luscious white chocolate, gooey marshmallow, and a silky chocolate swirl — truly a fan-freaking-tastic twist on classic fudge that will steal the show at any gathering. Stick with me, and I’ll share all my tips so you end up with fudge that’s silky, smooth, and decadently dreamy every single time.
Why You’ll Love This Recipe
- Perfect Layered Texture: Creamy white chocolate fudge base with a rich chocolate swirl that blends beautifully.
- Easy to Make: Despite looking fancy, the process is straightforward and beginner-friendly.
- Great for Gifting: It slices neatly and is always a crowd-pleaser during holidays and parties.
- My Personal Favorite: The marshmallow cream adds such a soft, fluffy touch that makes it impossible to resist.

Ingredients You’ll Need
This Boston Cream Fudge Recipe calls for simple pantry staples that come together in a way that’s almost magical. Each ingredient plays a special role in getting that perfect texture and flavor combo, so I always recommend using high-quality butter and chocolate for the best results.

- Granulated sugar: The sweet backbone that caramelizes to help set the fudge.
- Unsalted butter: Adds richness and smoothness; room temperature butter melts evenly.
- Heavy cream: Makes the fudge luxuriously creamy and tender.
- Light corn syrup: Helps prevent crystallization so your fudge stays smooth.
- White baking chocolate: Your creamy white layer’s star—chopped finely to melt easily.
- Marshmallow cream: For that soft, dreamy texture I can’t get enough of.
- Vanilla extract: Enhances all those layers with comforting flavor.
- Unsweetened cocoa powder: Sift it to avoid clumps and to get a smooth chocolate layer.
- Semi-sweet chocolate chips: For melting and dipping, adds a shiny finish.
- Vegetable oil: Keeps melted chocolate shiny and easy to dip with.
Variations
I love how versatile this Boston Cream Fudge Recipe is. You can easily tweak it to suit your taste or occasion, and I’m all for making recipes your own – that’s the secret to loving what you bake!
- Add your favorite nuts: I personally like tossing in chopped pecans or walnuts into the white fudge layer for some crunch.
- Switch chocolates: Try bittersweet chocolate chips instead of semi-sweet for a deeper chocolate flavor.
- Make it gluten-free: This recipe is naturally gluten-free, so just double-check any marshmallow cream or chips to be sure.
- Create mini fudge bites: Pour into mini muffin tins with liners to make bite-sized treats that are perfect for parties.
How to Make Boston Cream Fudge Recipe
Step 1: Prep the Pan Like a Pro
Start by lining an 8×8-inch baking pan with parchment paper, making sure you leave a generous overhang on the sides. This overhang is your best friend when it’s time to lift out the fudge cleanly. I like to lightly spray the parchment with nonstick cooking spray so the fudge slides out effortlessly—and trust me, this little step saves you frustration later!
Step 2: Boil Your Sugar Mixture
In a heavy-bottom saucepan, combine granulated sugar, butter, heavy cream, and light corn syrup. Cook it over medium heat, stirring constantly. When the mixture comes to a rolling boil, keep stirring and let it boil for about 4–5 minutes, or until a candy thermometer hits 235-240°F (soft-ball stage). This step is crucial—you want to watch your thermometer carefully. If the heat gets too high, the fudge won’t set right. When I first tried skipping the thermometer, my fudge ended up too grainy, so don’t rush it!
Step 3: Melt the White Chocolate and Add Marshmallow Cream
Remove the pan from heat and stir in the chopped white baking chocolate until it’s fully melted and smooth. This is when the fudge starts smelling incredibly heavenly—I always sneak a little taste here. Then, add the marshmallow cream and vanilla extract, mixing thoroughly until everything is perfectly combined.
Step 4: Make the Two-Layer Magic
Pour three-quarters of this creamy white fudge into your prepared pan—they make a delightful base. To the remaining fudge in the saucepan, whisk in the sifted cocoa powder until fully incorporated, turning it that rich chocolate shade you want. Now, carefully spoon this chocolate fudge on top of the white layer. To get that signature Boston Cream marbled look, grab a toothpick or skewer and gently swirl both layers just a bit.
Step 5: Chill and Set
Leave the fudge to cool at room temperature for about an hour, then cover it with foil and pop it in the fridge for another hour until it’s firm. If your kitchen tends to be cool, you can let the fudge finish setting right on the counter. This step really helps the fudge hold together when you slice it later.
Step 6: Slice and Dip
Use the parchment overhang to lift the fudge out of the pan and place it on a cutting board. Use a sharp kitchen knife to slice into about 25 squares (5×5), or smaller if you prefer. I like to warm my knife under hot water before slicing to get super clean cuts without dragging the fudge. Now for the finishing touch: melt the semi-sweet chocolate chips with vegetable oil in the microwave, stirring every 15 seconds to avoid burning. Dip the tops of your fudge squares into the glossy chocolate, then let them set completely before serving. It adds a beautiful shiny coat that your friends will drool over.
Pro Tips for Making Boston Cream Fudge Recipe
- Keep Your Temperature Steady: Using a candy thermometer is the biggest game-changer when boiling your sugar mixture; it ensures perfect consistency every time.
- Don’t Skip the Marshmallow Cream: It’s the ingredient I discovered later that really brings that melt-in-your-mouth softness and smooth texture.
- Swirl Gently: For a beautiful marbled effect, don’t overmix the layers—just a few swirls will do the trick.
- Use Parchment Overhang: It makes lifting and slicing your fudge so much easier—trust me, this trick saved me from a lot of sticky messes.
How to Serve Boston Cream Fudge Recipe

Garnishes
I usually keep it simple with a sprinkle of finely chopped toasted nuts or a dusting of cocoa powder on top just before the chocolate sets. It adds a little extra texture and looks super inviting without overpowering the fudge’s creamy layers.
Side Dishes
This fudge pairs wonderfully with a cup of strong coffee or creamy hot chocolate. For brunch or dessert tables, I recommend serving it alongside fresh berries or lightly whipped cream to balance the richness.
Creative Ways to Present
For special occasions, I like arranging fudge squares in a pretty gift box layered with tissue paper. Another fun approach is serving bite-sized fudge skewers with fresh fruit for an elegant finger food twist that always grabs attention at parties.
Make Ahead and Storage
Storing Leftovers
I keep leftover Boston Cream Fudge in an airtight container at room temperature; it stays perfectly soft and creamy for about a week. If I need it to last longer, I pop it in the fridge and it keeps well for 2-3 weeks, though I always let it sit out for a bit before eating to return to that perfect melt-in-your-mouth texture.
Freezing
Freezing fudge works like a charm for me. Just wrap it tightly in parchment paper and aluminum foil, then store it in a freezer-safe container for up to 2 months. When ready to enjoy, I thaw it overnight in the fridge and it comes out just as tasty and smooth.
Reheating
If your fudge gets too firm from refrigeration, simply leave it at room temperature for 20-30 minutes before serving. I avoid reheating on the stove or microwave since it can change the texture, but a gentle warm-up on the counter is all it needs.
FAQs
-
Can I substitute marshmallow cream with marshmallows?
While marshmallow cream blends smoothly to contribute essential softness, you can carefully melt mini marshmallows as a substitute; just be sure to melt and stir them fully before adding to avoid any grainy texture. However, marshmallow cream is preferred for best consistency.
-
What’s the best way to prevent the fudge from crystallizing?
Using light corn syrup helps stop sugar crystals from forming, which is a cornerstone of smooth fudge. Also, make sure to stir constantly while boiling and avoid sugar splashing onto pan sides, which can cause crystallization.
-
How long does Boston Cream Fudge last?
Stored in an airtight container at room temperature, this fudge stays fresh for about one week, and up to 2-3 weeks if refrigerated. Always keep it covered to protect it from drying out or absorbing odors.
-
Can I make this recipe dairy-free?
Making this exact Boston Cream Fudge Recipe dairy-free would require several swaps like vegan butter and plant-based cream substitutes, which may affect texture and flavor. If that’s a must, a recipe designed specifically for dairy-free fudge might serve you better.
Final Thoughts
I absolutely love how this Boston Cream Fudge Recipe brings together creamy white chocolate, sweet marshmallow, and bold chocolate in such a perfect little package. When I first tried making fudge, I used to worry about texture and setting times, but this recipe’s foolproof steps helped me nail it every time. I’m telling you, once you try this, your family and friends will keep asking for more. So, go ahead and make a batch—you deserve a treat this lush and comforting!
Print
Boston Cream Fudge Recipe
- Prep Time: 10 minutes
- Cook Time: 20 minutes
- Total Time: 30 minutes
- Yield: 25 pieces 1x
- Category: Dessert
- Method: Stovetop
- Cuisine: American
Description
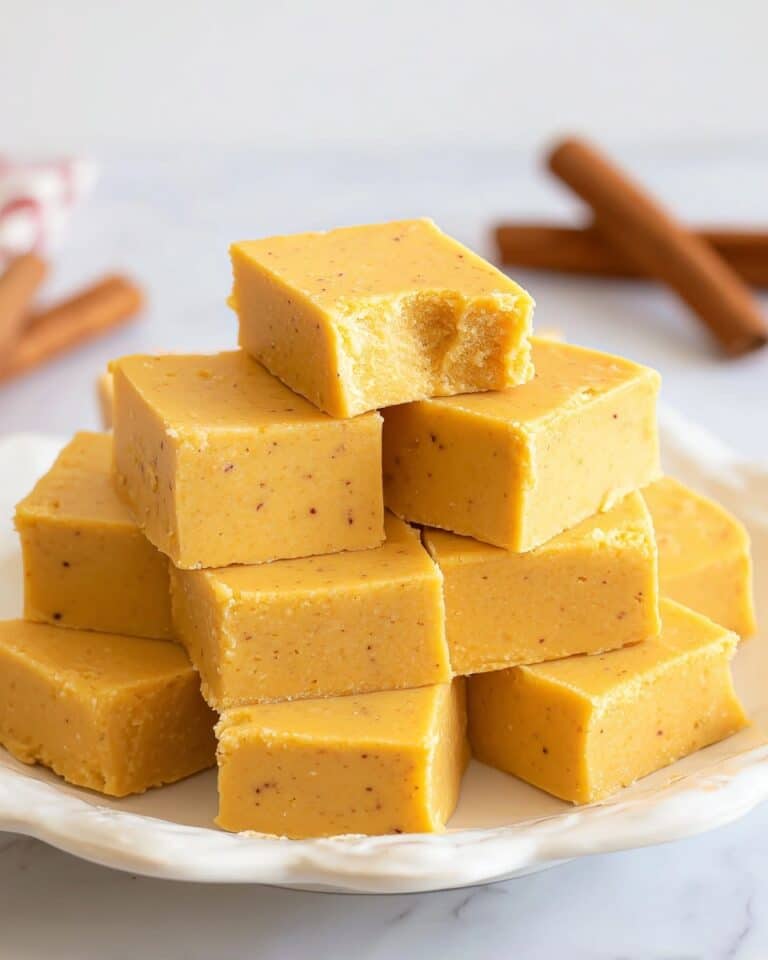
This Boston Cream Fudge is a luscious layered confection combining creamy white chocolate fudge with a rich cocoa fudge swirl, topped with a glossy semi-sweet chocolate coating. Perfectly smooth and decadently sweet, this fudge combines the classic flavors of Boston cream in a rich, bite-sized treat that’s ideal for sharing or gifting.
Ingredients
Fudge Base
- 2 cups granulated sugar
- ¾ cup unsalted butter
- ⅔ cup heavy cream
- ¼ cup light corn syrup
- 6 ounces white baking chocolate, chopped
- 7 ounces marshmallow cream
- 1 teaspoon vanilla extract
Cocoa Swirl Layer
- 1½ tablespoons unsweetened cocoa powder, sifted
Chocolate Topping
- 1 cup semi-sweet chocolate chips
- 1½ tablespoons vegetable oil
Instructions
- Prepare the pan: Line an 8×8-inch baking pan with parchment paper, ensuring the paper extends over the edges for easy removal. Lightly spray the parchment with nonstick cooking spray to prevent sticking.
- Cook the fudge base: In a heavy-bottomed saucepan, combine sugar, butter, heavy cream, and corn syrup. Stir continuously over medium heat until the mixture comes to a rolling boil.
- Reach soft-ball stage: Continue boiling while stirring for 4-5 minutes until a candy thermometer registers 235-240°F (soft-ball stage) to ensure proper consistency.
- Melt white chocolate: Remove the pan from heat and stir in chopped white baking chocolate until fully melted and smooth.
- Add marshmallow cream and vanilla: Stir in the marshmallow cream and vanilla extract until well combined, creating the white fudge layer.
- Pour white fudge: Pour about ¾ of the white fudge mixture into the prepared baking pan, spreading evenly.
- Prepare cocoa fudge swirl: Add sifted unsweetened cocoa powder to the remaining fudge mixture. Whisk until smooth and fully incorporated.
- Layer cocoa fudge: Carefully spoon the cocoa fudge mixture over the white fudge layer.
- Swirl layers: Use a toothpick or skewer to swirl the two fudge layers together gently, creating a marbled effect.
- Cool and chill: Let the fudge cool at room temperature for about 1 hour, then cover with aluminum foil and refrigerate for another hour until firmly set. Alternatively, if your kitchen is cool, you may let it set completely on the counter.
- Slice fudge: Lift the set fudge out of the pan using the parchment overhang. Using a sharp knife, slice into 5 x 5 (25 pieces) or 6 x 6 (36 pieces) as preferred.
- Prepare chocolate topping: In a microwave-safe bowl, combine semi-sweet chocolate chips and vegetable oil. Heat on high for 30 seconds, stir, then continue heating in 15-second intervals, stirring between until smooth and melted.
- Dip fudge tops: Dip each fudge piece’s top into the melted chocolate and place on parchment paper to set. Allow the chocolate topping to fully set before serving.
Notes
- This fudge is best served at room temperature for optimal texture.
- Store in an airtight container at room temperature for up to one week or refrigerate for 2-3 weeks.
- To freeze, wrap fudge tightly in parchment and aluminum foil, place in a freezer-safe container, and store up to 2 months. Thaw overnight in the refrigerator before serving.
- To facilitate easy cutting, warm your knife under hot water, dry it, and then slice the fudge cleanly without sticking.
- Be cautious while cooking sugar to avoid crystallization by preventing sugar splashes on the pan sides.
- Allow fudge to set on the counter if your kitchen is cooler to avoid over-chilling.
Nutrition
- Serving Size: 1 piece (approx. 28g)
- Calories: 160
- Sugar: 20g
- Sodium: 30mg
- Fat: 8g
- Saturated Fat: 5g
- Unsaturated Fat: 2g
- Trans Fat: 0g
- Carbohydrates: 22g
- Fiber: 1g
- Protein: 1g
- Cholesterol: 25mg


