

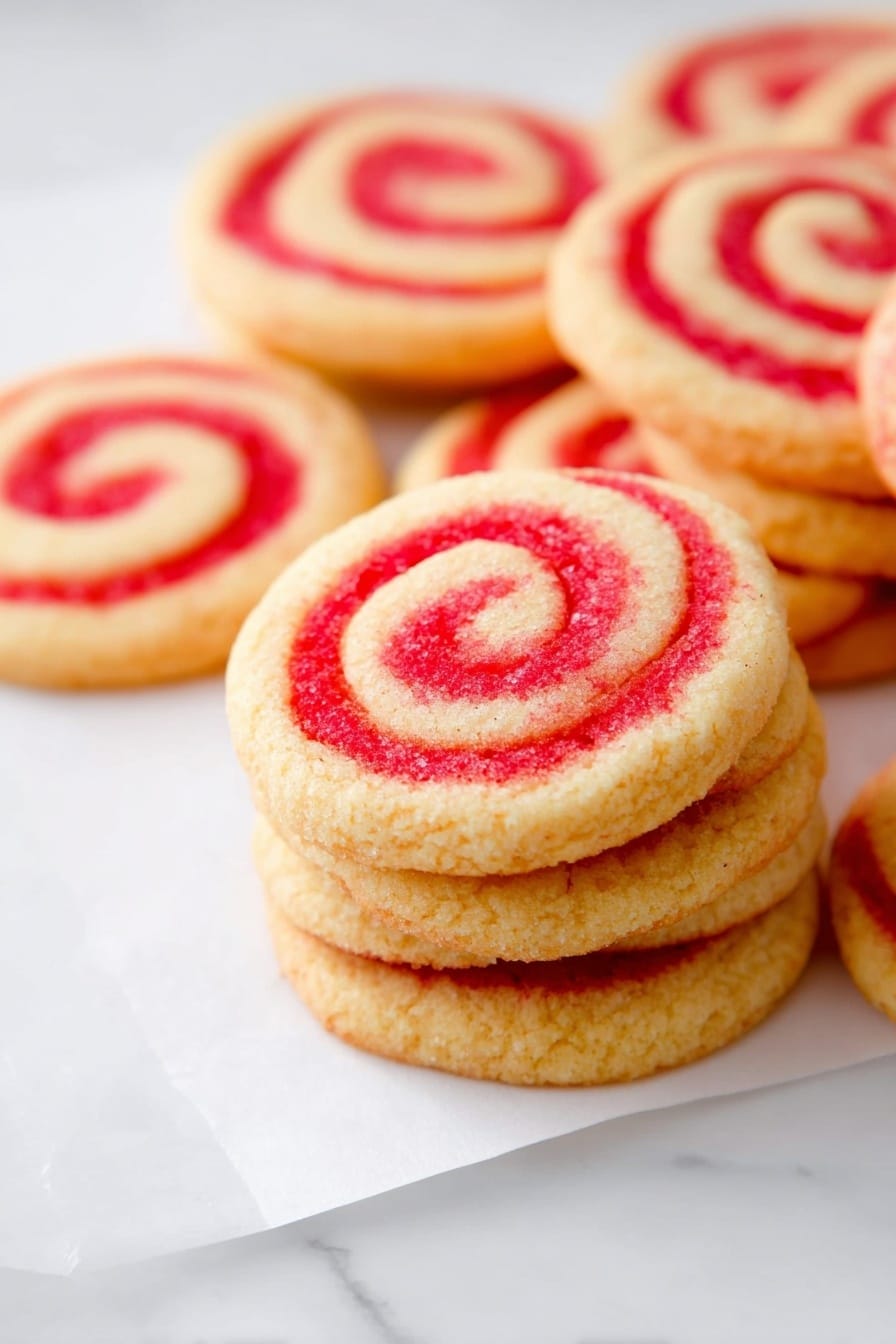
If you’re in the mood for something festive, fun, and absolutely delicious, you’ve got to try my Peppermint Pinwheel Cookies Recipe. These swirly beauties are as delightful to look at as they are to eat, and they bring that perfect combo of buttery sweetness with a bright peppermint zing. Whether it’s a cozy night in, a holiday party, or just a day when you want to treat yourself, these cookies fit the bill. Let me share everything I’ve learned so you can make these fan-freaking-tastic cookies with confidence!
Why You’ll Love This Recipe
- Easy to Assemble: The dough comes together quickly, and rolling it into pinwheels is simpler than it looks.
- Bright, Festive Flavors: The peppermint extract gives just the right cool kick without overpowering the buttery cookie.
- Perfect for Gifting: These cookies are eye-catching and hold well, so they’re ideal for sharing with loved ones.
- Make Ahead Friendly: You can chill or freeze the dough logs ahead of time, making your baking schedule super flexible.

Ingredients You’ll Need
The ingredients here are a classic buttery cookie base with a hint of peppermint that really shines. When buying your peppermint extract, I always recommend getting the real deal – it makes a notable difference in the depth of flavor!
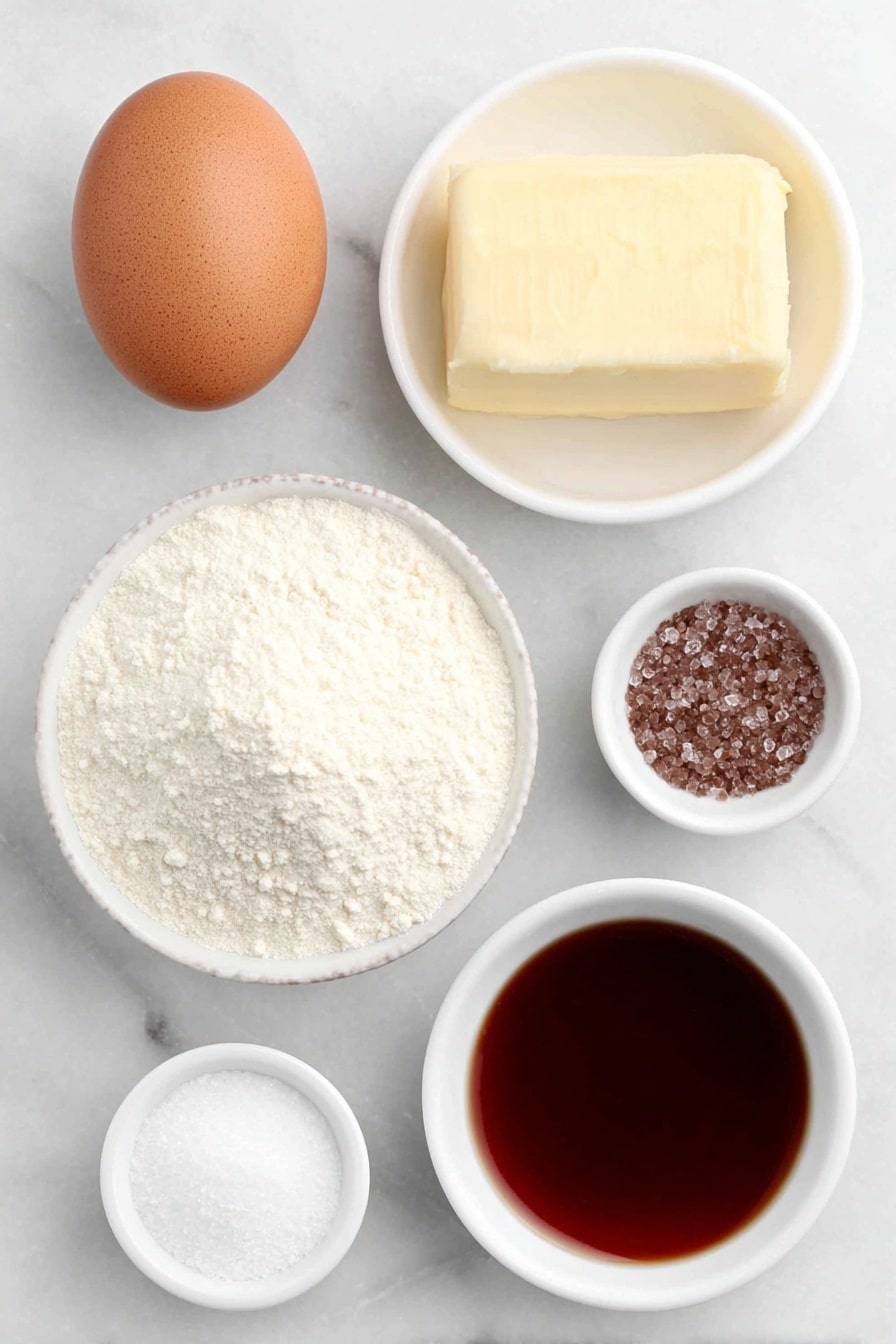
- Unsalted Butter: Using room temperature butter helps you achieve that creamy, fluffy cookie dough texture.
- Granulated Sugar: This keeps the cookie crisp and sweet without adding moisture.
- Egg: Helps bind everything together; make sure it’s at room temp for better mixing.
- Vanilla Extract: Adds warmth and depth to balance the peppermint.
- Peppermint Extract: Optional but highly recommended – it gives that unmistakable peppermint vibe!
- All-Purpose Flour: The base of the dough; sift it if you can to avoid lumps.
- Baking Powder: Gives a light lift to the cookies.
- Cream of Tartar: A secret ingredient I love for helping make the dough tender while keeping the pinwheel shape intact.
- Salt: Balances sweetness and enhances flavors.
- Red Food Coloring: For that iconic peppermint swirl. You can use gel coloring for a brighter color with less liquid.
Variations
I love how flexible this Peppermint Pinwheel Cookies Recipe is — you can easily adapt it to match your mood or dietary needs, and honestly, creating your own twist is half the fun!
- Swap the Extract: If peppermint isn’t your thing, I’ve tried orange and almond extracts for deliciously fragrant alternatives that still keep the cookies festive.
- Chocolate Twist: Add a teaspoon of cocoa powder to half the dough to make chocolate and peppermint pinwheels (my family goes crazy for this one!).
- Gluten-Free: Use a 1:1 gluten-free flour blend – just be sure to chill your dough a bit longer to prevent spreading.
- Natural Coloring: Try beet juice or pomegranate for a natural red hue if you prefer to avoid food dyes.
How to Make Peppermint Pinwheel Cookies Recipe
Step 1: Cream the Butter and Sugar
Start by beating the room temperature butter and sugar in a large bowl. I use my stand mixer for this and let it whip for about 2 minutes until the mixture looks pale and fluffy. This step sets the stage for a tender cookie by trapping air in the dough, so don’t rush it!
Step 2: Add the Egg and Extracts
Next, beat in the egg, vanilla extract, and peppermint extract until everything is well combined and smooth. If you’re a peppermint fan like me, that aroma gives you an instant holiday feel in the kitchen.
Step 3: Combine the Dry Ingredients
In a separate bowl, whisk together the flour, baking powder, cream of tartar, and salt. Mixing these dry ingredients first helps distribute the leavening agents evenly throughout the dough.
Step 4: Mix Dry Ingredients into Wet
Gradually beat the dry flour mixture into the butter mixture until the dough just comes together. Be careful not to overmix here; stopping as soon as the flour is incorporated keeps your cookies tender instead of tough.
Step 5: Divide and Color the Dough
Divide the dough in half. To one half, add a few drops of red food coloring and knead gently (I usually wear gloves to avoid staining!) until the color is even. This step is where your peppermint pinwheels start to take shape.
Step 6: Roll Out and Layer the Dough
On a floured surface, roll each dough half into a neat rectangle about 1/4 inch thick. Carefully layer the red dough on top of the plain dough and gently press them together. Precision isn’t necessary here; you want them nicely in contact so the roll holds together.
Step 7: Roll Up and Chill
Roll the layered dough into a tight log, starting from one of the longer edges. Wrap it well with plastic wrap and refrigerate for at least one hour, or overnight if you want better slices with less crumbling. I’ve found the chilling step makes slicing so much easier and cleaner.
Step 8: Slice and Bake
Preheat your oven to 350°F (175°C). Slice the chilled dough log into 1/4-inch thick rounds, discarding any uneven ends. Place the cookies on a parchment-lined baking sheet, leaving room to spread slightly. Bake for 8 to 12 minutes until they’re just beginning to turn golden on the edges.
Step 9: Cool and Enjoy
Let the cookies cool on the baking sheet for a few minutes before transferring to a wire rack. I love this moment because the peppermint aroma fills the kitchen, and these cookies freeze wonderfully for sharing or savoring later!
Pro Tips for Making Peppermint Pinwheel Cookies Recipe
- Keep Your Dough Cold: Rolling the dough cold prevents colors from blending and helps make perfect pinwheels.
- Use Gel Food Coloring: It gives vibrant color without adding extra liquid that could change the dough consistency.
- Slice with a Sharp Knife: A thin, sharp knife helps you get clean edges without squishing the dough.
- Don’t Skip the Cream of Tartar: It might seem minor, but it really helps the dough hold together while baking.
How to Serve Peppermint Pinwheel Cookies Recipe
Garnishes
I like to sprinkle a bit of crushed peppermint candies or mini candy canes on top before baking to add extra crunch and festive flair. It also amps up the peppermint flavor and makes them look like little holiday masterpieces.
Side Dishes
These cookies go wonderfully with a warm mug of hot cocoa or a peppermint-infused latte — trust me, the flavor pairing is addictive. They also add a sweet touch to holiday cookie platters alongside gingerbread and sugar cookies.
Creative Ways to Present
For special occasions, I arrange these cookies in a spiral on a festive plate and tie a red or green ribbon around the plate for gift-giving. You could also stack the cookies in cellophane bags with a cute tag — perfect for neighbor gifts or party favors.
Make Ahead and Storage
Storing Leftovers
Once cooled, store your peppermint pinwheel cookies in an airtight container at room temperature. I’ve kept them fresh for up to 5 days this way without losing that crisp texture and lovely flavor.
Freezing
If you want to bake later, freeze the wrapped dough log before slicing. When ready, thaw in the fridge overnight and slice just like fresh. I’ve found freezing doesn’t affect the texture or flavor, and it’s a big time-saver when the holidays come around!
Reheating
Leftover cookies reheat nicely for a few seconds in the microwave or a quick 3-5 minutes in a 300°F oven to regain a bit of that fresh-baked warmth and softness without becoming soggy.
FAQs
-
Can I make this Peppermint Pinwheel Cookies Recipe without peppermint extract?
Absolutely! You can omit peppermint extract or substitute it with other extracts like almond, orange, or rum to suit your taste preferences. The dough will still be rich and buttery, just with a different flavor profile.
-
How do I prevent the cookie dough from sticking when rolling and slicing?
Sprinkle your work surface lightly with flour before rolling the dough. Also, chilling the dough logs well before slicing helps keep the shape intact and prevents sticking. Using a sharp knife warms your hand less, so you avoid squashing the dough while slicing.
-
Can I make these cookies gluten-free?
Yes! Simply replace the all-purpose flour with a 1:1 gluten-free baking flour blend. Since gluten-free dough can be a bit more delicate, I recommend chilling the dough a bit longer and handling it gently during rolling and slicing.
-
How long do Peppermint Pinwheel Cookies stay fresh?
Stored in an airtight container at room temperature, these cookies stay fresh for up to 5 days. You can extend their shelf life by refrigerating them up to a week or even freezing baked cookies for longer storage.
Final Thoughts
This Peppermint Pinwheel Cookies Recipe holds a special place in my seasonal baking routine because it’s simple, stunning, and pure joy to share. Every twist of the dough feels like a little celebration of the holidays (or any day you want to add a magical touch to). I hope you enjoy making and munching on these as much as I do – trust me, your friends and family will be asking for the recipe once they taste them!
Print
Peppermint Pinwheel Cookies Recipe
- Prep Time: 20 minutes
- Cook Time: 10 minutes
- Total Time: 30 minutes
- Yield: 24 cookies 1x
- Category: Dessert
- Method: Baking
- Cuisine: American
Description
Delight in these festive Peppermint Pinwheel Cookies that combine a buttery vanilla dough with a bright swirl of peppermint-flavored red dough. Perfectly crisp and tender, these visually striking cookies are ideal for holiday gatherings or any time you want a refreshing, minty treat.
Ingredients
Cookie Dough
- 3/4 cup unsalted butter, room temperature
- 3/4 cup granulated sugar
- 1 large egg, room temperature
- 1 teaspoon vanilla extract
- 1/2 teaspoon peppermint extract, optional
- 2 1/4 cups all-purpose flour, plus more for rolling
- 1/2 teaspoon baking powder
- 1/2 teaspoon cream of tartar
- 1/2 teaspoon salt
- red food coloring
Instructions
- Cream Butter and Sugar: In a large bowl, beat together the unsalted butter and granulated sugar until light and fluffy, about 2 minutes, to create a smooth base for the cookie dough.
- Add Egg and Extracts: Beat in the egg, vanilla extract, and peppermint extract (if using) until fully combined, incorporating flavor and moisture into the dough.
- Combine Dry Ingredients: In a separate small bowl, whisk together the all-purpose flour, baking powder, cream of tartar, and salt to ensure even distribution of leavening agents and seasoning.
- Incorporate Dry Ingredients: Gradually beat the flour mixture into the butter mixture until a cohesive dough forms, taking care not to overmix.
- Divide and Color Dough: Separate the dough into two equal portions. Add red food coloring to one half, kneading gently until the color is evenly distributed.
- Roll Out Dough: On a clean, floured surface, roll each dough half into a rectangle about 1/4 inch thick. Layer the red dough on top of the uncolored dough carefully to maintain shape.
- Form Dough Log and Chill: Roll the layered doughs tightly into a log shape. Wrap in plastic wrap and refrigerate for at least one hour or overnight to firm up and enhance flavor melding.
- Preheat Oven and Prepare Baking Sheets: Preheat your oven to 350°F (175°C). Line two cookie sheets with parchment paper or silicone baking mats to prevent sticking.
- Slice Cookies: Remove the chilled dough from the fridge and cut into 1/4-inch thick rounds, discarding the uneven dough ends to maintain uniform shapes.
- Bake Cookies: Arrange the slices on the prepared baking sheets and bake for 8 to 12 minutes, until the edges are just slightly golden, indicating doneness.
Notes
- If you prefer, omit peppermint extract or substitute with orange, rum, or almond extract for a different flavor profile.
- Store cookies at room temperature in an airtight container for up to 5 days or refrigerate for up to 1 week to maintain freshness.
- For convenient slice-and-bake cookies, prepare the dough ahead, freeze the dough log wrapped in plastic wrap and aluminum foil, then slice and bake when ready.
Nutrition
- Serving Size: 1 cookie
- Calories: 110
- Sugar: 7g
- Sodium: 90mg
- Fat: 6g
- Saturated Fat: 4g
- Unsaturated Fat: 2g
- Trans Fat: 0g
- Carbohydrates: 14g
- Fiber: 0.5g
- Protein: 1g
- Cholesterol: 20mg
